# Angular
> Add the tx-ds-document-editor component to an Angular app, authorize it with client credentials or an access token and insert text with the JavaScript API.
- **Product:** DS Server
- **Section:** Documentation
- **Kind:** Topic
- **Path:** DS Server > Getting Started > Document Editor > Angular
- **2622 words**
- **Web URL:** https://docs.textcontrol.com/ds-server/getting-started/document-editor/angular/
- **LLMs URL:** https://docs.textcontrol.com/ds-server/getting-started/document-editor/angular/llms.txt
- **LLMs-Full URL:** https://docs.textcontrol.com/ds-server/getting-started/document-editor/angular/llms-full.txt
---
The npm package `@txtextcontrol/tx-ng-ds-document-editor` provides the `tx-ds-document-editor` component, which shows the Document Editor of DS Server in an Angular application. You need no backend of your own for a first test: the component loads the editor from DS Server and requests its access token there. Step by step, you prepare a security profile, create the application, add the component and insert text with the JavaScript API.
### Prerequisites
- [Node.js](https://nodejs.org/en/download/) and npm.
- The Angular CLI 19. To install it globally, open a command prompt and run:
```bash
npm install -g @angular/cli@19
```
The steps were written with Angular CLI 19 and [Visual Studio Code](https://code.visualstudio.com/). The package supports Angular 19 to 21. A newer Angular CLI creates applications with different file names, so install version 19 to follow the steps.
- A DS Server that is installed, licensed and reachable from the browser, as the [Installation Guide](https://docs.textcontrol.com/ds-server/installation/llms-full.txt) and [Licensing](https://docs.textcontrol.com/ds-server/administration/licensing/llms-full.txt) describe. The samples use `http://localhost:5000`. With a trial token instead, skip the next section and use `https://trial.dsserver.io` as the service URL and the client ID and secret of the token, as [Trial Token](https://docs.textcontrol.com/ds-server/getting-started/trial-token/llms-full.txt) describes.
### Prepare a Security Profile
The component requests its access token with the client credentials grant type: it sends the client ID and the client secret of a *security profile* from the browser to DS Server. The profile must allow this grant type, which is off by default.
1. In the admin portal of DS Server, choose **Security Profiles**, click **+ Create new profile**, enter a name and click **Create**.
2. Copy the **Client ID** and the **Client Secret** of the new profile.
3. Switch on **Allow "Client Credentials" grant type** and click **Done**.
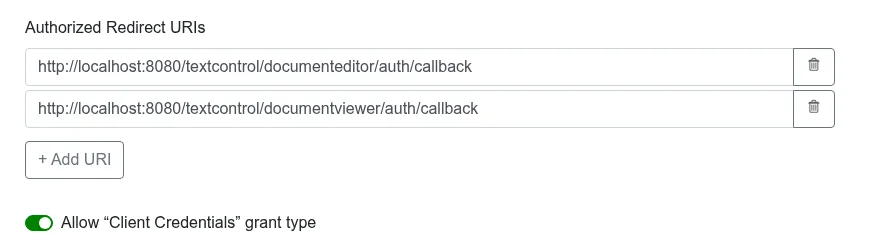
The client credentials are part of the page that the browser downloads, so any visitor can read them. Use them for development and tests. For production, pass an access token that your server requested, as [Use an Access Token](#use-an-access-token) shows. [Creating Security Profiles](https://docs.textcontrol.com/ds-server/administration/security-profiles/llms-full.txt) and [OAuth Grant Types](https://docs.textcontrol.com/ds-server/administration/oauth-grant-types/llms-full.txt) describe the settings.
### Create the Angular Application
1. Open a command prompt and create a new project with a root module:
```bash
ng new my-ds-editor-app --no-standalone
```
Select **CSS** as the stylesheet format and answer **N** to disable server-side rendering and static site generation.
2. Change to the project folder:
```bash
cd my-ds-editor-app
```
3. Add the Document Editor package with the Angular CLI:
```bash
ng add @txtextcontrol/tx-ng-ds-document-editor
```
Confirm the installation with **Y**. `ng add` installs the package and imports its `DocumentEditorModule` into *src/app/app.module.ts*. The component is declared in this module, not as a standalone component. That is why the project is created with `--no-standalone`: in a standalone application, `ng add` finds no module to import into and only prints "No NgModule found. This seems to be a standalone project. Please add DocumentEditorModule manually to the components where you want to use it."
4. Open the folder in Visual Studio Code:
```bash
code .
```
### Add the Editor Component
Open *src/app/app.component.html*, replace its complete content with the following code and save the file. Replace the service URL, the client ID and the client secret with your values.
```html
```
`width`, `height` and `serviceURL` are required, and `serviceURL` must start with `http://` or `https://`. Bind values that aren't strings, such as the array of `userNames`, with square brackets. [Angular](https://docs.textcontrol.com/ds-server/client-libraries/angular/#tx-ds-document-editor) in Client-Side Libraries lists every attribute, such as `editMode`, `documentData` and `jsonData`.
### Run the Application
In the command prompt, start the application:
```bash
ng serve --open
```
Your default browser opens the application, and the component loads the editor script from DS Server, requests the access token and shows the Document Editor with its ribbon bar.
### Insert Text With the JavaScript API
The component loads the editor script at run time, so the global `TXTextControl` object doesn't exist when your component is created. As soon as the script is loaded, the component fires the `dsDocumentEditorLoaded` event on the `document` object. Handle it, then wait for the editor's `textControlLoaded` event before you call the API.
Open *src/app/app.component.ts* and replace its complete content with the following code:
```typescript
import { Component, HostListener } from '@angular/core';
declare const TXTextControl: any;
@Component({
selector: 'app-root',
templateUrl: './app.component.html',
standalone: false,
styleUrl: './app.component.css'
})
export class AppComponent {
@HostListener('document:dsDocumentEditorLoaded')
onDsDocumentEditorLoaded() {
// wait until the editor is ready
TXTextControl.addEventListener('textControlLoaded', () => {
TXTextControl.selection.setText('Welcome to DS Server');
});
}
}
```
After the application reloads, the editor shows the text "Welcome to DS Server".
- `declare const TXTextControl: any;` makes the global [`TXTextControl`](https://docs.textcontrol.com/ds-server/reference/javascript/txtextcontrol/llms-full.txt) object known to TypeScript.
- `@HostListener('document:dsDocumentEditorLoaded')` runs the method when the component has loaded the editor script.
- [`addEventListener`](https://docs.textcontrol.com/ds-server/reference/javascript/txtextcontrol/addeventlistener-method/llms-full.txt) registers a handler for `textControlLoaded`, which fires when the editor is connected and ready. [`selection.setText`](https://docs.textcontrol.com/ds-server/reference/javascript/selection/settext-method/llms-full.txt) inserts the text at the input position.
The ribbon of the DS Server editor has no **File** tab. Load and save documents with [`loadDocument`](https://docs.textcontrol.com/ds-server/reference/javascript/txtextcontrol/loaddocument-method/llms-full.txt) and [`saveDocument`](https://docs.textcontrol.com/ds-server/reference/javascript/txtextcontrol/savedocument-method/llms-full.txt), or pass a document with the `documentData` and `documentFileFormat` attributes.
### Use an Access Token
To keep the client secret away from the browser, your server requests the access token from DS Server and your application passes it to the `accessToken` attribute. When `accessToken` is set, the component ignores `oauthClientID` and `oauthClientSecret`. The component reads the token once, when it loads the editor, so create it only after the token has arrived:
```html
@if (accessToken) {
}
```
In *src/app/app.component.ts*, request the token from your backend when the component is created. Replace `https://localhost:7143/api/token` with the address of your token endpoint:
```typescript
import { Component } from '@angular/core';
@Component({
selector: 'app-root',
templateUrl: './app.component.html',
standalone: false
})
export class AppComponent {
accessToken = '';
constructor() {
// request the access token from your own backend
fetch('https://localhost:7143/api/token')
.then(response => response.json())
.then(token => this.accessToken = token.access_token);
}
}
```
[Keep the Client Secret on Your Server](https://docs.textcontrol.com/ds-server/getting-started/document-editor/javascript/#keep-the-client-secret-on-your-server) shows an ASP.NET Core endpoint that returns the token. Because the Angular application runs on another origin, such as `http://localhost:4200`, the endpoint must allow it with a CORS policy. Protect the endpoint as well, for example with the sign-in of your application, because anyone who can call it gets a token. The blog article [DS Server: Authorizing Angular Client Components](https://www.textcontrol.com/blog/2021/03/08/ds-server-authorizing-angular-client-components/) shows the same idea with an Angular route resolver.
### Troubleshooting
- **"DS Server is not registered."** The editor area stays gray and shows this message when the DS Server has no license. Register it in the admin portal, as [Licensing](https://docs.textcontrol.com/ds-server/administration/licensing/llms-full.txt) describes.
- **An error in the browser console instead of the editor:** `Could not retrieve OAuth token. Error: unsupported_grant_type, error description: This security profile does not allow the specified grant type. (client_credentials)`. Switch on **Allow "Client Credentials" grant type** in the security profile, or pass an access token.
- **"Can't connect to the server. Please refresh the website to re-connect."** The editor could not open its WebSocket connection to `/documenteditor/WS`, for example because the service URL is wrong or the access token isn't valid.
[Document Editor and Viewer](https://docs.textcontrol.com/ds-server/troubleshooting/editor-viewer/llms-full.txt) in Troubleshooting covers more problems.
### Next Steps
- [Angular](https://docs.textcontrol.com/ds-server/client-libraries/angular/llms-full.txt): every attribute and event of the Angular components.
- [Document Editor JavaScript API](https://docs.textcontrol.com/ds-server/reference/javascript/llms-full.txt): the `TXTextControl` object and its methods and events.
- [Document Viewer in Angular](https://docs.textcontrol.com/ds-server/getting-started/document-viewer/angular/llms-full.txt): display documents in the same application.
- [OAuth Grant Types](https://docs.textcontrol.com/ds-server/administration/oauth-grant-types/llms-full.txt): client credentials and authorization code.
---
## Nearby
- **Previous:** [ASP.NET Core](https://docs.textcontrol.com/ds-server/getting-started/document-editor/aspnet-core/llms-full.txt)
- **Next:** [React](https://docs.textcontrol.com/ds-server/getting-started/document-editor/react/llms-full.txt)