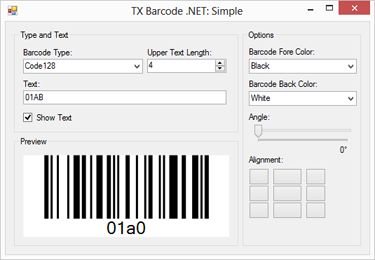
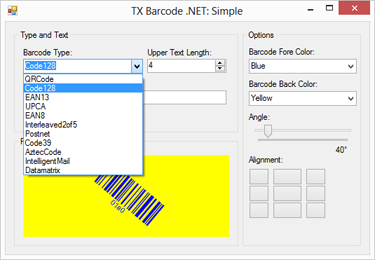
This sample shows how to implement a custom barcode dialog by using the most common properties of TX Barcode .NET.
The source code is contained in the following directories:
This sample should show how to use the most commonly used properties of TX Barcode .NET. To outline a typical scenario, a custom dialog has been implemented to adjust the barcode type, the text, color and rotation.

Open the sample project in Visual Studio and start it. The dialog uses a TXBarcodeControl to preview the adjusted settings. When changing the Barcode Type, you will recognize that the default Text and the Upper Text Length is changed automatically.
Each type has its' own constraints such as a minimum or maximum text length. This sample dialog implements the validation of these constraints using the available methods.
An example: If the Text is changed, the GetMinimumTextLength property is used to compare whether the new text length is larger than this minimum length.
Additionally, the IsTextValid method is used to check the validity of the new text. Specific constraints could be the usage of numeric values only or only a specific collection of alphanumeric values.
private void textBox1_TextChanged(object sender, EventArgs e)
{
if (textBox1.Text.Length < TXTextControl.Barcode.TXBarcodeControl.GetMinimumTextLength(txBarcodeControl1.BarcodeType))
return;
string sError;
if (TXTextControl.Barcode.TXBarcodeControl.IsTextValid(txBarcodeControl1.BarcodeType, textBox1.Text, out sError) == true)
txBarcodeControl1.Text = textBox1.Text;
else
MessageBox.Show(sError);
}You can change the Barcode Fore Color and the Barcode Back Color as well as the Angle between 0 and 360 degrees and the alignment of the barcode in it's control panel.
