DS Server is a lightweight, self-contained, .NET-based web service that can be manually installed and hosted in a variety of environments. It is distributed as a folder containing all the necessary files, including the core application assembly, TXTextControl.DocumentServices.dll. No complex setup or external dependencies beyond the .NET runtime are required.
To run DS Server, ensure that the necessary .NET runtime (8.0 or newer) is installed on the target system and start the application with the dotnet command. Since the folder contains everything needed to launch the service, no additional installation is required beyond copying the files to the server.
DS Server is fully platform-independent and can be hosted on Windows or Linux machines, whether they are virtualized (VMs), physical (bare metal), or containerized (e.g., using Docker). This flexibility makes integrating DS Server into existing infrastructure easy, whether it's in the cloud, on-premises, or in hybrid environments.
Once the DS Server is running, it exposes its document processing functionality via a RESTful API over HTTP/S, making it accessible to client applications and services.
Download the required ZIP file (DS-0400-XB.zip) from the online store that contains all the required files for your private DS Server installation.
Unzip the ZIP file to any location on your server (for example: C:\DSServer40).
Open a command prompt and navigate to the folder core which contains the platform-independent version of DS Server.
Run the following command to start the DS Server:
dotnet TXTextControl.DocumentServices.dll
This will launch the web service, which listens on a specified port that can be configured in the hostsettings.json file. By default, DS Server listens on port 5000 for HTTP and 5001 for HTTPS.
To access the DS Server, open a web browser and navigate to http://localhost:5000 or https://localhost:5001. You should see the DS Server welcome page, indicating that the server is running successfully.
The manual installation of DS Server is straightforward and is essentially adding a new website application to IIS on a Windows Server. The following steps are required to install the DS Server application on an existing Windows with an enabled IIS. Please refer to the system requirements to learn which components must be installed and enabled on a destination machine.
The following tutorial shows how to install DS Server on a new Windows installation with no other web applications installed and bindings enabled in IIS.
Download the required ZIP file (DS-0400-XB.zip) from the online store that contains all the required files for your private DS Server installation.
Unzip the ZIP file and copy the classic folder to any location on your server (for example: C:\DSServer40).
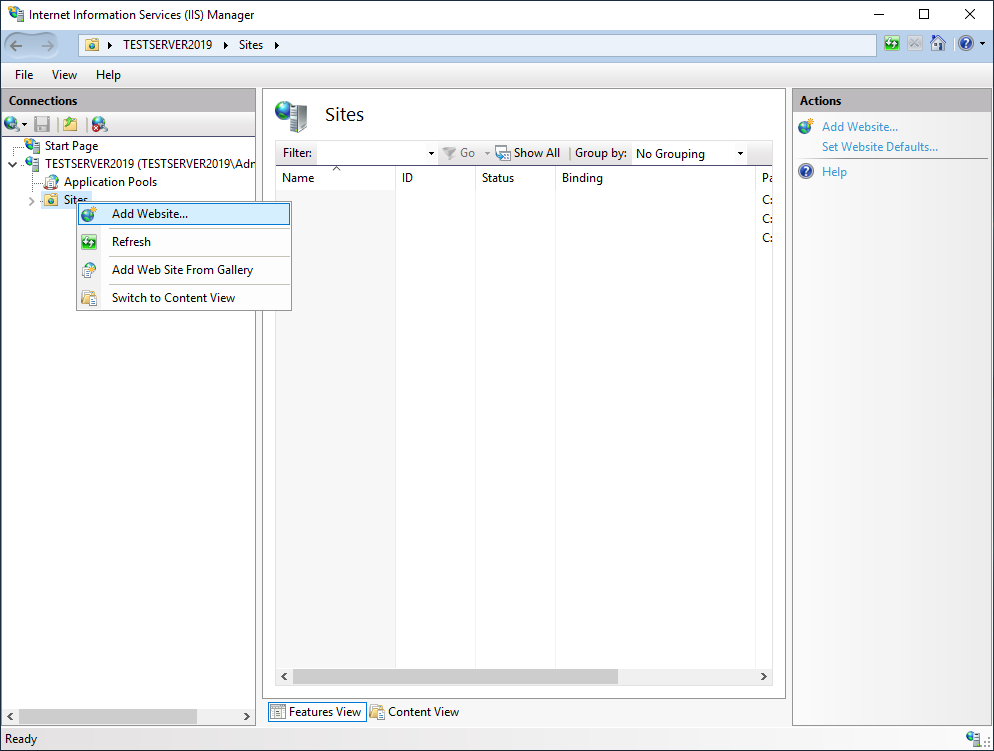
Open the Internet Information Services (IIS) Manager on your server. Select Add Website... from the right-click context menu of Sites.
In the opened dialog, choose DocumentServices as your Site name and select the classic folder of your unzipped DS Server folder as the Physical path.
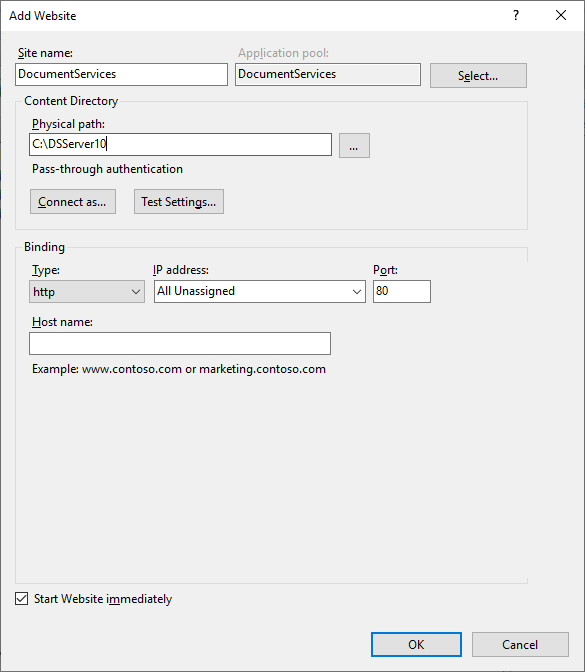
Confirm the creation by clicking OK.
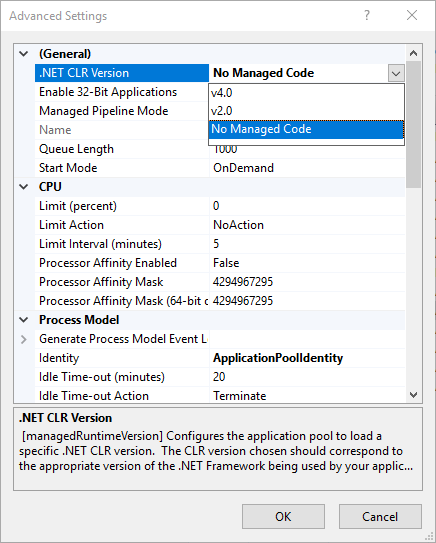
Select the Application Pools tree node and find the newly created pool DocumentServices and open the Advanced Settings....
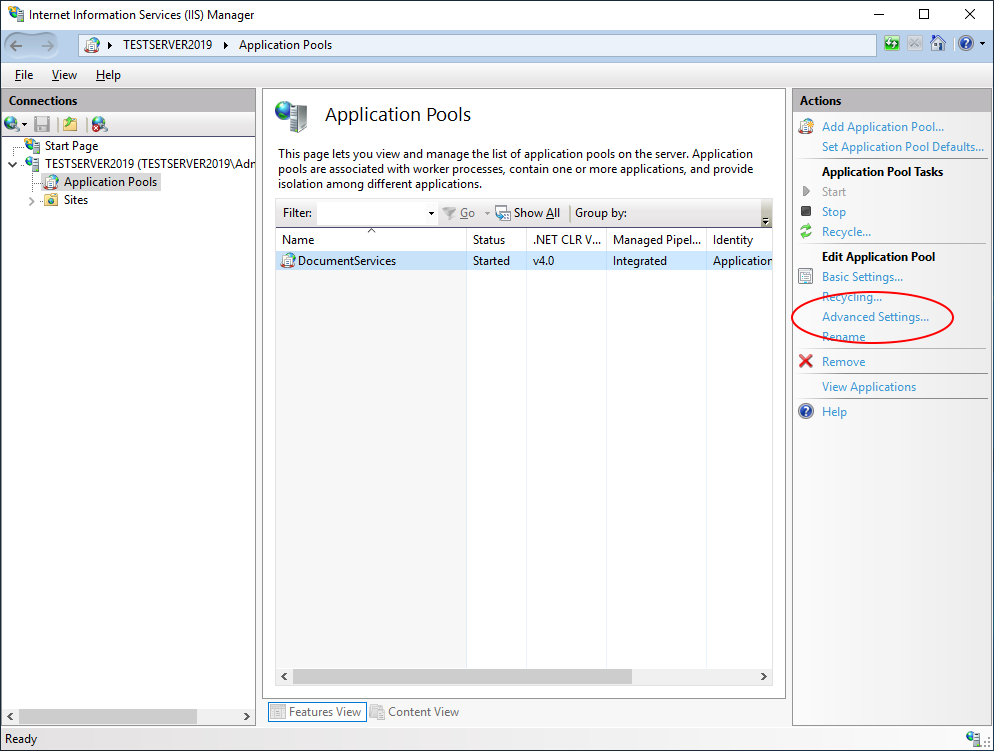
Set the .NET CLR Version to No Managed Code and confirm with OK.
Make sure that the your server or port (443 and/or 80) is accessible from outside (firewall) and test the web application by opening the website in a browser:
https://yourdomain.com/DocumentServices
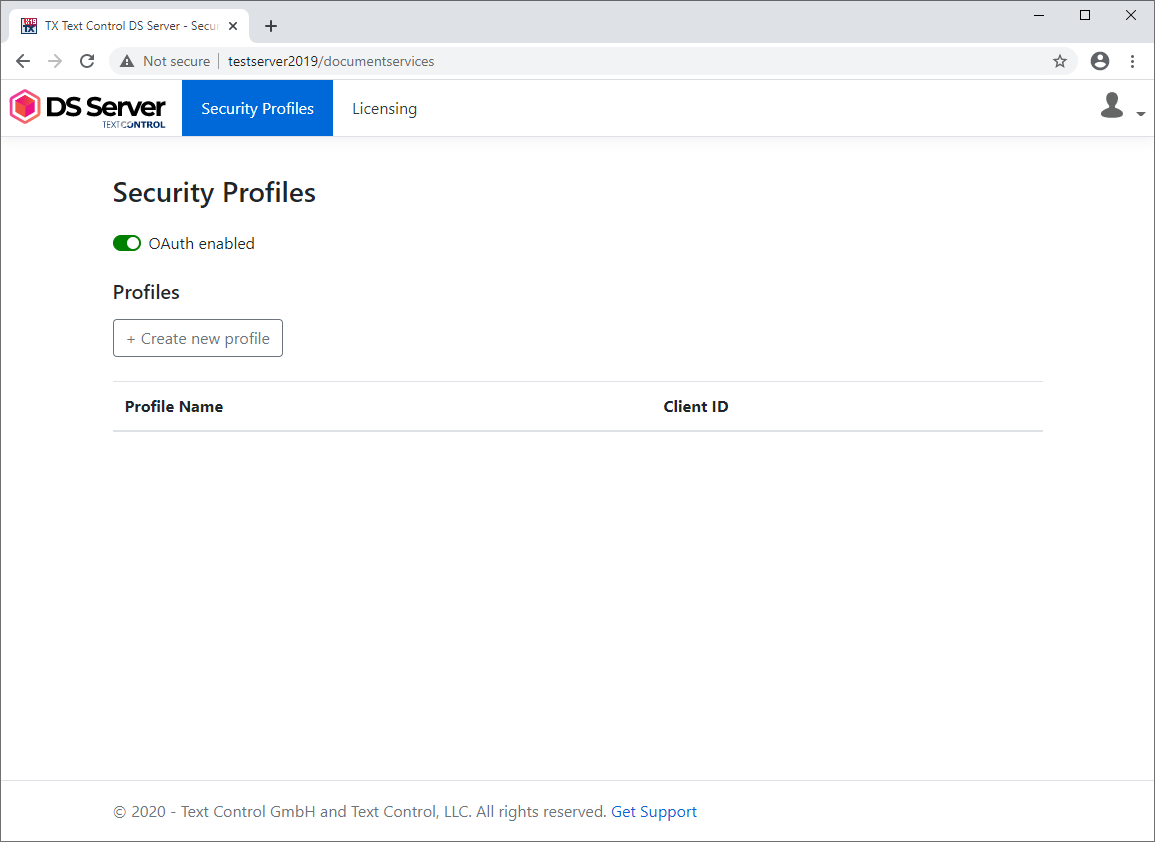
You should see the following website after typing in the default admin credentials (user name: admin, password: admin):
