TX Spell .NET for Windows Forms Windows Forms User's GuideTutorial: Starting with Microsoft Visual Studio 2019 and TX Text Control
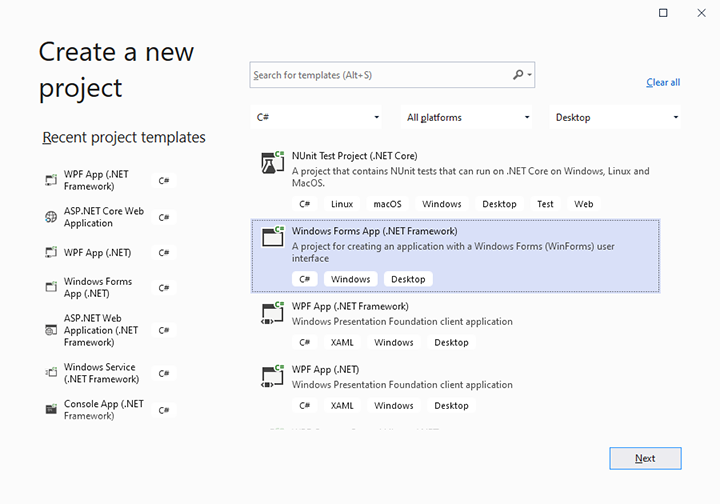
1. Start Visual Studio and create a new project. Select either Visual Basic or C# as a project type, and Windows Forms App (.NET Framework) as a template and confirm with Next. In the following dialog, choose a name and location and confirm with Create.
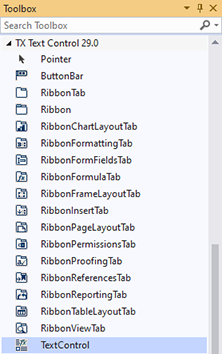
2. Find the TX Text Control 29.0 toolbox tab that was created automatically. All usable TX Text Control controls or components are listed in this tab.
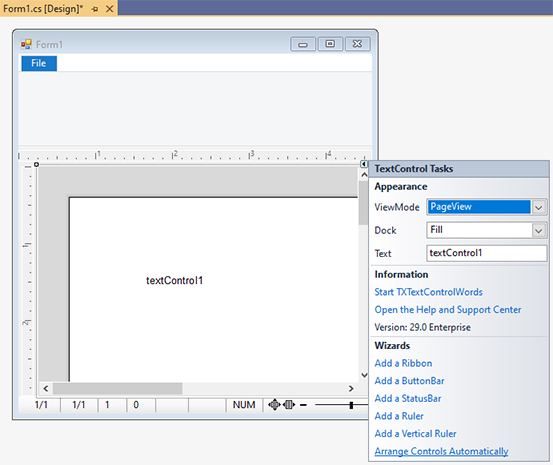
3. Click on the TextControl icon and draw it on the form. Now, click on the Smart Tag in the upper right corner of the TextControl. To add the additional controls of TX Text Control, click on Add a Ribbon, Add a Status Bar, Add a Ruler and Add a Vertical Ruler. Finally, click on Arrange Controls Automatically. The controls are now connected and docked automatically.
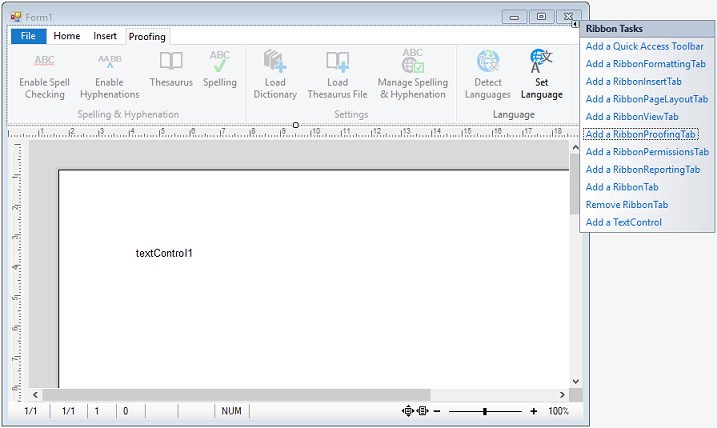
4. On the form, select the ribbon control by clicking the blue File tab title in order to click on the Smart Tag in the upper right corner of the ribbon control. To add a ribbon tab that handles proofing features, click on Add a RibbonProofingTab.
5. Find the TX Spell 8.0 toolbox tab in Visual Studio. Drag and drop an instance of TXSpellChecker to your form. It is displayed in the component tray at the bottom of the form.
![]()
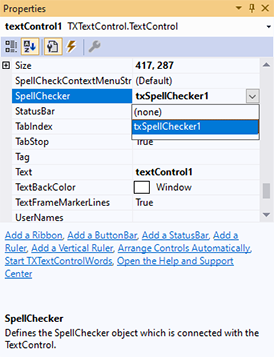
6. Click on the inserted TextControl and find the SpellChecker property in the Properties window. Click on the drop-down box and select the inserted TXSpellChecker instance.
7. In the same window, find the IsSpellCheckingEnabled property of TextControl and set it to true.
8. To enable hyphenation, set the IsHyphenationEnabled property of TextControl to true.
9. To enable language detection, set the IsLanguageDetectionEnabled property of TextControl to true.
Build and start the application to see the first results. The spell-as-you-type functionality and the English dictionary is enabled by default. Misspelled words are underlined automatically and can be corrected by using the shipped right-click context menu. Using this menu, you can open the integrated dialog box as well. In addition, on reaching the end of a line, the last word is hyphenated by using the corresponding English hyphenation list.
Selecting the RibbonProofingTab provides an interface to handle the main features of the SpellChecker. The corresponding spell checking and hyphenation buttons are toggled. The other buttons provide options to correct misspelled words, create synonyms, set and detect languages, as well as to handle spell checking, hyphenation, thesaurus settings.