TX Spell .NET for WPF WPF User's GuideTutorial: Starting with Microsoft Visual Studio 2019 and TX Text Control
TX Spell .NET is the perfect addition for TX Text Control to add professional, high-performance and reliable spell checking to your applications. Furthermore, combined with TX Text Control version 29.0, TX Spell .NET enables a fast way to hyphenate documents.
This getting started tutorial is the shortcut to use TX Spell .NET for WPF within Microsoft Visual Studio.
The source code for all steps is contained in the following directories:
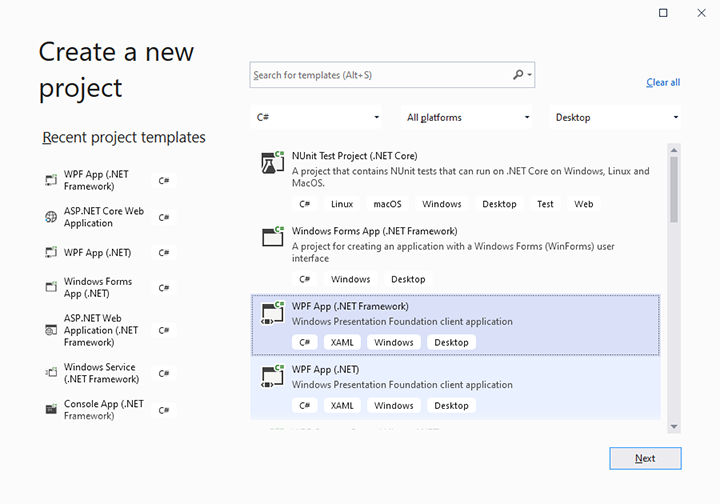
1. Start Visual Studio and create a new project. Select either Visual Basic or C# as a project type, and WPF App (.NET Framework) as a template and click Next. In the following dialog, select a name and location and confirm with Create.

2. Find the TX Text Control 29.0 toolbox tab that has been created automatically. All usable TX Text Control controls or components are listed in this tab.

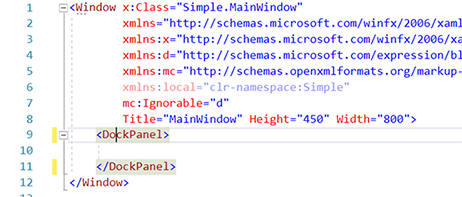
3. In the XAML view, replace the Grid with a DockPanel control as shown in the below screenshot:

4. Double-click the TextControl in the toolbox to add it to the Window. The XAML should look like this:

In the XAML, remove the Height and the Width properties for all added elements.
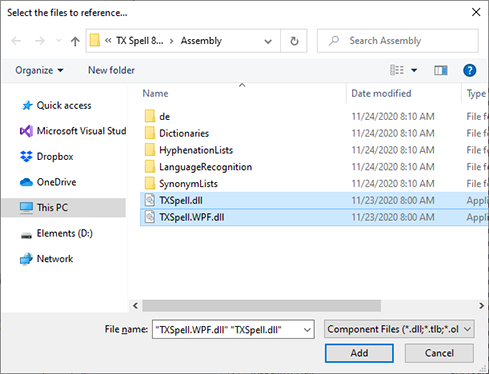
1. Select Add Reference... from the Project main menu. In the opened Add Reference dialog box, open the Browse tab page and browse for the installation folder of TX Spell .NET for WPF. The default folder is:
C:\Program Files\Text Control GmbH\TX Spell 8.0 .NET for WPF\Assembly\
Select TXSpell.dll and TXSpell.WPF.dll from the Assembly folder and confirm with OK.

2. The TX Spell .NET namespace must be added to the Window XAML. Additionally, TX Spell .NET must be added as a resource to the Window. The complete XAML should look like this:
<Window x:Class="Simple.MainWindow"
xmlns="http://schemas.microsoft.com/winfx/2006/xaml/presentation"
xmlns:x="http://schemas.microsoft.com/winfx/2006/xaml"
Title="MainWindow" Height="350" Width="525"
xmlns:my="clr-namespace:TXTextControl.WPF;assembly=TXTextControl.WPF"
xmlns:spell="clr-namespace:TXTextControl.WPF.Proofing;assembly=TXSpell.WPF">
<Window.Resources>
<spell:TXSpellChecker x:Key="txSpellChecker1"></spell:TXSpellChecker>
</Window.Resources>
<DockPanel>
<my:TextControl
Name="textControl1"
IsSpellCheckingEnabled="True"
IsHyphenationEnabled="True"
SpellChecker="txSpellChecker1" />
</DockPanel>
</Window>3. The SpellChecker property of TextControl must be set with the key name of the created TXSpellChecker instance. Add the property to the TextControl element in the XAML as shown in the code above.
4. Additionally, the IsSpellCheckingEnabled property of TextControl must be set to true.
5. To enable hyphenation, set the IsHyphenationEnabled property of TextControl to true.
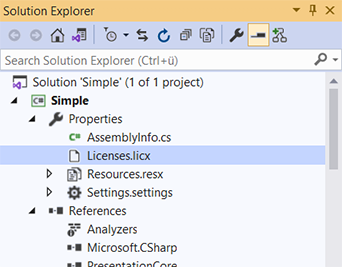
6. Open the licenses.licx file, which is located in the Properties folder (C#) or the My Project folder (VB.NET).

Add the following entry:
TXTextControl.WPF.Proofing.TXSpellChecker, TXSpell.WPFBuild and start the application to see the first results. The spell-as-you-type functionality and the English dictionary is enabled by default. Misspelled words are underlined automatically and can be corrected by using the shipped right-click context menu. Using this menu, you can open the integrated dialog box as well. In addition, on reaching the end of a line, the last word is hyphenated by using the corresponding English hyphenation list.