Each Text Control product comes with different requirements for development and redistribution. The following articles list the system requirements for development with TX Text Control .NET Server for ASP.NET and which files need to be included for redistribution.
Supported Windows versions:
Supported Microsoft .NET Versions:
Supported Development Environments:
To use TX Text Control's XML features, the Microsoft XML parser must be installed in the Windows system directory. The following lists the necessary files. Please refer to Microsoft's redistribution policy if you need to redistribute them.
When deploying applications, TX Text Control fully supports the Publish functionality of Visual Studio. The following steps are required to publish an application.
1. In the Solution Explorer, select the project and choose Build -> Publish Selection form the main menu.
2. Select Folder and click Next.
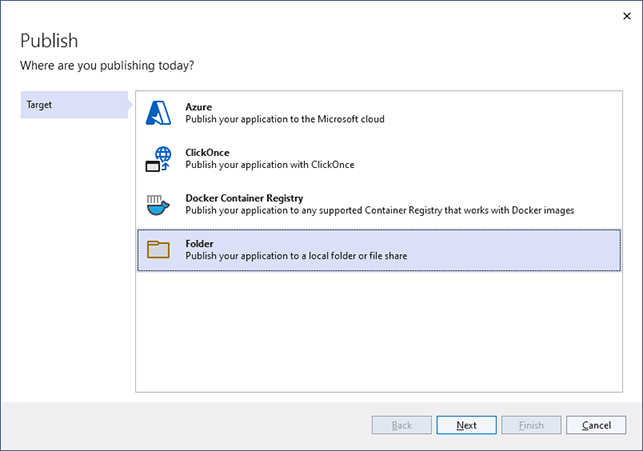
3. In the next dialog, select Folder again as the specific target and confirm with Next.
4. Select the folder location and confirm with Finish.
5. Click Show all settings to open the publish settings.
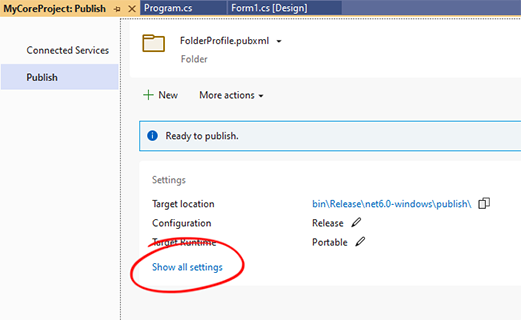
6. Select win-x64 as the Target runtime and confirm with Save.
7. Click Publish to publish the application.
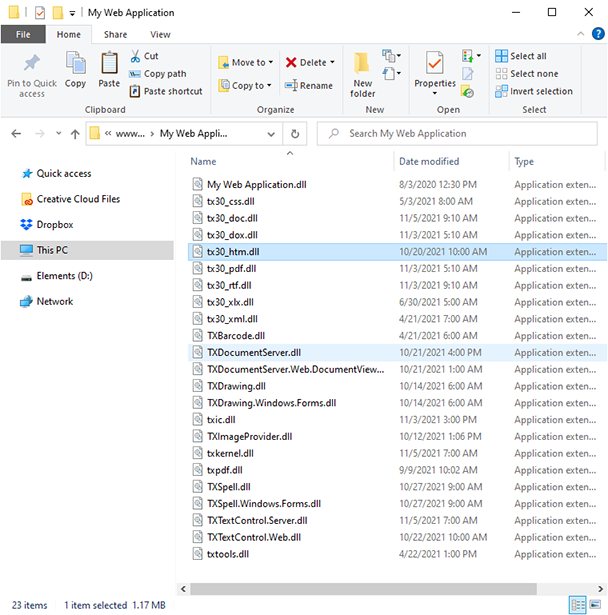
All listed files must be deployed in the web application's bin folder and all files must be located at the same level.
\Assembly subdirectory:
\Assembly\bin or \Assembly\bin64 subdirectory:
For 32-bit builds, the files from the bin folder are required. For 64-bit builds, the files from the bin64 folder must be deployed. For AnyCPU builds, the set of files depends on the host system's bitness. See TX Text Control 32-bit and 64-bit Edition.
TX Text Control .NET Server for ASP.NET uses the Microsoft Visual C++ runtime DLL file VCRUNTIME140.DLL. To redistribute this file, please use the Visual C++ Redistributable Packages for Visual Studio 2017 (32 or 64 bit).
Example:
If an application is deployed to C:\inetpub\wwwroot\My Web Application, all files must be located in the folder C:\inetpub\wwwroot\My Web Application\bin.
Supported Windows versions:
Supported Microsoft .NET Versions:
Supported Development Environments:
Supported Internet Browsers:
To use TX Text Control's XML features, the Microsoft XML parser must be installed in the Windows system directory. The following lists the necessary files. Please refer to Microsoft's redistribution policy if you need to redistribute them.
The deployment of the HTML5 web editor consists of two steps:
1. Deployment of the web application hosting the web editor.
2. Deployment of the TX TextControl Service.
We highly recommend to deploy the TX TextControl Service outside of the web application's bin folder.
1. Deploying the ASP.NET Web application
The ASP.NET Web application can be deployed just like any other ASP.NET application using the Publish Web functionality of Visual Studio. The following steps are required to publish your created project to your local file system that can be manually copied to your server. Optionally, you can directly publish your Web application to your server, a Windows Azure server or an FTP location. Refer to your Visual Studio documentation to learn how to use the Publish Web feature.
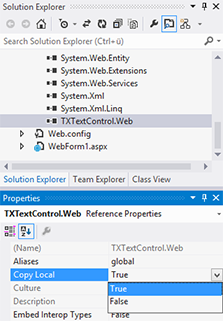
1.1. In case of a Web Forms application, in your created ASP.NET Web application, select the reference TXTextControl.Web located in the References folder in the Solution Explorer Window. In the Properties Window, set the Copy Local property to true.
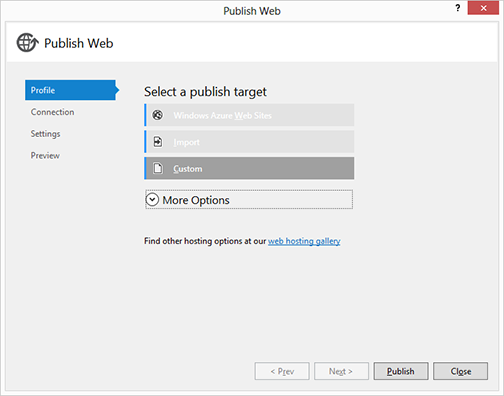
1.2. Select Publish %WebApplicationName% from the Build main menu. In the opened dialog Publish Web, select Custom as the publish target. In the opened dialog New Custom Profile, type in a name and confirm with OK.
1.3. In the next page of the dialog, select File System as your Publish method, set the target location and confirm with Next >.
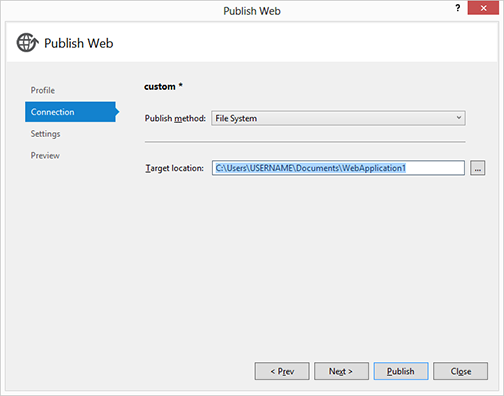
1.4. Confirm the next page with Next > and finally click Publish to start the publishing process.
All of your required files are copied to your specific target location. Copy all of those files to your destination server.
2. Deploying the TX TextControl Service
All necessary files must be copied into the same folder on your server. You will find the distributable files in the following default folder:
C:\Program Files\Text Control GmbH\TX Text Control 34.0.NET Server for ASP.NET\Assembly
and
C:\Program Files\Text Control GmbH\TX Text Control 34.0.NET Server for ASP.NET\Assembly\bin64
The following files from the Assembly folder are required:
The following files from the bin64 folder are required:
TX Text Control .NET Server for ASP.NET uses the Microsoft Visual C++ runtime DLL file VCRUNTIME140.DLL. To redistribute this file, please use the Visual C++ Redistributable Packages for Visual Studio 2017 (32 or 64 bit).
2.1. Copy the created folder with all of the above files to a preferred location on your destination server. A good place is C:\Program Files\TX TextControl Service XX, where XX equals the version number.
2.2. Copy the command line tool txregwebsvr.exe from the following folder to your destination folder on your server:
C:\Program Files\Text Control GmbH\TX Text Control 34.0.NET Server for ASP.NET\Tools
2.3. On your server, open a Command Prompt explicitly as an administrator and change the directory to the destination folder.
2.4. Type in and execute the following command:
txregwebsvr.exe /i /e /w
This command will register the TXTextControl.Web.Server.exe as the TX TextControl Service on your server. The optional switches /e and /w will activate interactive services and WebSockets on your server.
To uninstall the TX TextControl Service, please execute the following command:
txregwebsvr.exe /u /d