Trial Token
If you are evaluating DS Server and you are using a trial token, you can skip the Prerequisites - DS Server Installation and the DS Server Setup part and continue with the integration.
This article shows how to setup a new project with DS Server and how to use the document processing NuGet package in an ASP.NET Core MVC web application.
If you are evaluating DS Server and you are using a trial token, you can skip the Prerequisites - DS Server Installation and the DS Server Setup part and continue with the integration.
In order to follow these tutorials, DS Server must be successfully installed and licensed on a server. To learn how to do that, read the following articles:
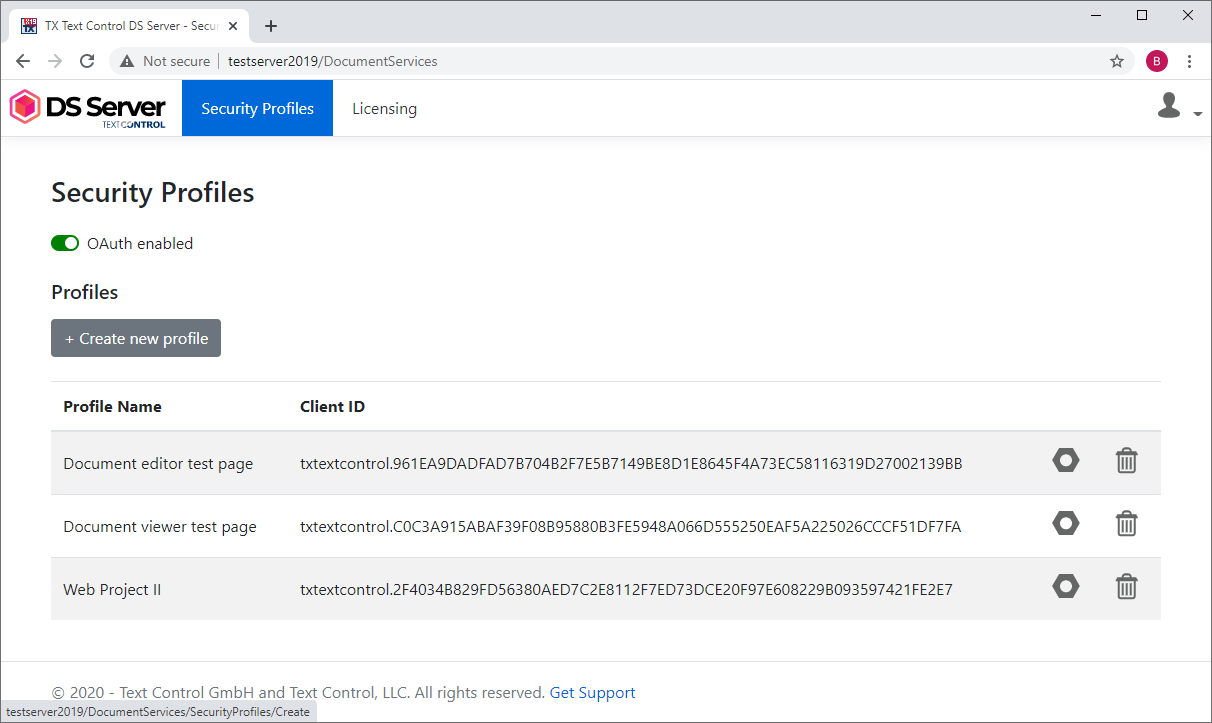
In the DS Server admin portal, a new security profile needs to be added.
Select Security Profiles from the main menu to open the security profile overview. Click on Create new profile to create a new security profile:
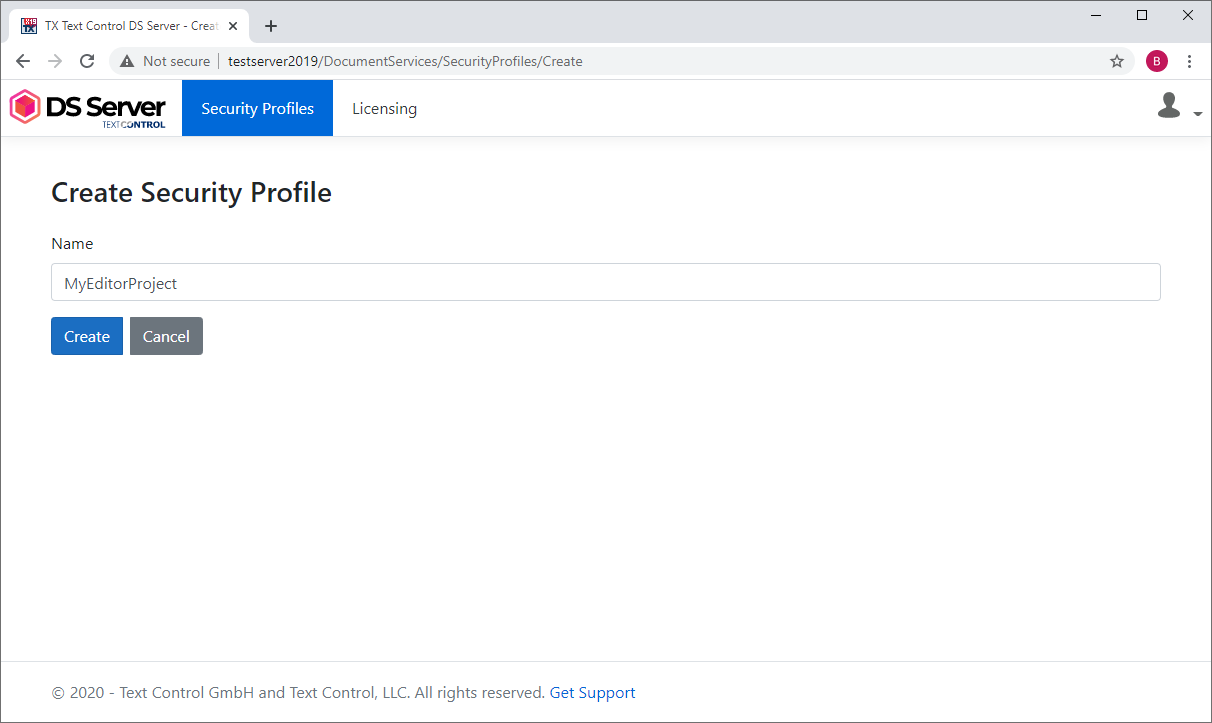
Type in a name and confirm with Create:
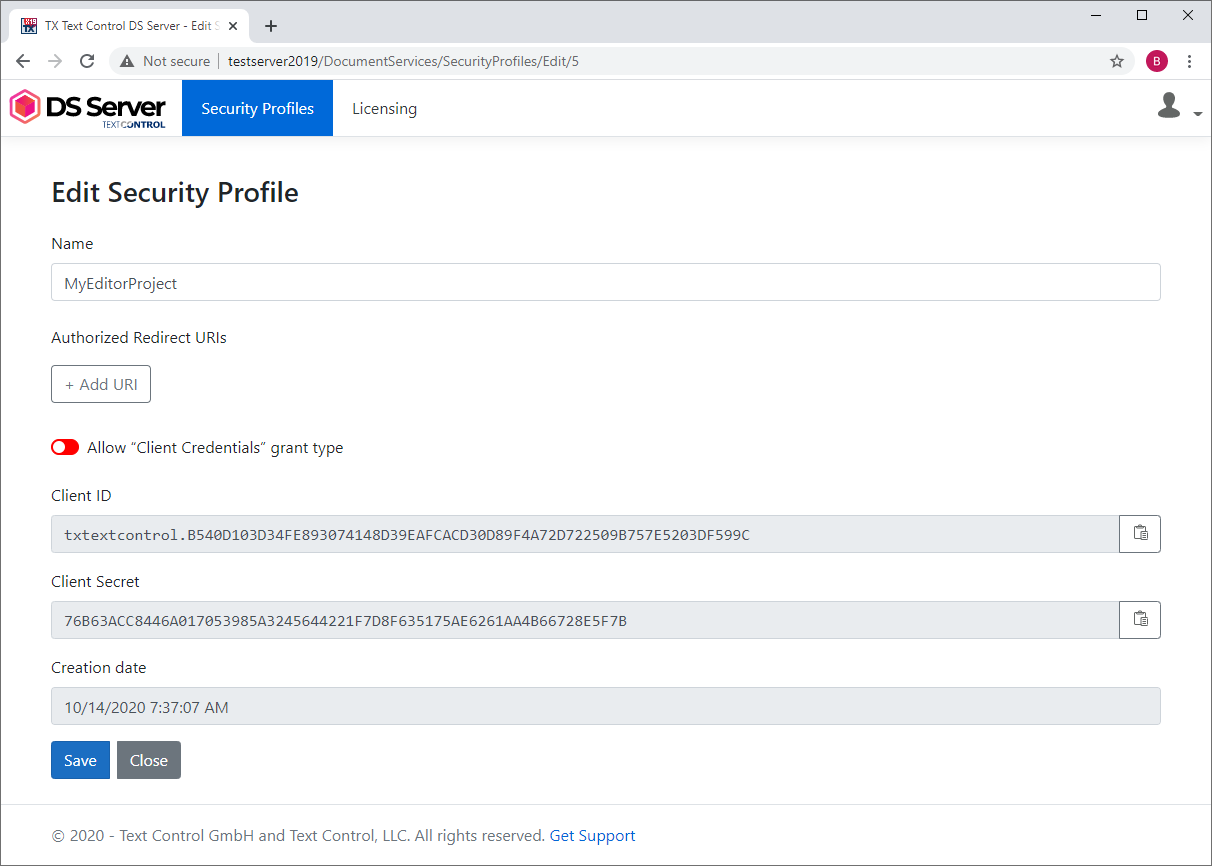
The profile details are shown including the Client ID and Client Secret values required for the OAuth authentication flow:
In the next step, a new ASP.NET Core MVC Web Application is created in Visual Studio 2019.
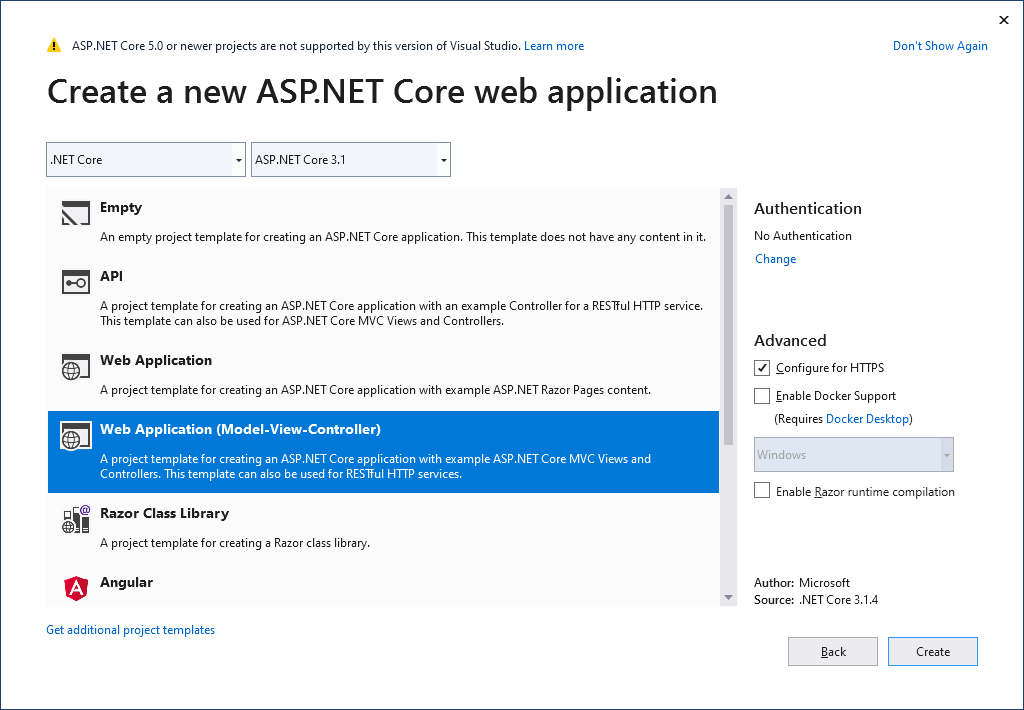
In Visual Studio 2019, create a new ASP.NET Core Web Application, choose a name and confirm with Create.
In the next dialog, choose Web Application (Model-View-Controller) and confirm with Create:
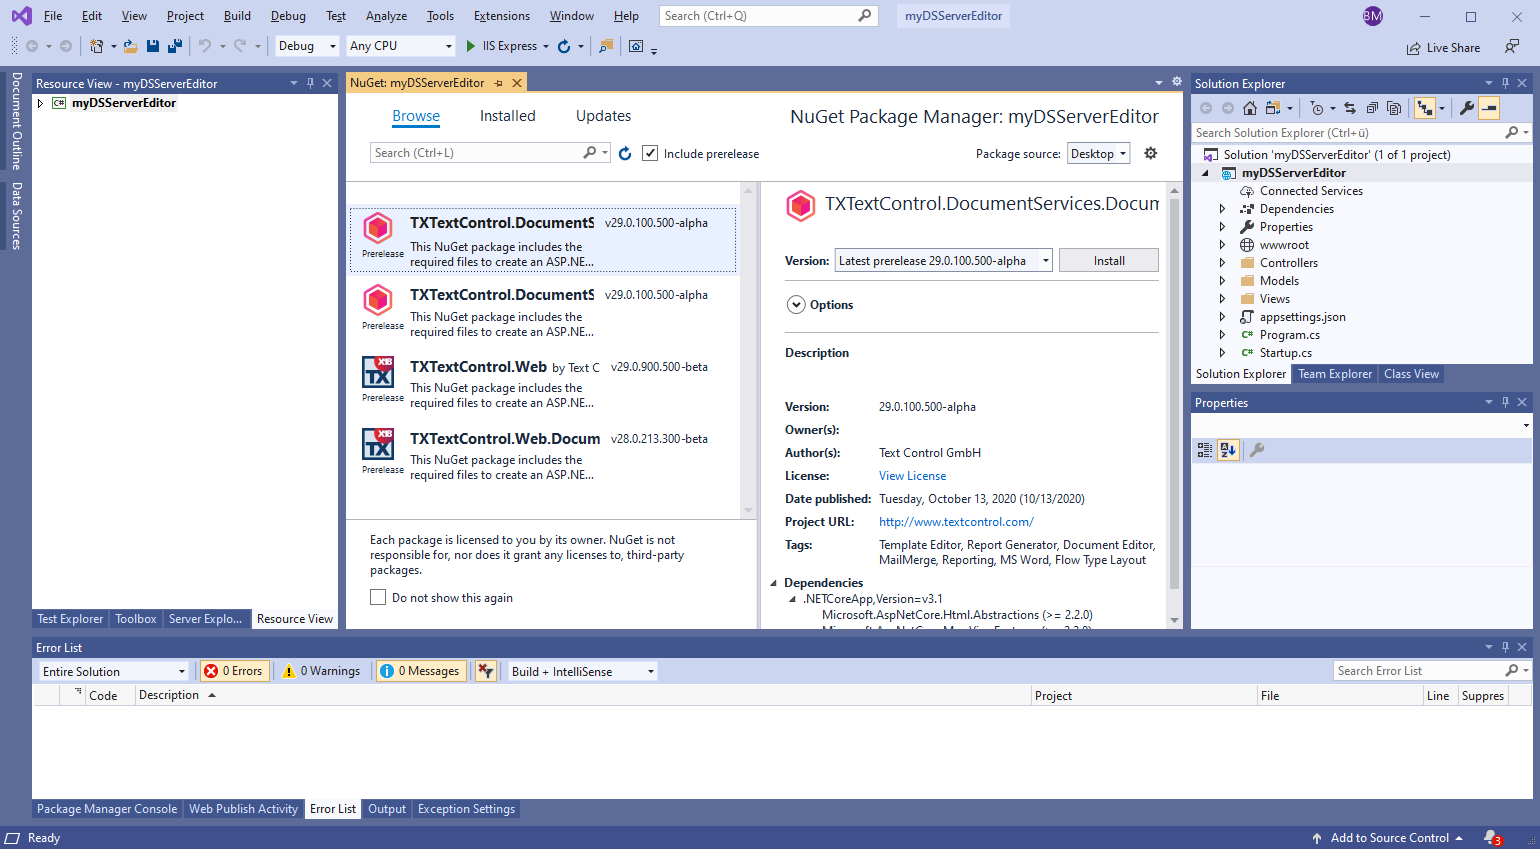
Select Manage NuGet Packages for Solution... from the NuGet Package Manager menu entry in the Tools main menu. Search for the package TXTextControl.DocumentServices.DocumentProcessing and confirm with Install.
In the Solution Explorer, select the project and select New Folder from the Project main menu and name it App_Data.
Find or create an MS Word document and add this document to the newly created folder and rename it to sample.docx. Therefore, select the folder and choose Add Existing Item... from the Project main menu. In the opened dialog, select the document and confirm with Add.
Create a new model by selecting the Models folder in the Solution Explorer and choosing Add Class... from the Project main menu. Name the class Thumbnail.cs and confirm with Add. Open the newly created class and replace the code with the following code:
namespace DSServerDemo.Models {
public class Thumbnail {
public string[] Thumbnails { get; set; }
}
}Open the Index.cshtml in the Views -> Home folder and replace the code with the following code:
@model DSServerDemo.Models.Thumbnail
@for (int i = 0; i < Model.Thumbnails.Length; ++i) {
var img = Model.Thumbnails[i];
<h2>Page @(i + 1)</h2>
<img src="@img" />
}Open the HomeController from the Controllers folder and replace the complete code with the following code:
using Microsoft.AspNetCore.Hosting;
using Microsoft.AspNetCore.Mvc;
using System;
using System.IO;
using System.Linq;
using System.Threading.Tasks;
using TXTextControl.DocumentServices.DocumentProcessing;
using TXTextControl.DocumentServices.DocumentProcessing.OAuth;
using DSServerDemo.Models;
namespace DSServerDemo.Controllers {
public class HomeController : Controller {
private static readonly DocumentProcessing s_dp;
private readonly byte[] m_demoRtfUtf8;
static HomeController() {
var os = new OAuthSettings(
"dsserver.ZVOL4OPU664IqA0NMJAisrX2iCeLaOmo",
"faZwTMHRe0VgKfyvMgD8FM8eOKymEst3",
"https://localhost:44327/textcontrol/DocumentProcessing/auth/callback");
s_dp = new DocumentProcessing("http://testserver2019/DocumentServices", os);
}
public HomeController(IWebHostEnvironment env) {
string rootPath = env.ContentRootPath;
string docFilePath = Path.Combine(rootPath, "App_Data/sample.docx");
m_demoRtfUtf8 = System.IO.File.ReadAllBytes(docFilePath);
}
public async Task<IActionResult> Index() {
// Display thumbnails
var thumbnails = await s_dp.Thumbnails(m_demoRtfUtf8, 50);
var thumbnailModel = new Thumbnail {
Thumbnails = thumbnails.Select(
t => $"data:image/png;base64,{Convert.ToBase64String(t)}").ToArray()
};
return View(thumbnailModel);
}
}
}Make sure to use the proper namespace in the code. In this tutorial, the project name is DSServerDemo.
If you are evaluating DS Server and you are using a trial token, remove the third parameter in the OAuthSettings (RedirectUri) and replace the ServiceUrl with the demo server location https://trial.dsserver.io.
Copy the below code and ignore the following steps that are not required when using the trial tokens.
static HomeController() {
var os = new OAuthSettings(
"dsserver.ZVOL4OPU664IqA0NMJAisrX2iCeLaOmo",
"faZwTMHRe0VgKfyvMgD8FM8eOKymEst3");
s_dp = new DocumentProcessing("https://trial.dsserver.io", os);
}Compile and start the application. You should see an error, because the required "authorized redirect URI" has not been specified in the security profile:
Copy the URL from the location bar (https://localhost:44374) into the clipboard or note it.
Back in the DS Server admin portal, open the created security profile and click Add URI. Paste the URL followed by the string /textcontrol/documentprocessing/auth/callback. Add the following complete string to the "Authorized Redirect URI" text box:
https://localhost:44374/textcontrol/documentprocessing/auth/callback
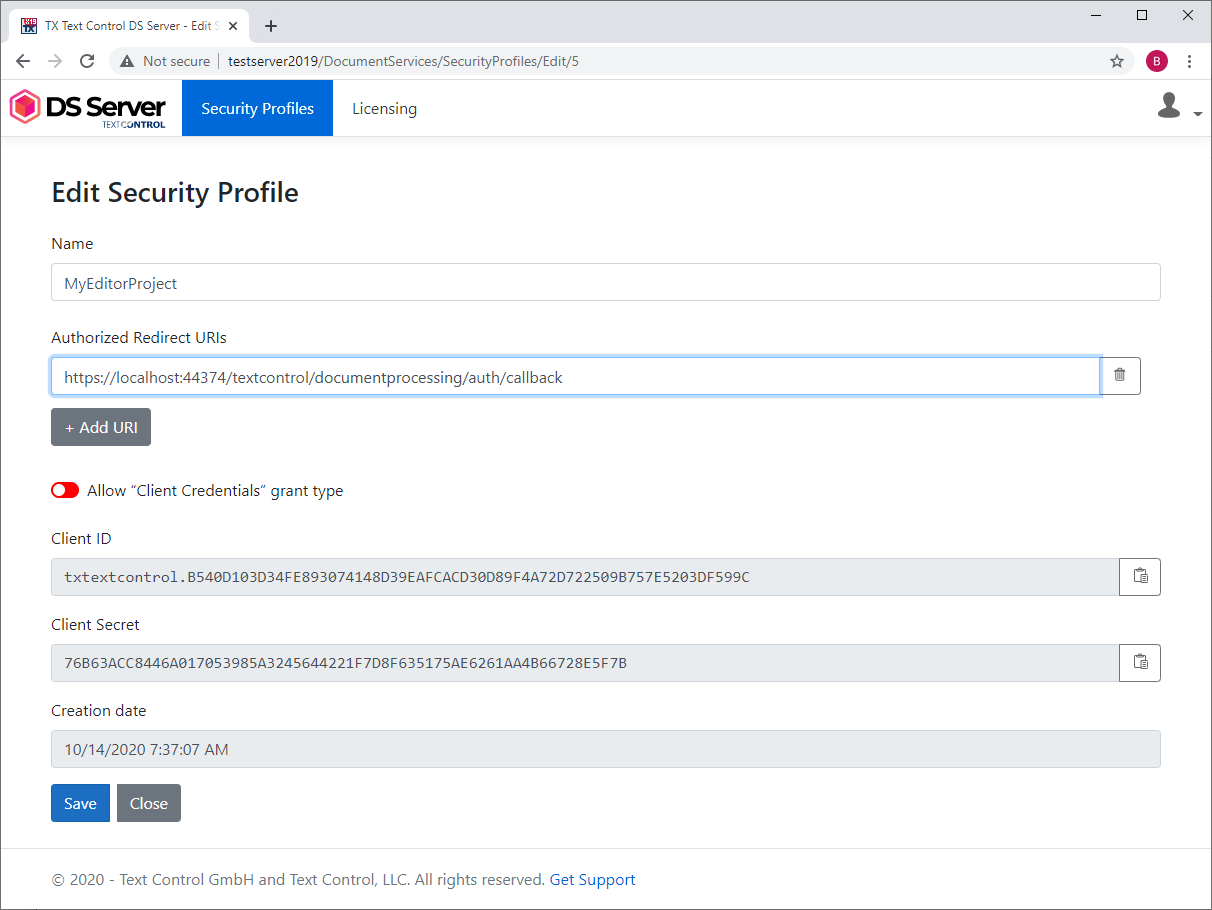
Confirm this step by clicking Save.
Restart the Visual Studio project or refresh the browser.