
Create Your First Windows Forms Application
A word processor with spell checking takes two packages and a few clicks in the designer. You create a Windows Forms application for .NET, add TX Text Control with a ribbon, drop the TXSpellChecker of TX Spell .NET on the form and connect the two. Without a line of code, misspelled words are then underlined as you type, corrected from the context menu, and words are hyphenated at the end of a line.
Prerequisites
- Visual Studio on Windows with .NET 8 or higher.
- The setups of TX Spell .NET for Windows Forms 11.0 and TX Text Control .NET for Windows Forms 34.0, the full or the trial versions, installed on your machine. They provide the package source Text Control Offline Packages and the designers. See Installing the Product.
Create the Project
Open Visual Studio and create a new project.
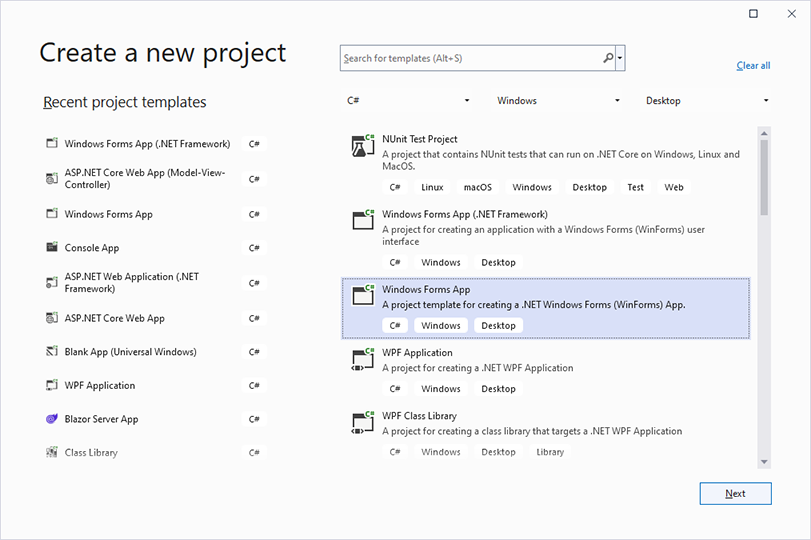
Select C# from the Languages list, Windows from the Platform list and Desktop as the Project Type.
Select the project template Windows Forms App and click Next.
Enter a project name and click Next.
Select .NET 8 or higher as the Framework, for example .NET 8 (Long Term Support), and click Create.
The template Windows Forms App (.NET Framework) creates a .NET Framework project instead, which Create a .NET Framework Application covers.
Install the NuGet Packages
Select the project in Solution Explorer and choose Project > Manage NuGet Packages....
Select Text Control Offline Packages in the Package source list and click Browse.
Select
TXTextControl.TextControl.WinForms.SDKand click Install.Select
TXTextControl.TXSpell.WinForms.SDKand click Install.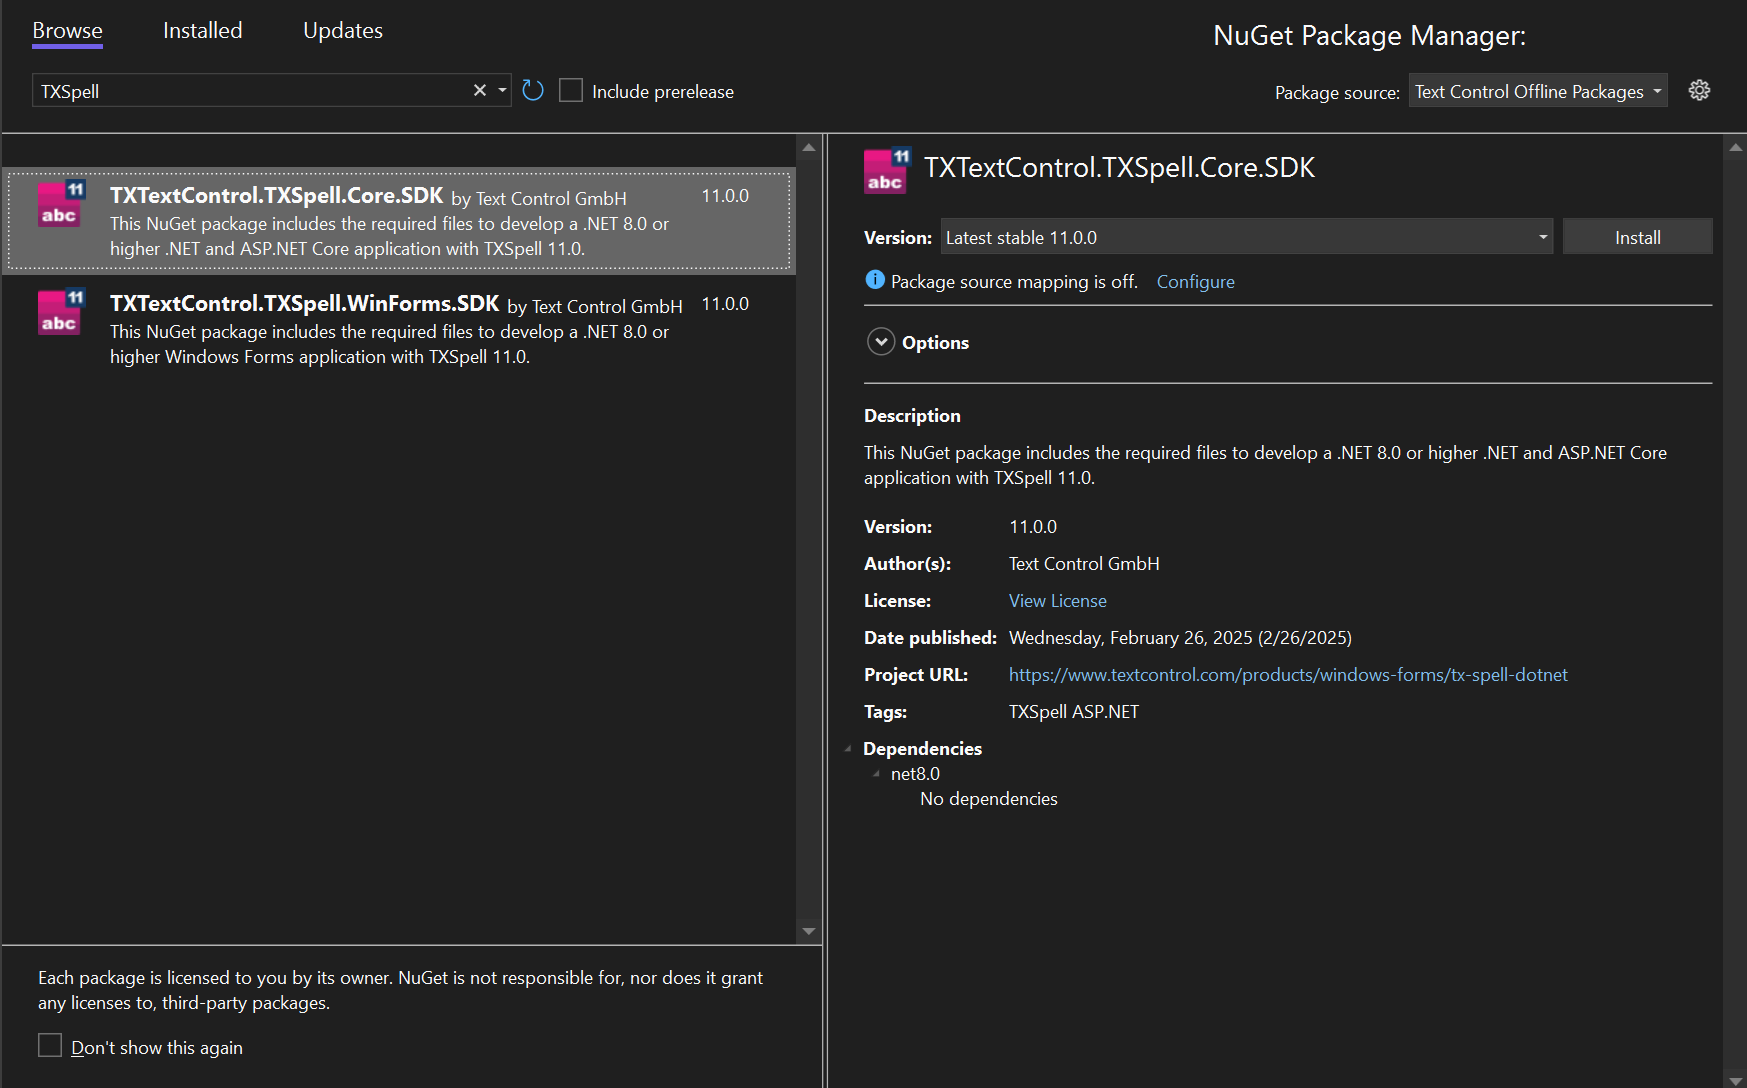
| Package | Adds |
|---|---|
TXTextControl.TextControl.WinForms.SDK | The TextControl editor, its ribbon and bars, and the license of TX Text Control |
TXTextControl.TXSpell.WinForms.SDK | The TXSpellChecker component, its dialogs, the license of TX Spell .NET, and the US English dictionary, hyphenation list, thesaurus and language recognition data, which it copies into the output folder when you build |
Package Overview describes the packages of TX Spell .NET.
Add the Editor to the Form
Open Form1 in the designer from Solution Explorer.
In the Toolbox, open the tab TX Text Control 34.0, select TextControl and draw the control onto the form.
Click the smart tag in the upper right corner of the
TextControl. In the Wizards group, click Add a Ribbon, Add a Status Bar, Add a Ruler and Add a Vertical Ruler.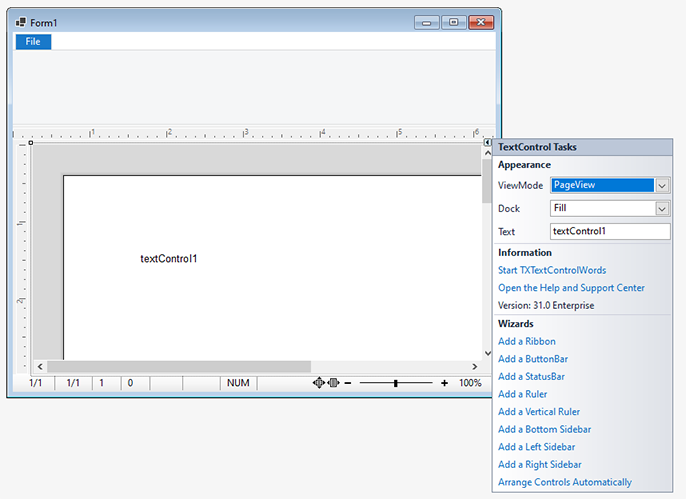
Click Arrange Controls Automatically. The controls are now connected to the
TextControland docked so that they fill the form.Select the ribbon by clicking its blue File tab title, and click the smart tag in the upper right corner of the ribbon.
Click Add a RibbonFormattingTab, Add a RibbonInsertTab, Add a RibbonPageLayoutTab, Add a RibbonViewTab and Add a RibbonProofingTab.
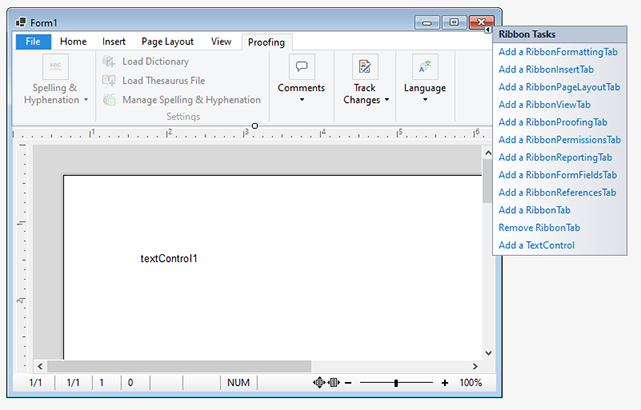
The Proofing tab holds the commands of TX Spell .NET. The TX Text Control tutorial Create Your First Windows Forms Application describes the editor and its ribbon in more detail.
Add the Spell Checker
In the Toolbox, open the tab TXSpell 11.0 and drag TXSpellChecker onto the form.
The component has no user interface: it appears as txSpellChecker1 in the component tray below the form.

Connect the Spell Checker
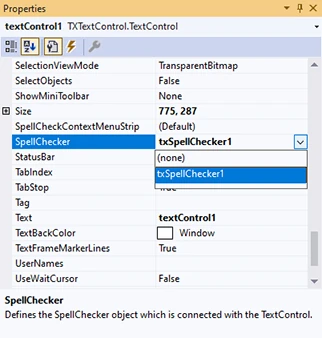
Select the
TextControlon the form.In the Properties window, open the drop-down list of SpellChecker and select txSpellChecker1.
Set IsSpellCheckingEnabled to True, to check spelling as the user types.
Set IsHyphenationEnabled to True, to hyphenate words at the end of a line.
Set IsLanguageDetectionEnabled to True, to detect the language of the text.
The application needs no code of your own: the designer writes these settings into Form1.Designer.cs. The settings work as follows:
- SpellChecker connects the editor to the spell checker. The spell checker is initialized by this connection.
- IsSpellCheckingEnabled underlines misspelled words.
- IsHyphenationEnabled and IsLanguageDetectionEnabled use the hyphenation lists and the language recognition data of the spell checker.
Run the Application
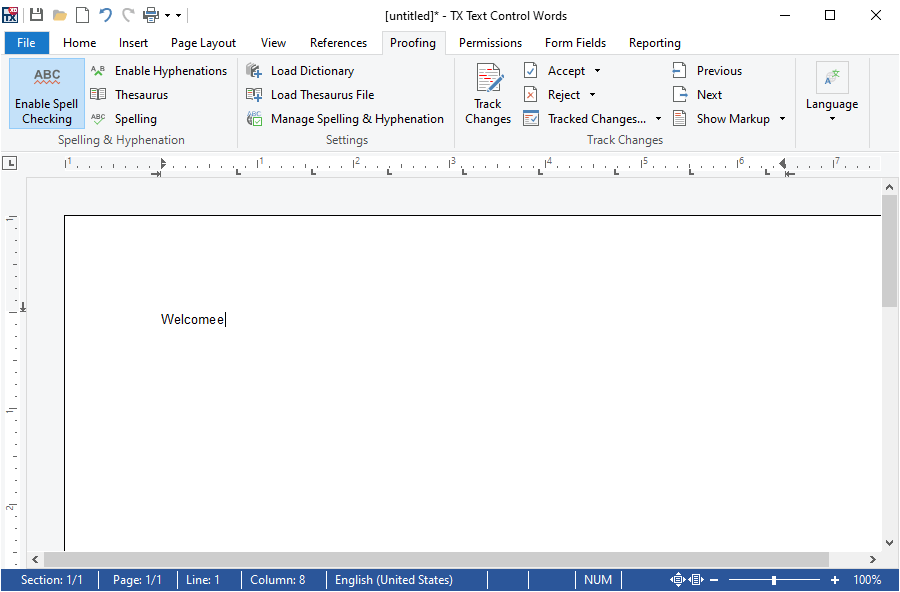
Press F5 and type a sentence with a spelling mistake:
- Each misspelled word gets a red zigzag line once it is complete. English is checked out of the box, with the dictionary the package copied into the output folder.
- A right-click on a misspelled word opens the spell check context menu with suggestions, which also opens the spell check dialog.
- When a line is full, its last word is hyphenated with the English hyphenation list.
- The Proofing tab turns spell checking and hyphenation on and off, and offers commands to correct misspelled words, show synonyms, set and detect languages, and change the settings of spell checking, hyphenation and the thesaurus.
Troubleshooting
- The tab TXSpell 11.0 is missing. The tab comes from
TXTextControl.TXSpell.WinForms.SDK, not fromTXTextControl.TXSpell.Core.SDK. See Toolbox and Designer. - No words are underlined. Check the three properties of the last step. See Spell Checking Doesn't Start.
- Text Control Offline Packages is not in the Package source list. See Configuring Package Sources.
Next Steps
- Correct Words from the Context Menu: try the commands of the menu.
- Open the Spell Check Dialog: correct the whole document in one pass.
- As-You-Type Checking: the properties behind the underlines, and connecting in code.
- Dictionaries and Languages: check languages other than English.