
Visual Studio Toolbox and Designer
In Windows Forms, TX Spell .NET is a component you drag from the toolbox onto a form and connect in the Properties window. It has no user interface of its own, so the designer places it in the component tray below the form, and the connection to TX Text Control takes no code at all.
The Toolbox Tab
The TXSpellChecker component appears in a tab of its own in the Toolbox:
- .NET 8 or higher. The package
TXTextControl.TXSpell.WinForms.SDKadds the tab TXSpell 11.0 when you install it and open a form in the designer. The packageTXTextControl.TXSpell.Core.SDKadds nothing to the toolbox. - .NET Framework. The setup creates the toolbox tab of TX Spell .NET. It is available in projects created with the template Windows Forms App (.NET Framework).
The tab holds one item, TXSpellChecker.
Put the Spell Checker on a Form
Open the form in the designer.
In the Toolbox, open the TX Spell .NET tab and drag TXSpellChecker onto the form.
The component appears as txSpellChecker1 in the component tray below the form:
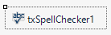
One TXSpellChecker serves every control on the form; Checking Multiple Controls shows how.
Connect It to TX Text Control
In the Properties window of the TextControl, choose txSpellChecker1 in the drop-down list of SpellChecker and set IsSpellCheckingEnabled to True; no code is needed. Connect the Spell Checker in the Designer shows the steps, and Create Your First Windows Forms Application builds the whole application.
Set Properties of the Spell Checker
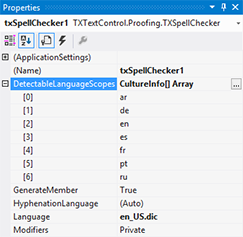
Select txSpellChecker1 in the component tray to set its properties in the Properties window:
Language chooses the default dictionary. "(Auto)", the default, takes the dictionary of the language the application runs in; the drop-down lists the dictionaries of the default dictionary folder. See Loading and Managing Dictionaries.
HyphenationLanguage chooses the hyphenation list, "(Auto)" by default.
DetectableLanguageScopes lists the languages that language detection looks for:
Licensing in the Designer
- .NET 8 or higher. The package embeds its license file into your assembly, so no licenses.licx entry is needed.
- .NET Framework. The license reaches the application through the project's licenses.licx file; Development Licenses shows the entry.
Next Steps
- Create Your First Windows Forms Application: the spell checker on a form with TX Text Control.
- Toolbox and Designer: when the tab is missing or spell checking doesn't start.
- Installing Dictionaries and Language Data: the files the spell checker reads.