
JavaScript
A plain HTML page can display documents with the Document Viewer of DS Server, without a framework or an npm package. Unlike the editor script, the viewer script requires an access token already when the page loads it, so the page first requests a token and then loads the script and initializes the viewer with TXDocumentViewer.init(). The last section moves the token request to your server.
Prerequisites
- A text editor, a web browser and a local web server to serve the page.
- A DS Server that is installed, licensed and reachable from the browser, as the Installation Guide and Licensing describe. The samples use
http://localhost:5000. - For Keep the Client Secret on Your Server: Visual Studio 2026 or the .NET 10 SDK.
With a trial token instead of your own server, skip the next section, use https://trial.dsserver.io as the service URL and the client ID and secret of the token; see Trial Token.
How the Page Works
The page runs three steps in order:
- It requests an access token from
<service URL>/oauth/tokenwith the client credentials grant type. DS Server expects the client ID and secret in an HTTP Basic authorization header. - It loads the viewer script from
<service URL>/documentviewer/TextControl/GetResource?Resource=minimized.tx-viewer.min.jsand appends the token as theaccess_tokenquery parameter. When OAuth is enabled, DS Server answers a request for the script without a valid token with the status code 401. - When the script is loaded, it calls
TXDocumentViewer.init()with the ID of a container element and the viewer settings, including the token. From then on, the globalTXDocumentViewerobject controls the viewer.
The Angular and React packages of DS Server load the viewer the same way.
Prepare a Security Profile
In the admin portal of DS Server, choose Security Profiles, click + Create new profile, enter a name and click Create.
Copy the Client ID and the Client Secret of the new profile.
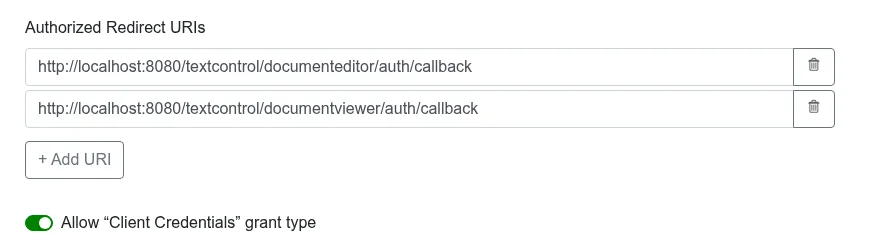
Switch on Allow "Client Credentials" grant type and click Done. It is off by default, and the token request of the page needs it.
A page that contains the client secret shows it to every visitor. Use it for a first test only; the last section removes it.
Create the HTML Page
Create a file named index.html with the following content. Replace the service URL, the client ID and the client secret with your values.
<html>
<head>
<meta charset="utf-8" />
<title>DS Server Document Viewer</title>
</head>
<body>
<div id="txViewer" style="width: 1000px; height: 600px;"></div>
<script>
const serviceURL = "http://localhost:5000";
const clientId = "<client ID>";
const clientSecret = "<client secret>";
// 1. Request an access token with the client credentials grant type
fetch(serviceURL + "/oauth/token", {
method: "POST",
headers: {
"Authorization": "Basic " + btoa(clientId + ":" + clientSecret),
"Content-Type": "application/x-www-form-urlencoded"
},
body: "grant_type=client_credentials"
})
.then(response => response.json())
.then(token => initViewer(token.access_token));
function initViewer(accessToken) {
// 2. Load the viewer script with the access token
const script = document.createElement("script");
script.onload = function () {
// 3. Initialize the viewer
TXDocumentViewer.init({
containerID: "txViewer",
viewerSettings: {
basePath: serviceURL + "/documentviewer",
dock: 1,
toolbarDocked: true,
isSelectionActivated: true,
showThumbnailPane: true,
userNames: ["user1"],
documentData: btoa("<strong>Welcome to DS Server</strong>"),
documentPath: "welcome.html",
oauthSettings: { accessToken: accessToken }
}
});
};
script.src = serviceURL +
"/documentviewer/TextControl/GetResource?Resource=minimized.tx-viewer.min.js&access_token=" +
encodeURIComponent(accessToken);
document.head.appendChild(script);
}
</script>
</body>
</html>
What the Page Does
- The
divwith the IDtxVieweris the container of the viewer. It needs an explicit width and height. fetch()postsgrant_type=client_credentialsto the token endpoint. The answer is a JSON object whoseaccess_tokenthe page passes on.initViewer()adds the viewer script to the page. Itsonloadhandler runs when the script is loaded and theTXDocumentViewerobject exists.TXDocumentViewer.init()creates the viewer in the element named bycontainerID. TheviewerSettingsare:
| Setting | Description |
|---|---|
basePath | The service URL of DS Server followed by /documentviewer |
dock | How the viewer is docked: 1 fills the container, 0 fills the browser window |
toolbarDocked | Whether the toolbar is docked or floating |
isSelectionActivated | Whether text can be selected and copied |
showThumbnailPane | Whether the pane of page thumbnails is visible |
userNames | The names of users who have access to editable regions |
documentData | The document to display as a Base64-encoded string |
documentPath | The document name the viewer displays |
oauthSettings | The access token in accessToken |
The viewer also accepts signatureSettings, documentLoadSettings and resources, with the same meaning as the attributes of the Angular component.
Open the Page
Serve index.html from your local web server and open it in the browser. The page shows the Document Viewer with its toolbar, the thumbnail pane and a page with the text "Welcome to DS Server".
Load a Document With JavaScript
After init(), TXDocumentViewer.loadDocument() replaces the displayed document. It takes the document as a Base64-encoded string and the document name for the status bar, and returns a promise. Add a button below the container and a function to the script element:
<input type="button" onclick="loadOtherDocument()" value="Load Document" />
function loadOtherDocument() {
  TXDocumentViewer.loadDocument(btoa("<p>Loaded with <strong>JavaScript</strong></p>"), "loaded.html");
}
To display a file from your server, download it first, for example with fetch, and pass its Base64-encoded content. addEventListener registers handlers for viewer events such as documentLoaded and annotationsChanged.
Keep the Client Secret on Your Server
The page doesn't need the client secret if your server requests the token. The ASP.NET Core application in Keep the Client Secret on Your Server of the Document Editor tutorial does this: its /api/token endpoint sends the client credentials to DS Server and returns the token, and it serves the HTML page from its wwwroot folder. Use the same application, save the viewer page as wwwroot/index.html and replace the fetch() call of step 1 and the three constants for the credentials with a request to the endpoint:
const serviceURL = "http://localhost:5000";

// 1. Request an access token from your own server
fetch("/api/token")
  .then(response => response.json())
  .then(token => initViewer(token.access_token));
The initViewer() function stays as it is. Protect the endpoint the way you protect the rest of your application, because it gives a token to anyone who calls it.
Troubleshooting
"DS Server is not registered." On a DS Server without a license, the viewer script only writes this message in red at the top of the page, and the browser console shows
TXDocumentViewer is not defined. Register the server in the admin portal, as Licensing describes.
The script request answers 401: the
access_tokenquery parameter is missing or the token isn't valid. A token is valid for the number of seconds thatexpires_inof the token response gives, 3600.The token request answers 400 with
unsupported_grant_type: the security profile doesn't allow the client credentials grant type.
Document Editor and Viewer in Troubleshooting covers more problems.
Next Steps
- Document Viewer JavaScript API: annotations, forms, signatures and events.
- JavaScript: add the Document Editor to a plain HTML page.
- Overview: the client libraries that do these steps for you.
- Enable OAuth: require access tokens for every request.