
Create a .NET Framework Application
Existing WPF applications often still run on the .NET Framework, and TX Spell .NET works there as well. The result is the same editor with spell checking as in Create Your First WPF Application, reduced to the TextControl. What differs is how the components get into the project: there are no NuGet packages. TX Text Control comes from the toolbox tab its setup created, you reference the assemblies of TX Spell .NET yourself, and the license of the spell checker needs an entry in licenses.licx.
Prerequisites
- Visual Studio on Windows with the .NET Framework 4.8.
- The setups of TX Spell .NET for WPF 11.0 and TX Text Control .NET for WPF 34.0, the full or the trial versions. For .NET Framework projects, they provide the assemblies, the language data and the toolbox tab. See Installing the Product.
Create the Project
Open Visual Studio and create a new project.
Select C# from the Languages list, Windows from the Platform list and Desktop as the Project Type.
Select the project template WPF App (.NET Framework) and click Next.
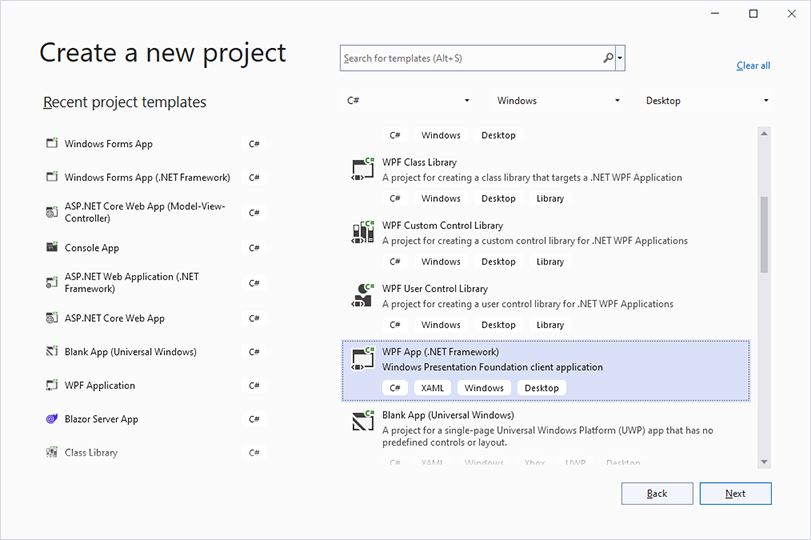
Enter the project name Simple, select .NET Framework 4.8 in the Framework list and click Create.
Add the Editor to the Window
Open MainWindow.xaml. In the XAML view, replace the
Gridwith aDockPanel: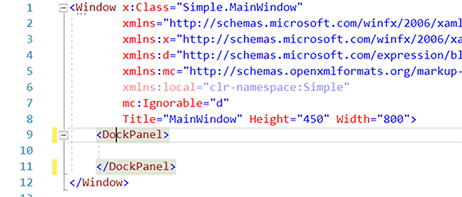
In the Toolbox, find the tab TX Text Control 34.0, which the setup of TX Text Control created, and double-click TextControl. Visual Studio adds the control inside the
DockPaneland maps the prefixWPFto the namespace of TX Text Control: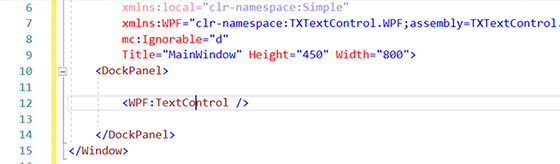
Remove the
HeightandWidthattributes of theTextControl, so that it fills the window.
Reference TX Spell .NET
Choose Project > Add Reference.... In the Reference Manager, click Browse.
Go to the Assembly folder of the installation, by default C:\Program Files\Text Control GmbH\TX Spell 11.0 .NET for WPF\Assembly.
Select TXSpell.dll and TXSpell.WPF.dll, click Add, and close the Reference Manager with OK.
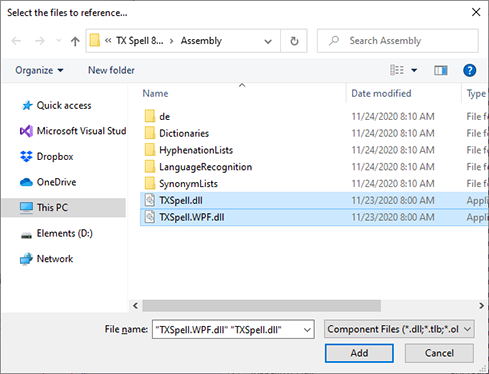
TXSpell.dll holds the spell checking engine, and TXSpell.WPF.dll the WPF spell checker with its dialogs. The same Assembly folder holds the language data in the folders Dictionaries, HyphenationLists, SynonymLists and LanguageRecognition, where the spell checker finds it on the development machine.
Declare and Connect the Spell Checker
Map the namespace of TX Spell .NET to a prefix, declare the spell checker as a resource of the window, and name its key in the SpellChecker property of the TextControl. The complete MainWindow.xaml:
<Window x:Class="Simple.MainWindow"
        xmlns="http://schemas.microsoft.com/winfx/2006/xaml/presentation"
        xmlns:x="http://schemas.microsoft.com/winfx/2006/xaml"
        xmlns:WPF="clr-namespace:TXTextControl.WPF;assembly=TXTextControl.WPF"
        xmlns:spell="clr-namespace:TXTextControl.WPF.Proofing;assembly=TXSpell.WPF"
        Title="MainWindow" Height="450" Width="800">
    <Window.Resources>
        <spell:TXSpellChecker x:Key="txSpellChecker1" />
    </Window.Resources>
    <DockPanel>
        <WPF:TextControl x:Name="textControl1"
                         SpellChecker="txSpellChecker1"
                         IsSpellCheckingEnabled="True"
                         IsHyphenationEnabled="True" />
    </DockPanel>
</Window>
The markup works as follows:
<spell:TXSpellChecker x:Key="txSpellChecker1" />creates the spell checker as a resource of the window.- SpellChecker holds the key of the resource as plain text.
- IsSpellCheckingEnabled underlines misspelled words, and IsHyphenationEnabled hyphenates the last word of a full line.
Add the License Entry
In a .NET Framework project, the license of the spell checker is embedded through licenses.licx when you build.
Open licenses.licx in the Properties folder of the project in Solution Explorer. In Visual Basic, it is in the My Project folder.
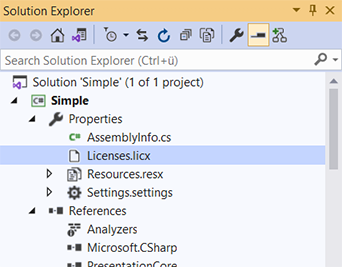
Add this line:
TXTextControl.WPF.Proofing.TXSpellChecker, TXSpell.WPF
If the project has no licenses.licx yet, add a text file with this name and set its build action to Embedded Resource. Licensing covers the license problems you may meet.
Run the Application
Press F5 and type a sentence with a spelling mistake. The application behaves like the .NET application of the first tutorial: misspelled words are underlined once they are complete, English is checked out of the box, the context menu offers suggestions and opens the spell check dialog, and the last word of a full line is hyphenated.
When you deploy the application, ship the language data folders with it. See Deploying .NET Framework Applications.
The Finished Sample
The setup installs this tutorial as a finished project below TX Spell 11.0.NET for WPF\Samples\WPF in your Documents folder: CSharp\TextControl\Simple in C#, and VB.NET\TextControl\Simple in Visual Basic.
Next Steps
- Correct Words from the Context Menu: try the commands of the menu.
- Open the Spell Check Dialog: correct the whole document in one pass.
- Create Your First WPF Application: the same application for .NET 8 or higher, with a button bar, rulers and a status bar.