
Visual Studio
TX Spell .NET for WPF 11.0 is made for Visual Studio 2022: the release notes of version 11.0 name it for creating applications for .NET 8 and .NET 9. You write the code in C# or Visual Basic, start from the WPF templates of Visual Studio, and add TX Spell .NET from the package source the setup provides.
Supported Version and Languages
| Supported | |
|---|---|
| Visual Studio | Visual Studio 2022 |
| Languages | C# and Visual Basic |
The blog article Document Editor with TX Spell .NET on Linux using ASP.NET Core already uses Visual Studio 2026.
The setup installs its samples in C# and Visual Basic. The tutorials of this documentation use C#.
Project Templates
| Project | Template |
|---|---|
| .NET 8 or higher | WPF Application |
| .NET Framework | WPF App (.NET Framework) |
In the Create a new project dialog, select C# or Visual Basic from the Languages list, Windows from the Platform list and Desktop as the Project Type to find them:
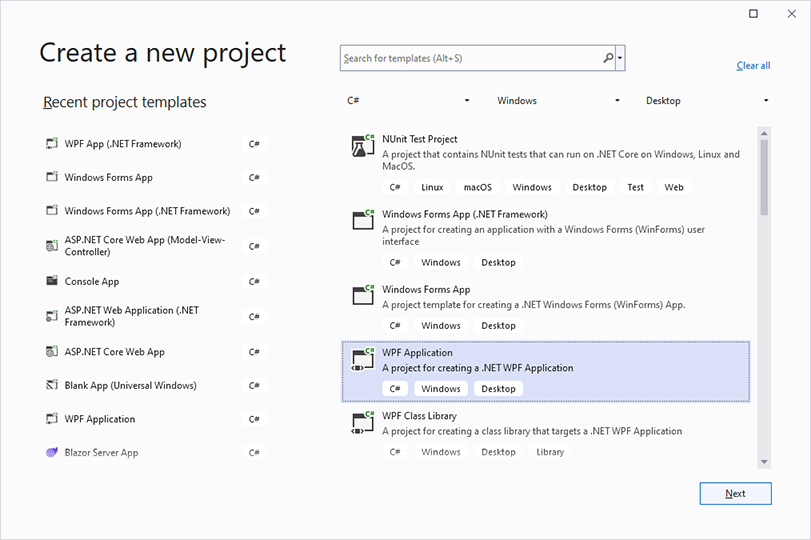
How TX Spell .NET Appears in Visual Studio
The NuGet Package Manager. The setup adds the package source Text Control Offline Packages, which holds the packages of all installed Text Control products. In Project > Manage NuGet Packages..., you select this source and install
TXTextControl.TXSpell.WPF.SDK. Installing and Updating Packages shows the steps.XAML instead of the toolbox. The WPF spell checker is not a control in the toolbox. You declare it as a resource of the window and name its key in the
SpellCheckerproperty of theTextControl:<Window.Resources> <spell:TXSpellChecker x:Key="txSpellChecker1" /> </Window.Resources>The prefix
spellmaps the namespaceTXTextControl.WPF.Proofingof the assembly TXSpell.WPF.
Visual Studio Toolbox and Designer describes the design-time support in detail.
Next Steps
- Installing the Product: run the setup that provides the package source.
- Create Your First WPF Application: a first project in Visual Studio.
- Toolbox and Designer: what to do when the spell checker doesn't appear.