
Azure App Service Windows
Azure App Service on Windows runs an ASP.NET Core application with TX Text Control .NET Server without a server of your own. Two settings of the App Service matter before the first deployment: the 64-bit platform, because the Core engine and the Document Editor backend need a 64-bit process, and Web sockets, because the Document Editor connects through them. With both in place, the application is published for win-x64, as for any other Windows server.
The steps follow Text Control's tutorial and publish the application of Document Editor: ASP.NET Core from Visual Studio or with the Azure CLI.
Prerequisites
- An Azure subscription.
- An ASP.NET Core application with the Core engine, for example the application of Document Editor: ASP.NET Core, with the packages
TXTextControl.TextControl.Core.SDK,TXTextControl.WebandTXTextControl.Web.DocumentEditor.Backend. - Visual Studio 2026, or the .NET CLI and the Azure CLI.
- Runtime licenses. Each instance of the App Service needs one. See Runtime Licenses.
Before You Create the App Service
- Use the Core engine. Text Control's tutorial deploys the Core engine to App Service on Windows. The Windows sandbox of App Service blocks most calls to the Windows graphics and user interface functions, which the Classic engine uses.
- Choose the Basic tier or higher. The 64-bit platform requires a Basic or higher service plan; the Free and Shared tiers run 32-bit only.
- Count the WebSocket connections. On Windows, an instance accepts 350 WebSocket connections in the Basic tier and an unlimited number in Standard and higher. An editor opens two WebSocket connections while it initializes.
Create the App Service and Publish From Visual Studio
In Solution Explorer, right-click the project and choose Publish.
Select Azure as the target and click Next.
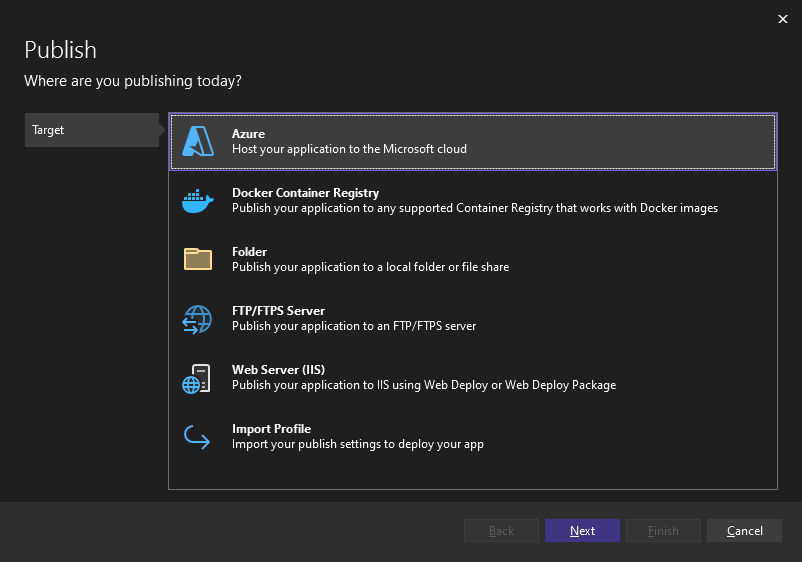
Select Azure App Service (Windows) and click Next.
Sign in to your Azure account. Select an existing App Service, or click Create new.
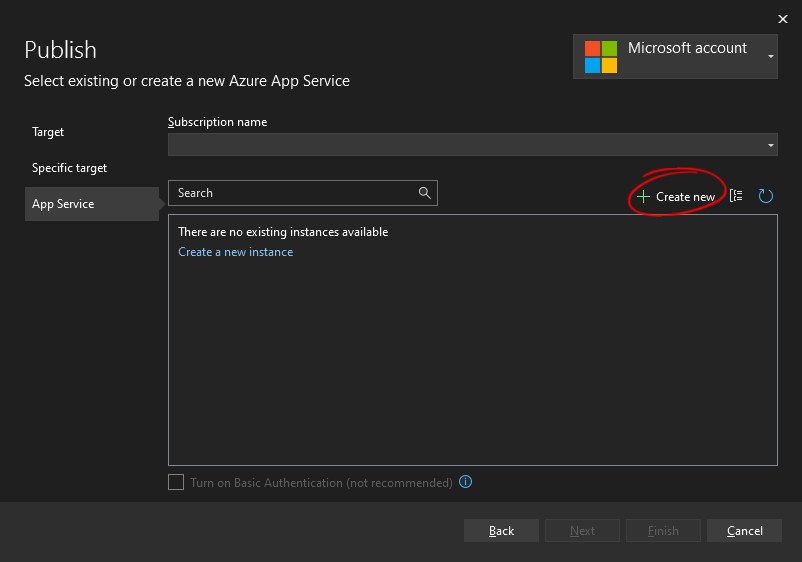
For a new App Service, enter the Name, select the Subscription name, the Resource group and a Hosting Plan in the Basic tier or higher and click Create.
Check the summary and click Finish. Visual Studio creates a publish profile.
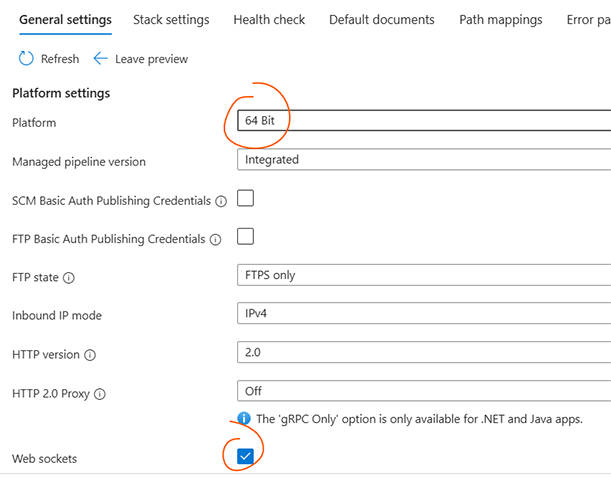
Before you publish, open the App Service in the Azure portal, go to Settings > Configuration > General settings, set Platform to 64 Bit and switch Web sockets on. Save the settings.
Back in Visual Studio, edit the settings of the publish profile: keep Configuration at Release and Deployment Mode at Framework-dependent, and set Target Runtime to win-x64, as Text Control's tutorial does. The Core engine ships native Windows libraries for 64-bit only, so a
win-x86target runtime doesn't work. Save the settings and click Publish.
Visual Studio builds and publishes the application and opens it in the browser. The page with the Document Editor shows the editor with its ribbon.
The App Service already contains the .NET runtime, so the framework-dependent output needs no runtime of its own. The output contains the native Windows libraries of TX Text Control, the Fonts folder of the Core engine and the files of the Document Editor backend.
Publish With the Azure CLI
Without Visual Studio, the Azure CLI creates the same App Service. Create a Windows plan in the Basic tier and the web app:
az appservice plan create MyResourceGroup MyPlan B1 false
az webapp list-runtimes windows
az webapp create MyResourceGroup MyPlan <app-name> <runtime>
Use a .NET value from the output of az webapp list-runtimes for --runtime. Then switch to 64 bit and turn on Web sockets:
az webapp config set MyResourceGroup <app-name> false true
Publish the application for win-x64, pack the output into a ZIP file and deploy it:
dotnet publish -c Release -r win-x64 --self-contained false -o publish
Compress-Archive -Path publish\* -DestinationPath app.zip
az webapp deploy -g MyResourceGroup -n <app-name> --src-path app.zip
A ZIP deployment doesn't build the application on App Service, so the packages from the Text Control Private NuGet Feed are restored only on your machine or build server. CI/CD shows the same steps in a pipeline.
Check the Application
- Open the site at its default domain, which has the form
<app-name>-<hash>.<region>.azurewebsites.net, or from the Overview page of the App Service. - Watch the log stream with
az webapp log tail -g MyResourceGroup -n <app-name>. - Check the installed runtimes in the Kudu console: Development Tools > Advanced Tools > Go > Debug console, then
dotnet --info.
If the editor doesn't connect, check that Web sockets is on. If the application doesn't start, check that the platform is 64 bit and that the target runtime was win-x64.
Run Several Instances
When the App Service scales out, keep Session affinity on, which is the default, and plan a runtime license for each instance, as Scaling and Licensing describes.
Next Steps
- Azure App Service Linux: the same application on App Service on Linux.
- CI/CD: deploy from a pipeline.
- WebSocket Architecture: the connection of the Document Editor in detail.
- Troubleshooting Azure: solve problems in App Service.