
ASP.NET MVC Document Viewer
Existing ASP.NET MVC 5 applications on the .NET Framework display documents with the same Document Viewer and HTML helper as ASP.NET Core applications. What differs is how TX Text Control gets into the project: the viewer package comes from NuGet, while the engine assemblies are referenced from the installation folder and licensed with a licenses.licx file. The steps below build such an application in Visual Studio 2022 with .NET Framework 4.8 and load a comment annotation into the viewer.
Legacy technology. This setup runs on Windows only and uses the Classic engine of the Windows setup. New applications use ASP.NET Core with the NuGet packages of the Core engine.
Prerequisites
- Visual Studio 2022 and .NET Framework 4.8.
- The Windows setup of TX Text Control .NET Server 34.0, trial or full version. It installs the assemblies to
C:\Program Files\Text Control GmbH\TX Text Control 34.0.NET Server for ASP.NET\and the Text Control Offline Packages package source.
The finished sample of this tutorial is installed with the setup in %USERPROFILE%\Documents\TX Text Control 34.0.NET Server for ASP.NET\CSharp\MVC\viewer\.
Unlike the Document Editor, the viewer needs no TX TextControl Service, but it needs the TX Text Control assemblies that you reference in the project below. The README of the package says that in ASP.NET MVC the backend of the viewer is already set up, so the project needs no middleware or route of its own.
Create the Project
In Visual Studio 2022, choose Create a new project.
Select ASP.NET Web Application (.NET Framework) as the project template and confirm with Next.
Enter a project name, select .NET Framework 4.8 as the Framework and confirm with Create.
In the next dialog, choose MVC as the project template and confirm with Create.
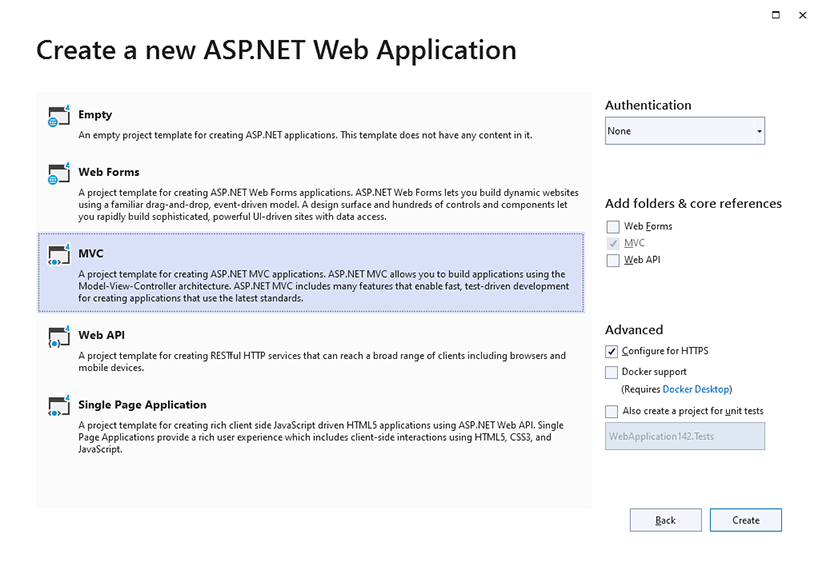
Install the NuGet Package
- In Solution Explorer, select the project and choose Manage NuGet Packages... from the Project menu.
- Select Text Control Offline Packages or nuget.org as the Package source.
- Search for
txtextcontrol.web.documentviewerand install the latest version ofTXTextControl.Web.DocumentViewer.
Its .NET Framework 4.5 build depends on Microsoft.AspNet.Mvc 5.3.0, Newtonsoft.Json 13.0.1 and System.Net.Http 4.3.4, which NuGet installs with it. The package doesn't contain the TX Text Control engine: you add it in the next step. A package from nuget.org requires the trial version of TX Text Control .NET Server on the development machine.
Add the TX Text Control References
- With the project selected in Solution Explorer, choose Project > Add Project Reference... to open the Reference Manager, and click Browse....
- In the installation folder, open the Assembly folder and select these assemblies:
- TXDocumentServer.dll
- TXTextControl.dll
- TXTextControl.Server.dll
- Repeat the step for these files from the Assembly\bin64 folder:
- tx34.dll
- tx34_ic.dll
- tx34_tls.dll
- Close the Reference Manager with OK.
The Assembly\bin64 folder holds the 64-bit files, and Assembly\bin holds the 32-bit files of the same names. A 64-bit application needs the files from bin64, a 32-bit application the files from bin.
Add the License File
Applications on the .NET Framework license TX Text Control with a licenses.licx file, which the .NET license compiler reads when the project is built.
With the project selected, choose Project > Add New Item....
Select Text File, name it licenses.licx and click Add.
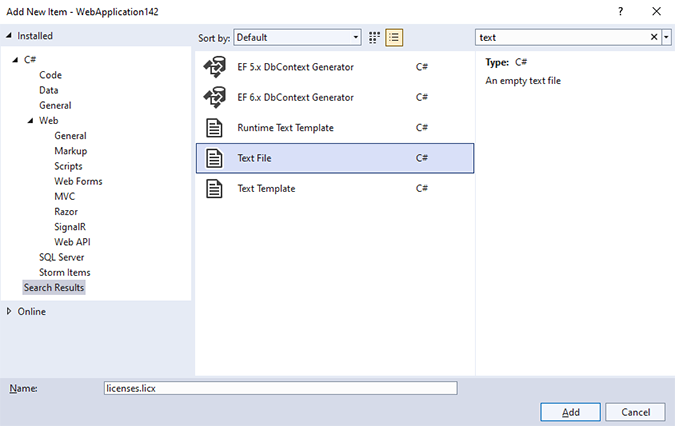
Paste the following line into the file and save it:
TXTextControl.ServerTextControl, TXTextControl.Server, Version=34.0.1900.500, Culture=neutral, PublicKeyToken=6b83fe9a75cfb638
The line names the licensed class, its assembly and the full version of the assembly. Since version 30.0, the full version is required; without it, an older installed version can be used, which ends in a license error. After an upgrade, change the version, close and reopen Visual Studio and rebuild. See A Control Could Not Be Licensed.
Add the Viewer to the View
Open Index.cshtml in the Views/Home folder and replace its complete content with the following code:
@using TXTextControl.Web.MVC.DocumentViewer
@using System.Text

<div style="width: 800px; height: 600px;">

@Html.TXTextControl().DocumentViewer(settings => {
    settings.DocumentData = Convert.ToBase64String(
        Encoding.ASCII.GetBytes("<strong>Sample Content</strong>"));
    settings.Dock = DocumentViewerSettings.DockStyle.Fill;
}).Render()

</div>

<script>

    var jsonAnnotations = '[[{"pen":{"type":"comment","objectWidth":32,"objectHeight":32},"user":"Unknown User","location":{"x":127,"y":50},"time":1658908087097,"comments":[{"comment":"Welcome to Text Control","user":"Unknown User","date":1658908100339,"id":"c8d818ce-ff1e-4c0c-b78c-6ba95a98dede","status":"none"}],"id":"feed80ff-1c94-4abf-9838-3e833faa4092","status":"Accepted"}]]';

    window.addEventListener("documentViewerLoaded", function () {
        TXDocumentViewer.annotations.showToolbar(true);
        TXDocumentViewer.annotations.load(jsonAnnotations);
    });

</script>
The view works as follows:
@using TXTextControl.Web.MVC.DocumentViewerimports the namespace of the HTML helper and of DocumentViewerSettings.Html.TXTextControl().DocumentViewer()creates the viewer, andRender()writes it into the page.- DocumentData holds the document as a Base64-encoded string, here a short HTML string.
- Dock set to
Fillmakes the viewer fill thedivof 800 by 600 pixels. - When the
documentViewerLoadedevent fires, annotations.showToolbar shows the annotation toolbar and annotations.load loads a comment from the JSON string.
Run the Application
Press F5 to build and start the application. The home page shows the viewer with the text "Sample Content", the annotation toolbar and a comment with the text "Welcome to Text Control".
Load a Document From a File
To show a file of the web application, set DocumentPath instead of DocumentData. In an MVC 5 view, Server.MapPath turns an application path into the physical path. Copy a document to App_Data/Documents and use this helper call:
@using TXTextControl.Web.MVC.DocumentViewer

@Html.TXTextControl().DocumentViewer(settings => {
    settings.DocumentPath = Server.MapPath("~/App_Data/Documents/nda.tx");
    settings.Dock = DocumentViewerSettings.DockStyle.Fill;
}).Render()
The settings, the JavaScript API, annotations, forms and signatures of the viewer are the same as in ASP.NET Core. The Document Viewer section describes them.
Next Steps
- ASP.NET MVC Mail Merge: create the documents the viewer shows on the server.
- Web Forms Document Viewer (Legacy): the older viewer control of Web Forms.
- .NET Framework Applications: the files to deploy with the application.
- ASP.NET Core: the same viewer in ASP.NET Core.