
Creating an API Token
NuGet authenticates against the Text Control Private NuGet Feed with a developer's email address and an API token. Account holders create these tokens when they give developers access, and developers can look up where their credentials come from. A token is created in one of two ways: automatically, by assigning a serial number, or manually.
Before You Begin
- You need access to the Text Control account that holds the licenses, with at least one NuGet-eligible serial number.
- Every API token belongs to one developer's email address. Only email addresses that you have used to assign serial numbers appear when you create a token manually.
Create a Token by Assigning a Serial Number
The easiest way to get developers started is to assign a serial number to them. When you assign a NuGet-eligible serial number to a developer, an API token is generated automatically and sent to the developer's email address.
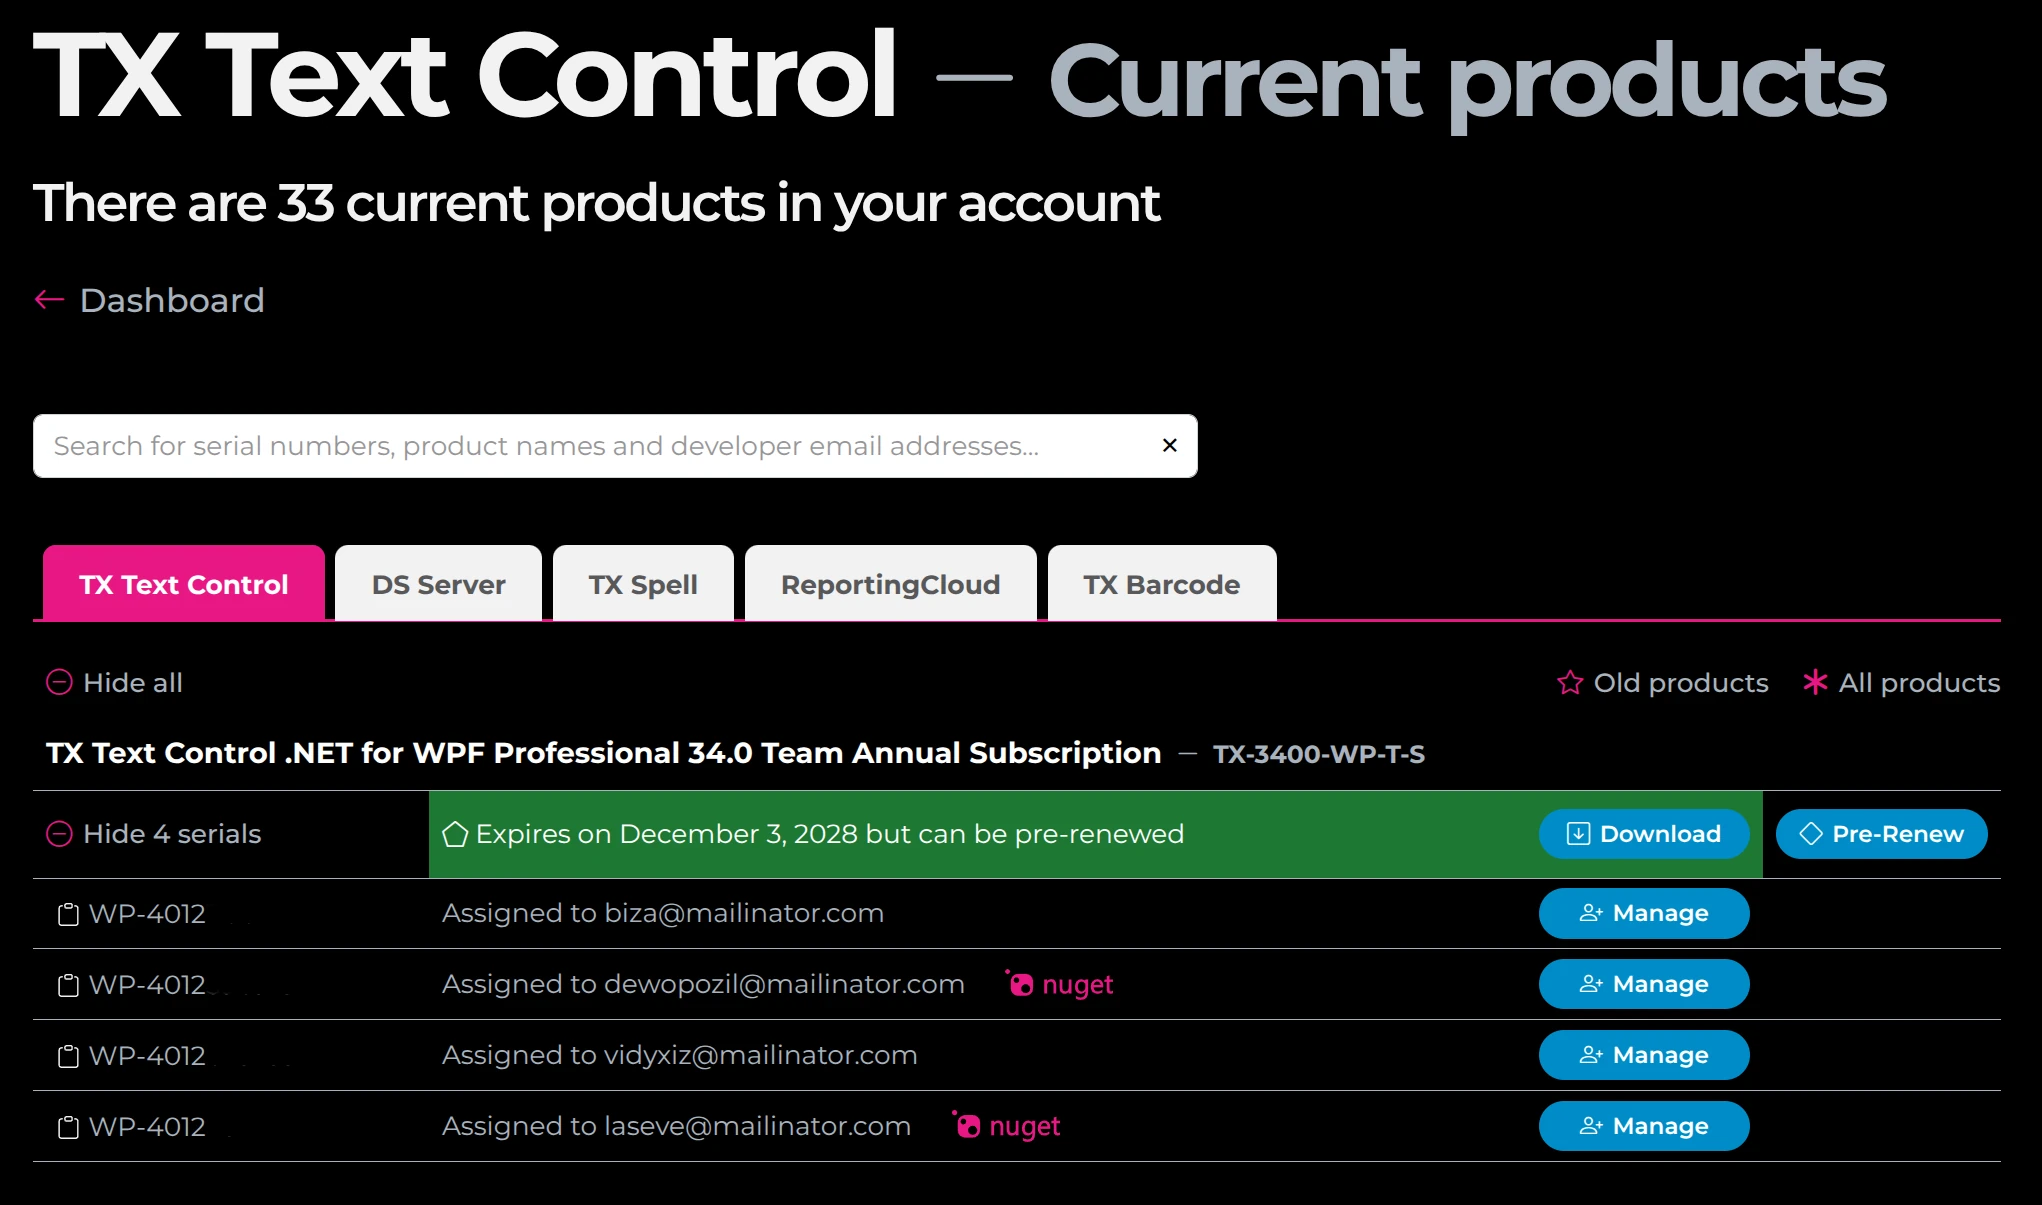
- In your account, navigate to Manage Products.
- Click Manage > Assign next to the serial number you want to assign.
- Enter the developer's email address.
- Click Assign to complete the assignment.
- The developer receives an email that contains both the serial number assignment and a download link for their personalized NuGet configuration file.
No further steps are required. The developer receives everything they need in this email.
Reassigning and Unassigning Serial Numbers
- Reassigning a serial number to the same or a different developer follows the same process. If the developer already has a valid token, its expiry is extended. If the token has expired or does not exist, a new one is created.
- Unassigning a serial number checks whether the developer has any other NuGet-eligible serial numbers assigned. If not, the developer's API token is deleted.
Create a Token Manually
Create a token manually if you need more control over the token name or the expiry date, or if you want to create a token for a developer who already has assigned serial numbers.
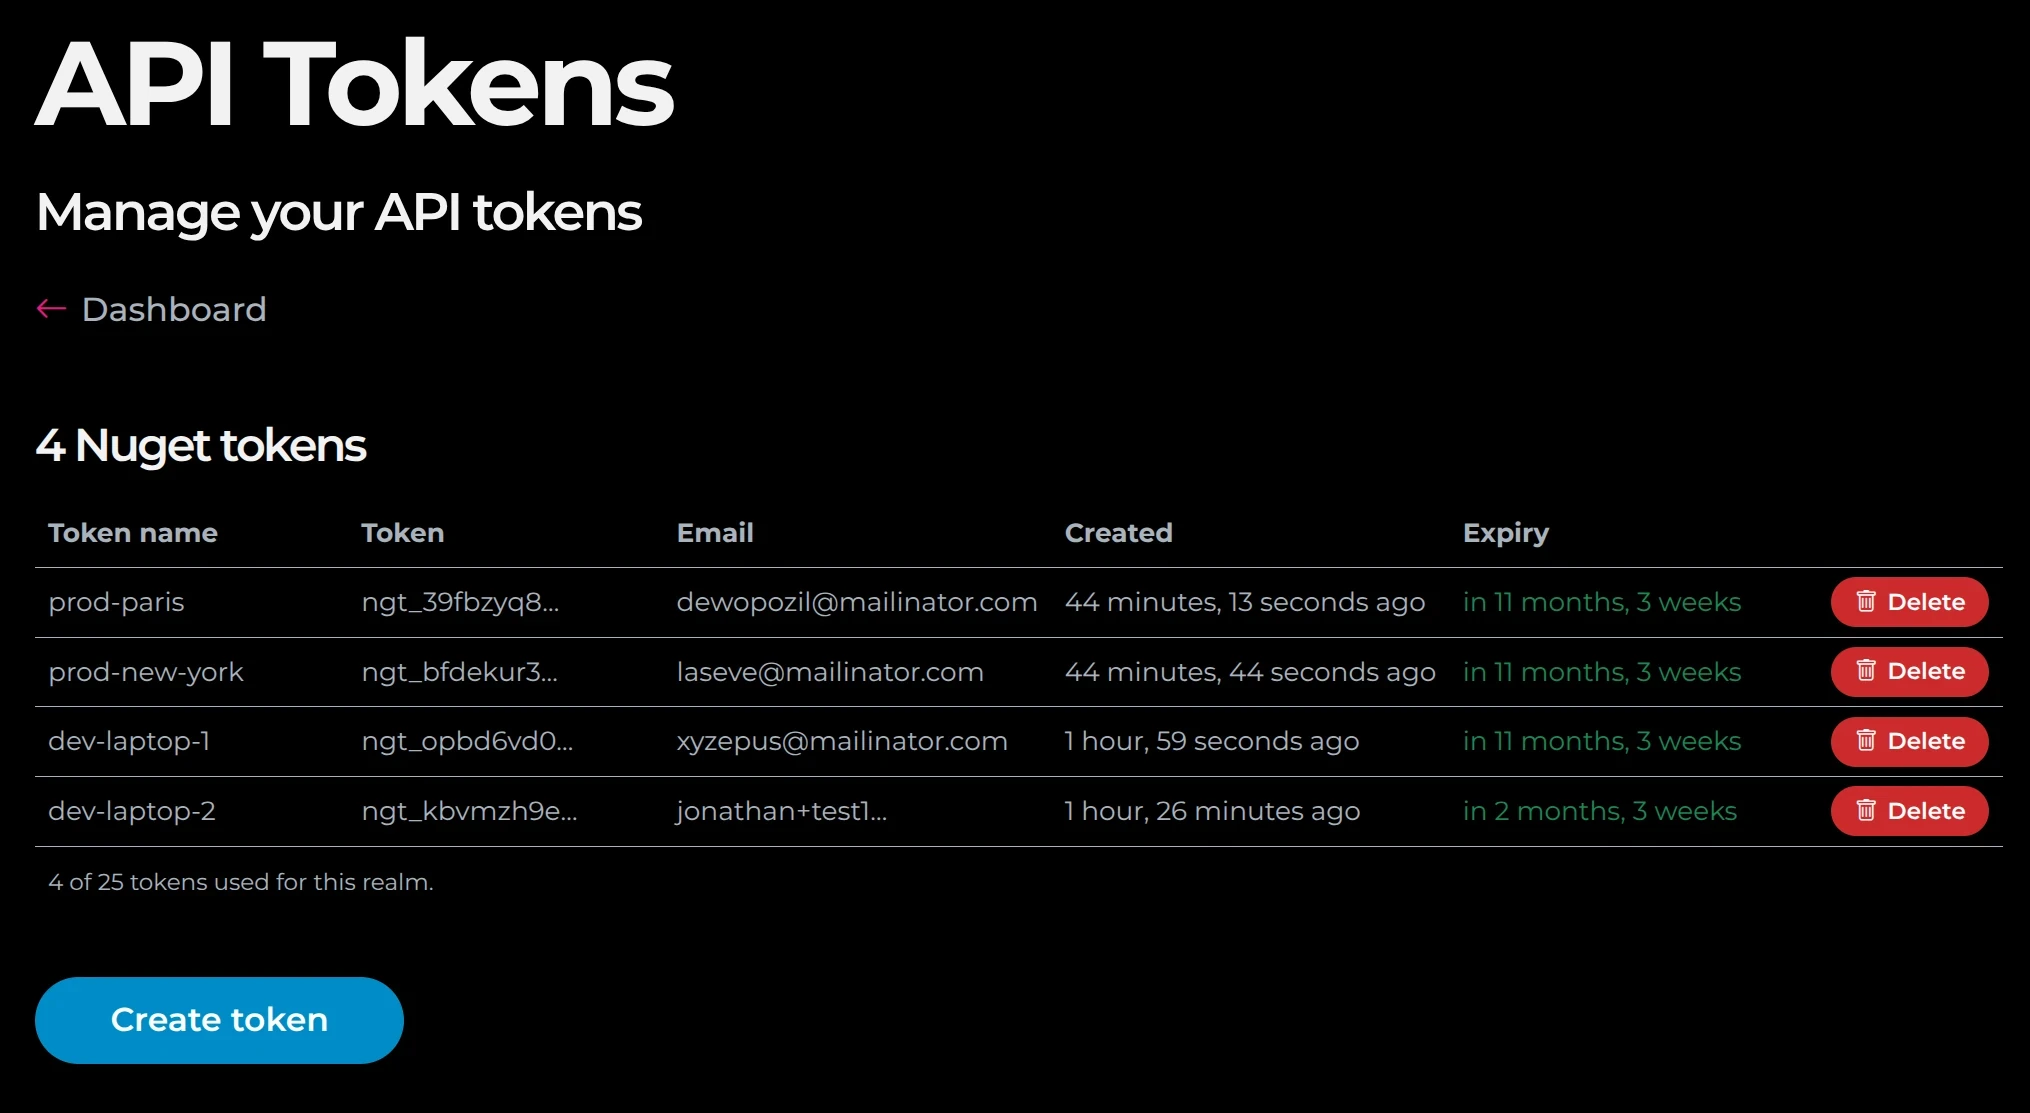
- In your account, navigate to Manage API tokens.
- Click Create token.
- Enter a name for the API token. To use a random name, click Generate.
- Enter the number of days for which the API token is valid. The minimum is 1 day and the maximum is 730 days (2 years).
- Select the email address of the developer for whom you want to issue the token.
- Click Create token again.
- An API token and a corresponding NuGet configuration file are generated. The file contains sensitive credentials and is not displayed. A download link is sent to the developer by email. The confirmation screen shows the token name and the token prefix for your reference.
- Click Proceed to return to the API token management screen.
What the Developer Receives
The developer receives an email with a download link for a personalized nuget.config file. With automatic token creation, this is the email about the serial number assignment; its subject line starts with "Your Serial Number, Installation File, and NuGet File for".
Together, the email and the downloaded nuget.config file give the developer the three values that NuGet needs:
| Value | Description |
|---|---|
| Feed URL | https://www.textcontrol.com/nuget/v3/index.json |
| Email address | The email address the serial number is assigned to, used as the user name |
| API token | The token, used as the password. Tokens start with ngt_. |
The developer copies the file to the project, as described in nuget.config. If a developer cannot find the email, they contact the account holder or Text Control support.
Token Validity
| How the token was created | Validity |
|---|---|
| Automatically, by assigning a serial number | 365 days. The expiry is extended each time you assign or reassign a serial number to the developer. |
| Manually, in Manage API tokens | The number of days you enter, from 1 to 730 days |
When a developer's token has expired, reassigning a serial number to the developer creates a new token. You can also create a new token manually. Manage API tokens shows the expiration date of every token.
A token that is used on a build server authenticates the same way. See CI/CD Authentication for storing it as a secret.
Manage Tokens
- Manage Products marks every email address that has a NuGet API token with the NuGet logo. Clicking the logo opens the Manage API tokens page.
- Manage API tokens lists all tokens you have created. There you can view token details, check expiration dates and delete tokens that are no longer needed.
- Unassigning a serial number deletes the developer's token automatically when the developer has no other NuGet-eligible serial number, as described above.
Treat an API token like a password. If a token or a nuget.config file that contains it was shared by mistake, delete the token in Manage API tokens and create a new one.
Next Steps
- nuget.config — what the downloaded file contains and where to put it.
- Visual Studio — install packages with the NuGet Package Manager.
- .NET CLI — install packages from the command line.
- Development Licenses — how developer licenses are assigned.