
ASP.NET Core
The fastest way to the Document Editor is an ASP.NET Core MVC application that shows the editor in a view. The same application hosts the required backend, loads an initial document and inserts a table through the JavaScript API when you click a button.
Prerequisites
- Visual Studio 2026 with the .NET 10 SDK. The engine and backend packages require .NET 8 or higher.
- A TX Text Control .NET Server license. A serial number must be assigned to your email address.
- Access to the Text Control Private NuGet Feed in Visual Studio. See Text Control Private NuGet Feed and Visual Studio.
Create the Project
- In Visual Studio 2026, choose Create a new project.
- Select ASP.NET Core Web App (Model-View-Controller) as the project template and confirm with Next.
- Enter a project name, choose a location and confirm with Next.
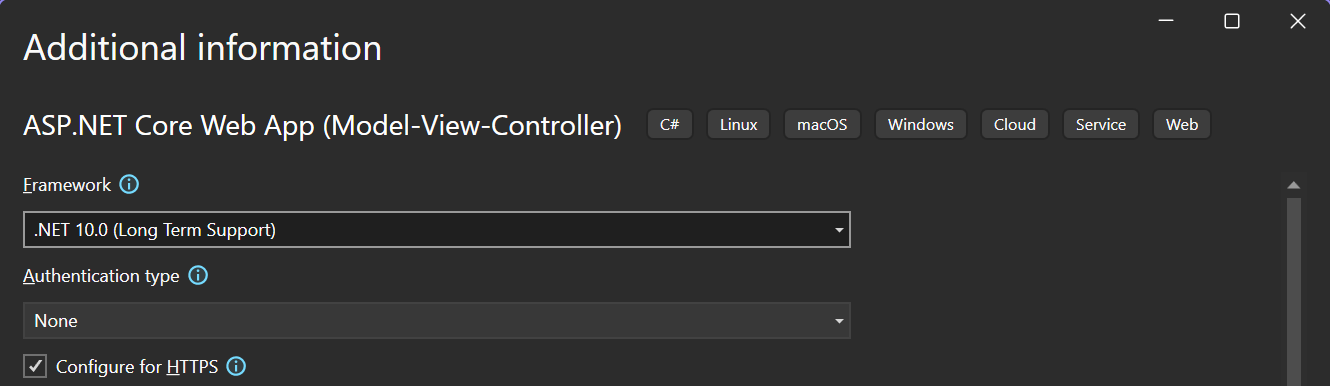
- Choose .NET 10.0 (Long Term Support) as the Framework and create the project.
The Additional information step of the wizard looks like this in Visual Studio 2026:
Without Visual Studio, for example in the terminal of Visual Studio Code or on Linux, create the same project with the .NET CLI and change to its folder:
dotnet new mvc MyEditorApp net10.0
cd MyEditorApp
Install the NuGet Packages
- In Solution Explorer, select your project and choose Manage NuGet Packages... from the Project menu.
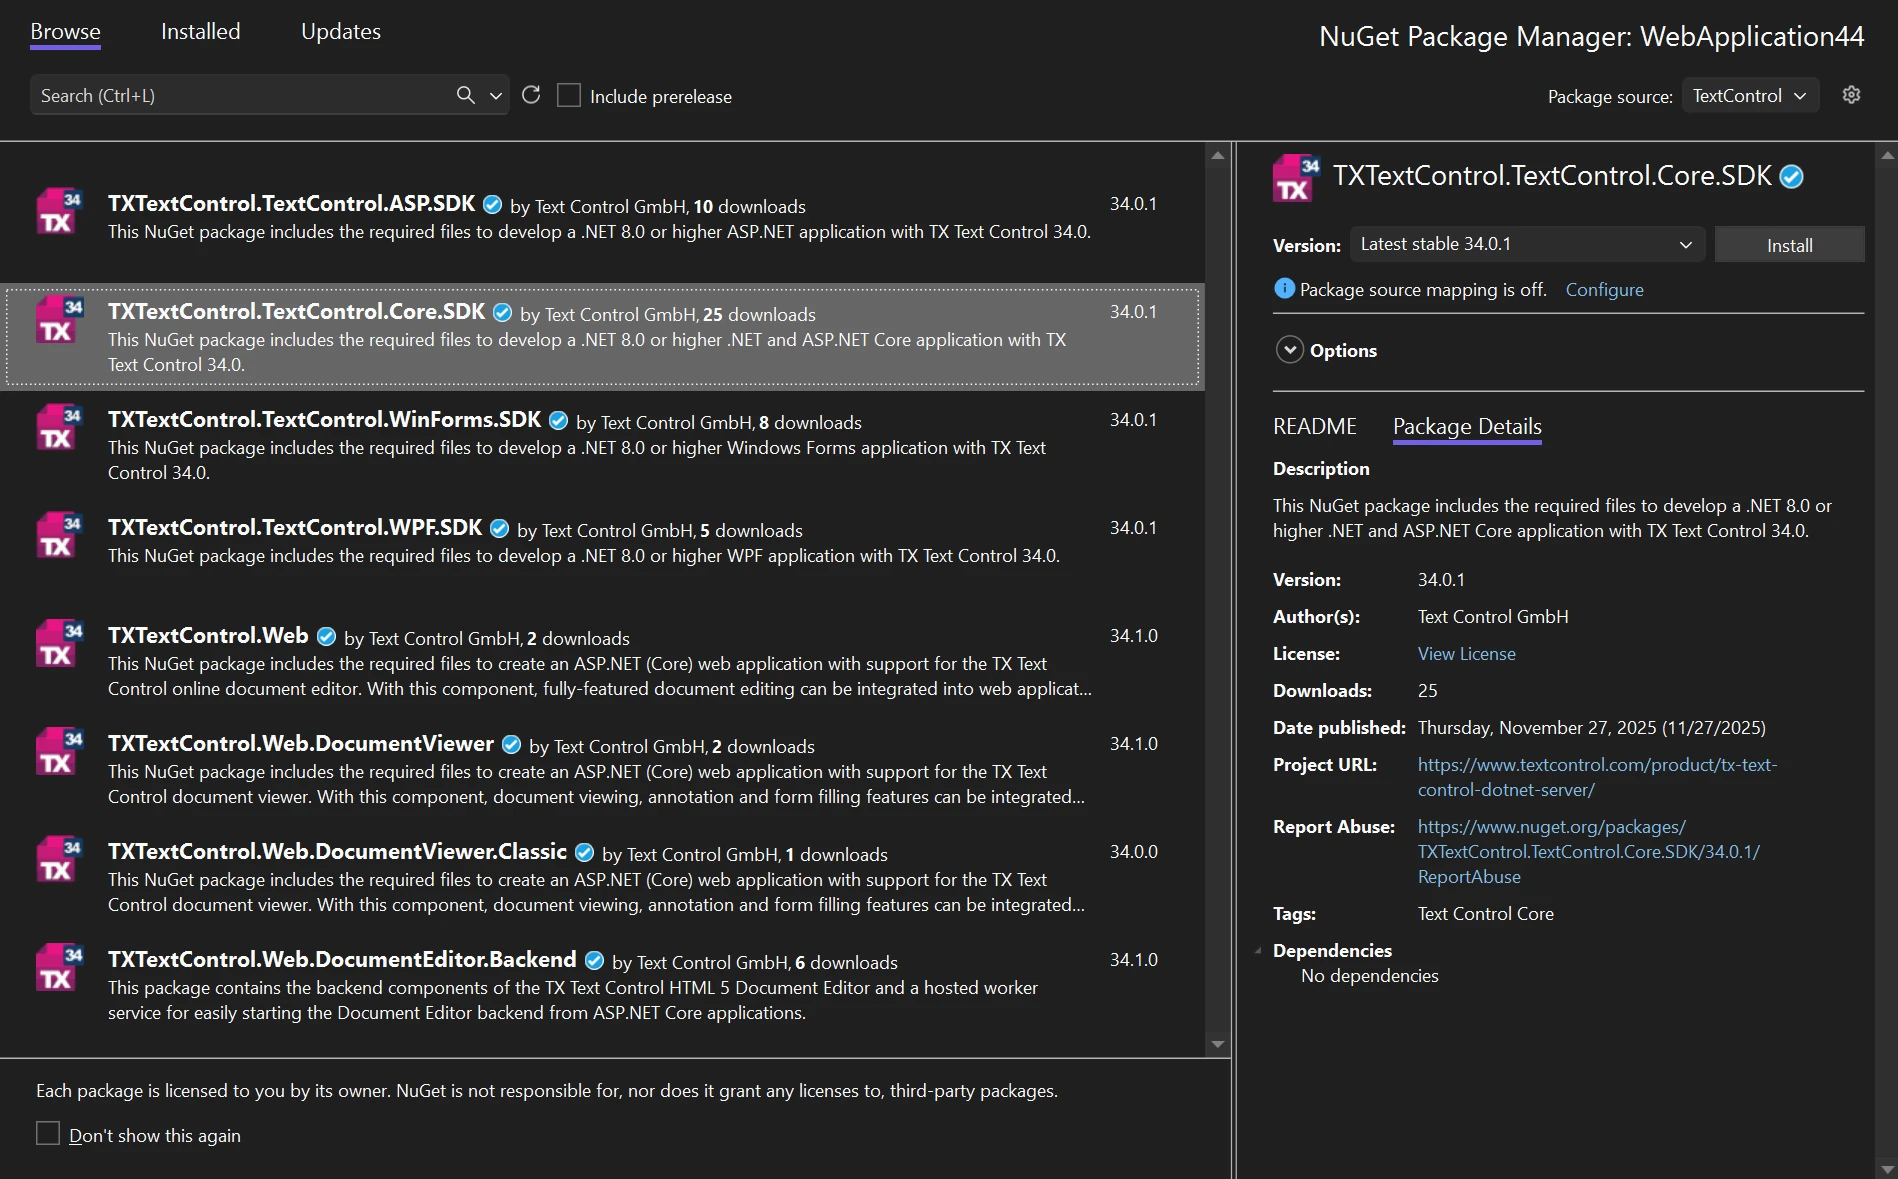
- Select your private NuGet feed (TextControl) as the package source.
- Install the following packages:
| Package | Purpose |
|---|---|
TXTextControl.Web | Contains the files for an ASP.NET Core web application that supports the Document Editor, including the WebSocket middleware and the HTML helper. |
TXTextControl.TextControl.Core.SDK | Contains the cross-platform TX Text Control engine for .NET and ASP.NET Core applications. |
TXTextControl.Web.DocumentEditor.Backend | Contains the backend components of the Document Editor and a hosted worker service that starts the backend from your ASP.NET Core application. |
With TextControl selected, the Browse tab lists the packages your license gives you access to:
If you prefer the command line, run these commands in the project folder:
dotnet add package TXTextControl.Web
dotnet add package TXTextControl.TextControl.Core.SDK
dotnet add package TXTextControl.Web.DocumentEditor.Backend
Configure Program.cs
Open Program.cs in the project's root folder and replace its content with the following code. It is the code of the Visual Studio template plus two using directives, the hosted backend service and the WebSocket middleware.
using TXTextControl.Web;
using TXTextControl.Web.DocumentEditor.Backend;

var builder = WebApplication.CreateBuilder(args);

// Add services to the container.
builder.Services.AddControllersWithViews();
builder.Services.AddHostedService<DocumentEditorWorkerManager>();

var app = builder.Build();

// Configure the HTTP request pipeline.
if (!app.Environment.IsDevelopment())
{
    app.UseExceptionHandler("/Home/Error");
    // The default HSTS value is 30 days. You may want to change this for production scenarios, see https://aka.ms/aspnetcore-hsts.
    app.UseHsts();
}

app.UseHttpsRedirection();
app.UseRouting();

app.UseWebSockets();
app.UseTXWebSocketMiddleware();

app.UseAuthorization();

app.MapStaticAssets();

app.MapControllerRoute(
    name: "default",
    pattern: "{controller=Home}/{action=Index}/{id?}")
    .WithStaticAssets();

app.Run();
What the Added Code Does
builder.Services.AddHostedService<DocumentEditorWorkerManager>()registers the Document Editor backend as a hosted service. When the application starts, the backend worker process (TXTextControl.Web.Server.Core) starts automatically. It synchronizes the documents that are edited in the browser. By default, it listens on TCP port 4283.app.UseWebSockets()enables WebSocket support in ASP.NET Core. The editor in the browser exchanges every change with the server over a WebSocket connection, so this call is required.app.UseTXWebSocketMiddleware()adds the TX Text Control WebSocket middleware. It accepts the WebSocket connections of the editors in the browser and forwards them to the backend worker process. Without parameters, it connects to the backend on the default port.
Add the Editor to the View
Open Index.cshtml in the Views/Home folder and replace its complete content with the following code:
@using TXTextControl.Web.MVC

@{
    var sDocument = "<html><body><p>Welcome to <strong>Text Control</strong></p></body></html>";
}

@Html.TXTextControl().TextControl(settings => {
    settings.UserNames = new string[] { "Tim Typer" };
}).LoadText(sDocument, TXTextControl.Web.StringStreamType.HTMLFormat).Render()

<input type="button" onclick="insertTable()" value="Insert Table" />

<script>
    function insertTable() {
        TXTextControl.tables.add(5, 5, 10, function(e) {
          if (e === true) { // if added
            TXTextControl.tables.getItem(function(table) {
              table.cells.forEach(function(cell) {

                cell.setText("Cell text");

              });
            }, null, 10);
          }
        })
    }
</script>
What the View Does
@using TXTextControl.Web.MVCimports the namespace of the HTML helper.Html.TXTextControl().TextControl()creates the editor. The lambda expression receives aTextControlSettingsobject. Here,UserNamessets the users who have access to editable regions.LoadTextloads the initial document. In this example, it is an HTML string, so the format isStringStreamType.HTMLFormat.Render()writes the editor into the page.- The button calls
insertTable(), which uses the JavaScript API of the editor, the globalTXTextControlobject:TXTextControl.tables.add(5, 5, 10, callback)inserts a table with 5 rows and 5 columns at the current input position and gives it the ID 10. The callback receivestrueif the table was added.TXTextControl.tables.getItem(callback, null, 10)returns the table with the ID 10. The second parameter is an optional error callback.table.cells.forEach()iterates all cells, andcell.setText()sets the text of each cell.
Many functions of the JavaScript API are asynchronous. They pass their results to callback functions instead of returning them, so code that depends on a result, like getItem above, runs inside the callback.
Run the Application
Press F5 or choose Debug > Start Debugging, or run dotnet run in the project folder and open the URL it prints in the browser. The page shows the Document Editor, its ribbon bar and the welcome text. Click Insert Table to insert a table with the text "Cell text" in every cell.
The table is inserted at the input position, which is at the start of the document when the page opens:
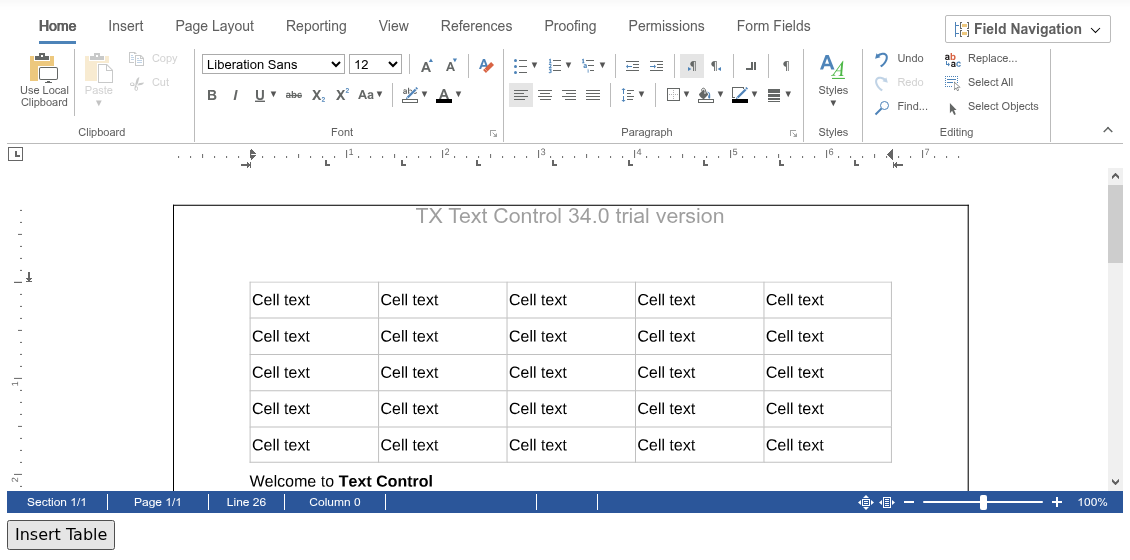
The screenshot was taken with the trial packages. Two details of it are expected:
- The trial header. With the trial packages, the editor shows "TX Text Control 34.0 trial version" at the top of every page. Trial and Licensed Packages explains how to tell trial packages from licensed ones.
- Liberation Sans in the font box. The Core engine doesn't use the fonts of the operating system but the Fonts folder that
TXTextControl.TextControl.Core.SDKadds to your application. It contains no Arial, so the editor offers Liberation Sans instead. To offer your own fonts, add them to that folder, as described in The Document Editor Offers Other Fonts.
Run the Application on Linux
The Core engine and the Document Editor backend are cross-platform, so the same project runs on Linux without code changes. Visual Studio on Windows starts it in the Windows Subsystem for Linux (WSL) when you select WSL as the startup profile, or in a Linux container when you check Enable container support in the project wizard and select Container (Dockerfile), as Development Environments describes. The Dockerfile that Visual Studio adds needs no changes.
In both cases, DocumentEditorWorkerManager starts the backend on Linux with the dotnet command, and the browser on Windows shows the same editor as before. In the container, the backend listens on port 4283, which only the application in the container uses, so the port doesn't need to be published. To build an image for production, with the credentials of the private NuGet feed kept out of the image, see Dockerfile.
Load a Document From a File
To start with a real document instead of an HTML string, create a folder named Documents in the project's root folder and copy a DOCX document named template.docx into it. Then pass the file path and the format to LoadText:
@using TXTextControl.Web.MVC

@Html.TXTextControl().TextControl().LoadText(
    "Documents/template.docx",
    TXTextControl.Web.StreamType.WordprocessingML).Render()
The second parameter is a value of the TXTextControl.Web.StreamType enumeration: WordprocessingML for DOCX, RichTextFormat for RTF, HTMLFormat for HTML and InternalUnicodeFormat for the internal TX Text Control format. The cross-platform Core engine does not support the legacy DOC format.
Size the Editor
To let the editor fill its container, set the Dock property to DockStyle.Fill and give the container an explicit height:
@using TXTextControl.Web.MVC

<div id="text-control-container">
    @Html.TXTextControl().TextControl(settings => {
        settings.Dock = TXTextControl.Web.DockStyle.Fill;
    }).Render()
</div>
The container needs a height that the browser can calculate, such as a pixel value or calc(). A percentage height only works if every parent element has an explicit height.
#text-control-container {
    width: 100%;
    height: calc(100vh - 6rem);
}
The complete sample with five layouts (full screen, modal, sidebar, split panel and tabs) is available on GitHub: TXTextControl.DocumentEditor.Views.
Next Steps
- Loading and Saving Documents — load documents into the editor and save them to your backend.
- JavaScript API — program the document in the editor from JavaScript.
- Blazor — use the editor in a Blazor Web App and load and save documents in C#.
- Deployment Guide — run the application and the backend on Windows, Linux, Docker and in the cloud.