
Blazor
A Blazor Web App shows the Document Editor with the DocumentEditor Razor component and hosts the required backend in the same application. You load a DOCX document into the editor and save it back to the server with C# code, without writing JavaScript.
Prerequisites
- Visual Studio 2026 with the .NET 10 SDK. The Blazor package targets .NET 8 or higher.
- A TX Text Control .NET Server license with a serial number assigned to your email address, and access to the Text Control Private NuGet Feed.
- A DOCX document to load, for example template.docx.
How It Works
The DocumentEditor component uses the interactive server render mode (InteractiveServer). Your C# code runs on the server, so it can load documents from the server's file system into the editor and save them back without sending them through the browser first.
Like every Document Editor frontend, the component needs a backend. In this tutorial, the Blazor application itself hosts it: the DocumentEditorWorkerManager hosted service starts the Document Editor backend, and the WebSocket middleware connects the editor in the browser to it.
The Blazor getting started article on the Text Control blog was written for version 33.0 and uses the backend of an installed TX Text Control .NET Server setup. With the private NuGet feed, the backend comes from the TXTextControl.Web.DocumentEditor.Backend package instead, as in the ASP.NET Core tutorial.
Create the Project
- In Visual Studio 2026, choose Create a new project.
- Select Blazor Web App as the project template and confirm with Next.
- Enter a project name, choose a location and confirm with Next.
- Choose .NET 10.0 (Long Term Support) as the Framework, select Server as the Interactive render mode and create the project.
Install the NuGet Packages
- In Solution Explorer, select your project and choose Manage NuGet Packages... from the Project menu.
- Select your private NuGet feed (TextControl) as the package source and install
TXTextControl.Web,TXTextControl.TextControl.Core.SDKandTXTextControl.Web.DocumentEditor.Backend. - Select nuget.org as the package source and install
TXTextControl.Web.Blazor.DocumentEditor.
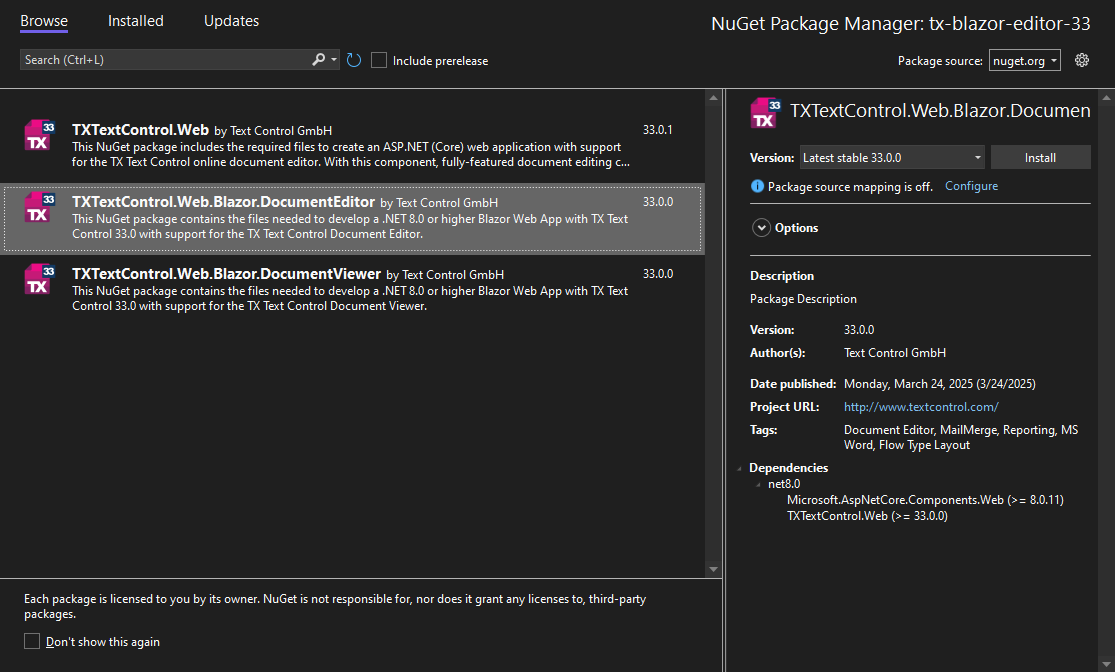
On nuget.org, the Blazor component is listed with the other TX Text Control web packages. The screenshot comes from the Blazor article on the Text Control blog, written for version 33.0:
| Package | Source | Purpose |
|---|---|---|
TXTextControl.Web | Text Control Private NuGet Feed | The WebSocket middleware of the Document Editor. The Blazor package depends on it. |
TXTextControl.TextControl.Core.SDK | Text Control Private NuGet Feed | The cross-platform TX Text Control engine. |
TXTextControl.Web.DocumentEditor.Backend | Text Control Private NuGet Feed | The Document Editor backend and the hosted service that starts it. |
TXTextControl.Web.Blazor.DocumentEditor | nuget.org | The DocumentEditor Razor component for Blazor Web Apps. |
Configure Program.cs
Open Program.cs in the project's root folder. At the very top of the file, insert the following code:
using TXTextControl.Web;
using TXTextControl.Web.DocumentEditor.Backend;
Before the line var app = builder.Build();, register the hosted service that starts the Document Editor backend together with your application:
builder.Services.AddHostedService<DocumentEditorWorkerManager>();
After the line app.UseHttpsRedirection();, add the following code:
// enable Web Sockets
app.UseWebSockets();

// attach the Text Control WebSocketHandler middleware
app.UseTXWebSocketMiddleware();
UseWebSockets() enables WebSockets in ASP.NET Core, because the editor in the browser synchronizes every change with the server over a WebSocket connection. UseTXWebSocketMiddleware() accepts that connection and forwards it to the Document Editor backend.
Add the Editor to a Page
Open Home.razor in the Components/Pages folder and replace its complete content with the following code:
@page "/"
@rendermode InteractiveServer

<PageTitle>Home</PageTitle>

<h1>Hello, Blazor!</h1>

<TXTextControl.Web.Blazor.DocumentEditor.DocumentEditor
    @ref="_documentEditor" Width="800px" Height="500px" />

<button class="btn btn-primary mt-5" @onclick="ButtonLoad">
    Load Document
</button>

@code {
    private TXTextControl.Web.Blazor.DocumentEditor.DocumentEditor _documentEditor;

    private async Task ButtonLoad()
    {
        try
        {
            await _documentEditor.LoadDocumentAsync("Documents/template.docx",
                TXTextControl.Web.StreamType.WordprocessingML);
        }
        catch (Exception ex)
        {
            Console.Error.WriteLine($"Error loading document: {ex.Message}");
        }
    }
}
What the Page Does
@rendermode InteractiveServerruns the page with interactive server rendering, which the component requires.TXTextControl.Web.Blazor.DocumentEditor.DocumentEditoradds the editor.WidthandHeightset its size.@ref="_documentEditor"stores a reference to the component in the_documentEditorfield, so your C# code can call its methods.LoadDocumentAsyncloads the file Documents/template.docx from the server into the editor. The second parameter is the format, a value of theTXTextControl.Web.StreamTypeenumeration.WordprocessingMLis the DOCX format.
Add a Document
- Create a folder named Documents in the project's root folder.
- Copy the DOCX document you want to load into this folder and name it template.docx.
Run the Application
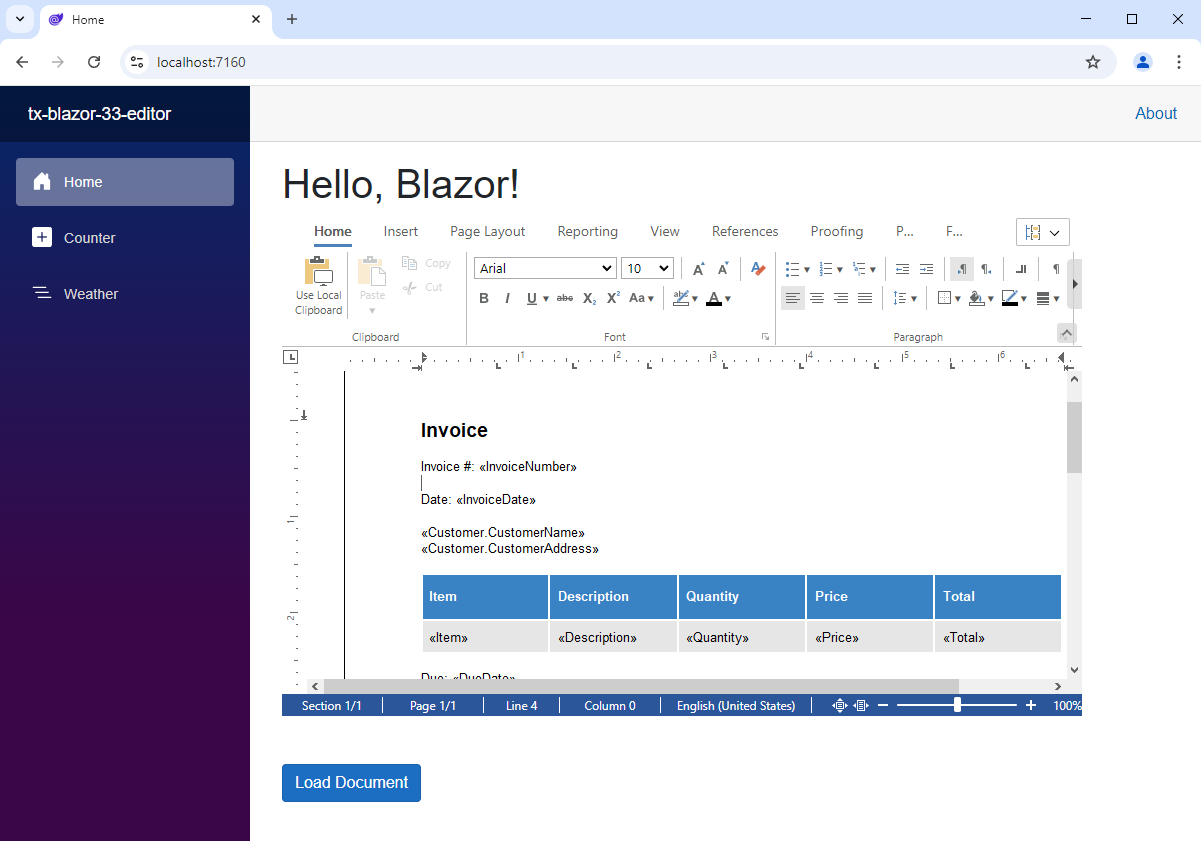
Press F5 or choose Debug > Start Debugging. The home page shows the Document Editor with its ribbon bar. Click Load Document to load template.docx into the editor.
The blog article shows the same page with version 33.0, after an invoice template was loaded:
Save the Document on the Server
SaveDocumentAsync saves the current content of the editor to a file on the server. Add a second button below the Load Document button:
<button class="btn btn-primary mt-5" @onclick="ButtonSave">
    Save Document
</button>
Then add the following method to the @code block:
private async Task ButtonSave()
{
    try
    {
        await _documentEditor.SaveDocumentAsync("Documents/output.docx",
            TXTextControl.Web.StreamType.WordprocessingML);
    }
    catch (Exception ex)
    {
        Console.Error.WriteLine($"Error saving document: {ex.Message}");
    }
}
Click Save Document to write the edited document to Documents/output.docx.
Load a Document When the Editor Is Ready
To show a document as soon as the editor is ready, handle the OnLoad event of the component. Add OnLoad to the component tag:
<TXTextControl.Web.Blazor.DocumentEditor.DocumentEditor
    OnLoad="DocumentEditorLoaded"
    @ref="_documentEditor" Width="800px" Height="500px" />
Then add the event handler to the @code block. This example loads an HTML string:
private async Task DocumentEditorLoaded()
{
    try
    {
        await _documentEditor.LoadDocumentAsync(
            "<html><body><h1>Welcome to TX Text Control</h1><p>This is a sample document.</p></body></html>",
            TXTextControl.Web.StringStreamType.HTMLFormat);
    }
    catch (Exception ex)
    {
        Console.Error.WriteLine($"Error loading document: {ex.Message}");
    }
}
The component also works with the JavaScript API. The global TXTextControl object is available in the page for tasks such as responding to user interactions in the browser.
Next Steps
- Loading and Saving Documents — load documents into the editor and save them to your backend.
- Blazor Integration Guide — go further with the Blazor components, including the Document Viewer.
- Simple Mail Merge — merge data into a template designed in the editor.
- Deployment Guide — run the application and the backend on Windows, Linux, Docker and in the cloud.