
Create Your First Application
Your first TX Text Control application is a .NET console application that uses ServerTextControl to create a document and save it as DOCX and PDF. You install TX Text Control from the Text Control private NuGet feed, write a few lines of C# and run the application. The last section shows where to continue when the same code runs in ASP.NET Core.
Choose Core or Classic
TX Text Control .NET Server ships with two versions of the document processing engine, each in its own NuGet package: Core (TXTextControl.TextControl.Core.SDK) for Windows and Linux, and Classic (TXTextControl.TextControl.ASP.SDK) for Windows only. Both contain the ServerTextControl class, so your code looks the same. This tutorial uses the Core package, which is recommended for new projects; The Document Engine compares the two and explains when you need Classic.
Prerequisites
- A TX Text Control .NET Server license with a serial number assigned to your email address. The private NuGet feed only shows the packages you are licensed for.
- The
nuget.configfile for the Text Control private NuGet feed. When a serial number is assigned to you, you receive an email with a download link for your personalnuget.config. The file contains your credentials, so do not commit it to source control. - The .NET 8 SDK or higher. The steps were written with Visual Studio 2026 and .NET 10 (Long Term Support). You can also use the .NET CLI with any editor, for example Visual Studio Code on Linux.
See System Requirements for the supported operating systems and .NET versions.
Create the Project
Use either Visual Studio or the .NET CLI.
Visual Studio
- In Visual Studio 2026, create a new project by choosing Create a new project.
- Select Console App as the project template and confirm with Next.
- Enter a project name and choose a location to save the project. Confirm with Next.
- Choose .NET 10.0 (Long Term Support) as the Framework and confirm with Create.
.NET CLI
Open a terminal and create a new console application:
dotnet new console MyTextControlAppChange to the project directory:
cd MyTextControlApp
Install the NuGet Package
NuGet downloads the package from the private feed with the credentials in nuget.config. Your license is injected into the package on the server before the download, so there is no license file to manage and no activation dialog.
Visual Studio
- Copy the
nuget.configfile you downloaded to the root folder of your project. - In Solution Explorer, select your project and choose Manage NuGet Packages... from the Project main menu.
- In the Package source drop-down, select TextControl.
- Browse for
TXTextControl.TextControl.Core.SDKand install it.
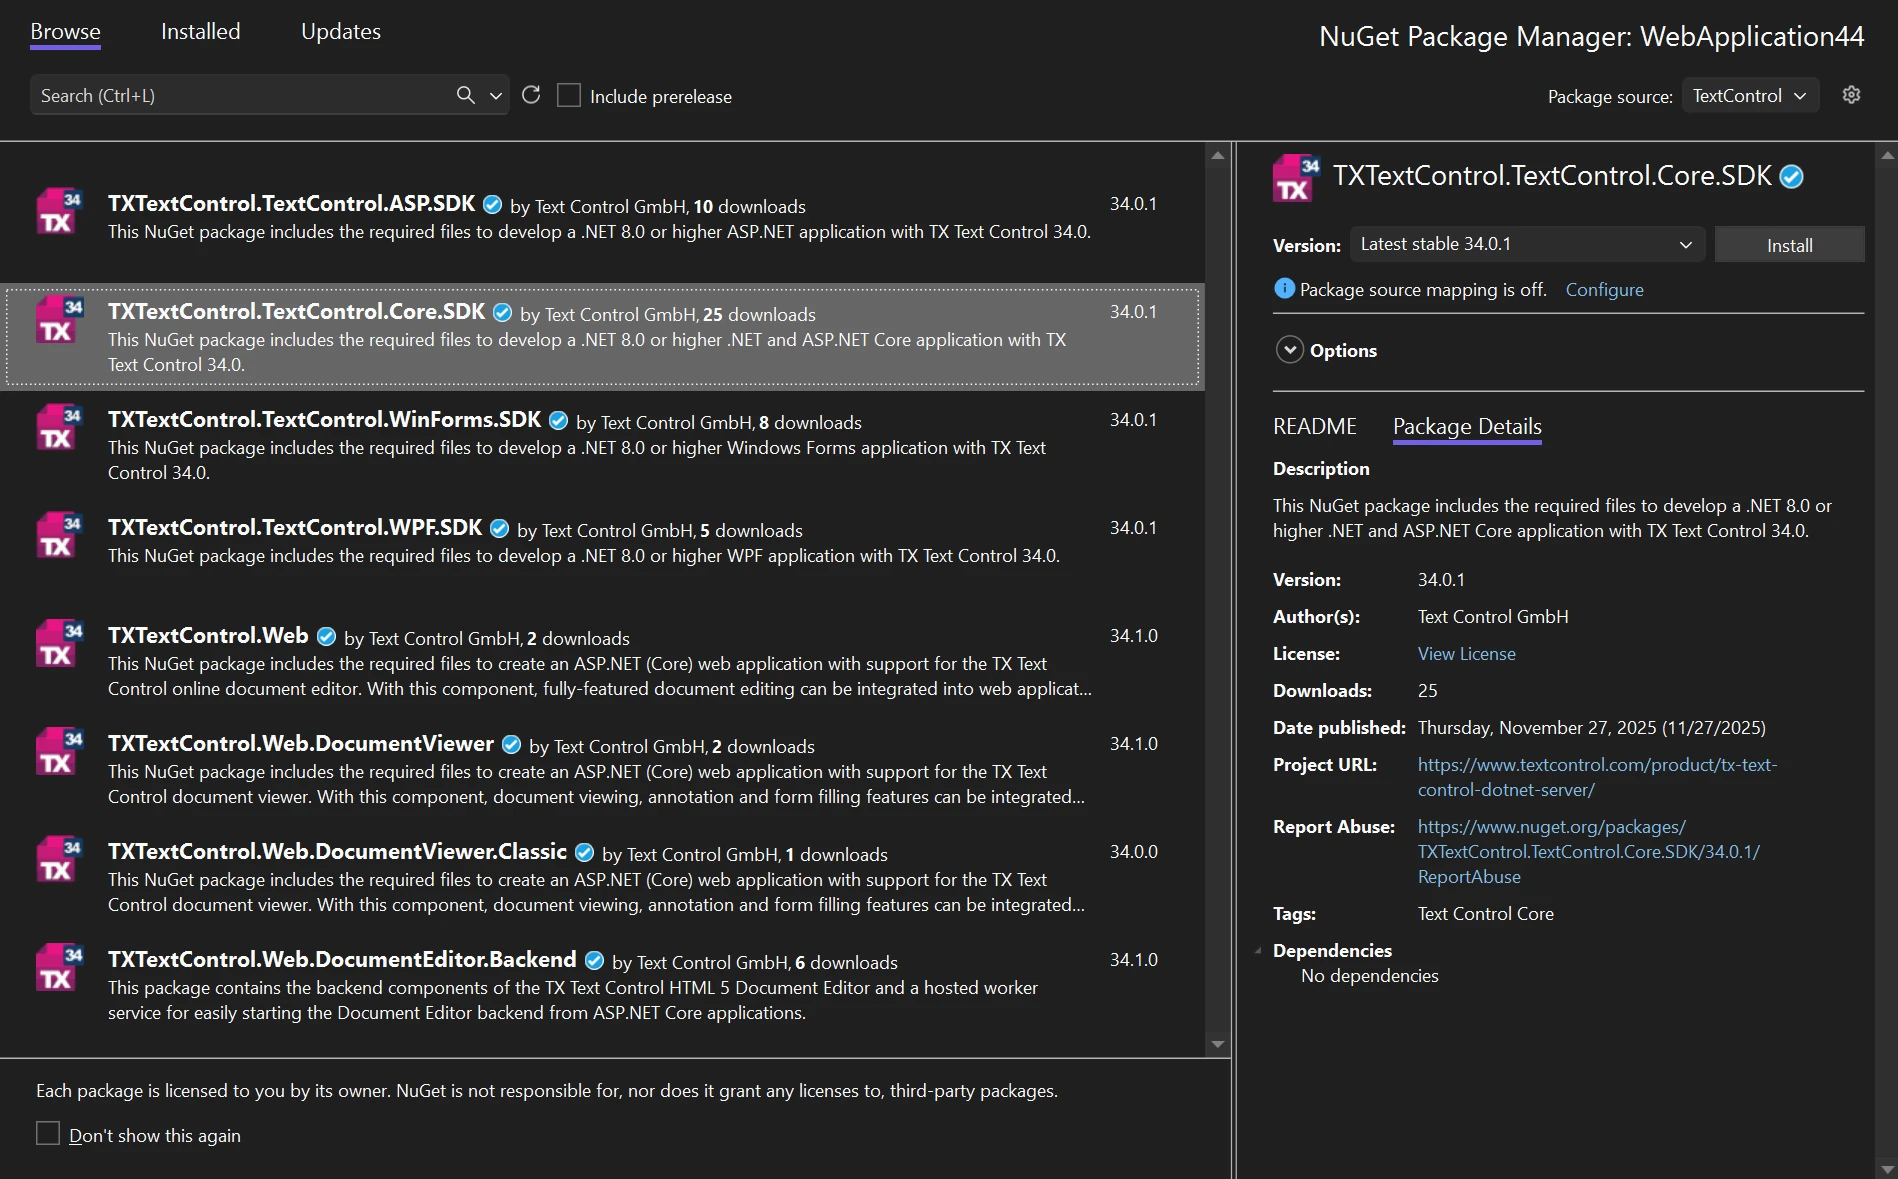
If Visual Studio does not recognize the nuget.config file, follow the steps in Visual Studio.
.NET CLI
Copy the
nuget.configfile you downloaded to the project directory.Optionally, list the packages your license gives you access to:
dotnet package search "TXTextControl" TextControlAdd the package to the project:
dotnet add package TXTextControl.TextControl.Core.SDK
Write the Code
Open Program.cs and replace its content with the following code:
using TXTextControl;

using (ServerTextControl tx = new ServerTextControl())
{
    // Initialize the new instance before using it
    tx.Create();

    // Set the text of the document
    tx.Text = "This is a sample document.";

    // Save the document as DOCX and as PDF
    tx.Save("sample.docx", StreamType.WordprocessingML);
    tx.Save("sample.pdf", StreamType.AdobePDF);
}

Console.WriteLine("Documents created: sample.docx and sample.pdf");
What the code does:
- The
usingstatement disposes theServerTextControlat the end of the block, so its resources are released as soon as the work is done. - Create initializes the resources of the new instance. You must call it before you use any other member.
- The Text property sets the text of the document.
- Save writes the complete document to a file. The StreamType value selects the format:
WordprocessingMLfor DOCX andAdobePDFfor PDF. If the file already exists, it is overwritten.
Run the Application
Start the application:
In Visual Studio, press F5 or choose Debug > Start Debugging.
With the .NET CLI, run the following command in the project directory:
dotnet run
The application writes sample.docx and sample.pdf to its current working directory. With dotnet run, this is the project directory. When you start the application from Visual Studio, look in the build output folder, for example bin\Debug\net10.0. Open the PDF in any PDF viewer and the DOCX file in a word processor.
The PDF contains the text of the document on an otherwise empty page. Built with the trial packages, the application also adds a line of trial text above it:

Documents created with the packages from the private NuGet feed don't contain this line. If yours do, the application was built with trial packages; Trial and Licensed Packages explains how to replace them.
Use ServerTextControl in ASP.NET Core
ServerTextControl works the same way in an ASP.NET Core application. The only difference is that a web application usually saves the document to a byte array and returns it to the browser instead of writing it to disk. Return a Document from an ASP.NET Core Controller creates such an application and a controller that returns DOCX and PDF documents.
Troubleshooting
- The package is not found: Check that
nuget.configis in the project folder, that you selected the TextControl package source, and that a serial number is assigned to your email address. See NuGet Authentication. - The application runs on Linux: See Linux Requirements for what the target system needs.
Next Steps
- Load a Document — open existing DOCX, RTF, HTML and PDF files.
- Create a Document — add formatted text, tables and headers.
- Save as DOCX and PDF — save to files and byte arrays, and return documents from ASP.NET Core.
- Simple Mail Merge — merge JSON data into a template.