Self-Signed Certificates
Signing code has to be written and tested long before a certificate authority issues the certificate for production. A self-signed certificate fills the gap: you create it yourself in a few minutes, with PowerShell on Windows, with OpenSSL on Linux or in the Windows Subsystem for Linux or as a digital ID in Adobe Acrobat Reader. The code that signs with it stays the same when the real certificate arrives.
The shortest way from a new certificate to a signed PDF is part of Create a Self-Signed Certificate for Testing in Getting Started. What a signing certificate needs in general is described in Certificate-Based Signatures.
When a Self-Signed Certificate Is Enough
A self-signed certificate is its own issuer: no certificate authority (CA) confirms who owns it. That makes it the right choice in these situations:
- Development and tests of the code that signs documents, including automated tests.
- Internal use, where the people who check the signatures know the certificate.
Documents that customers, partners or authorities must be able to trust need a certificate from a CA. Validators check whether a certificate was trusted when the document was signed, and a self-signed certificate of your own isn't trusted by other people's systems.
Create a Certificate With PowerShell
On Windows, New-SelfSignedCertificate creates a certificate in the certificate store, and Export-PfxCertificate saves it with its private key as a PFX file. Getting Started shows both commands. Their parameters mean the following:
| Parameter | Meaning |
|---|---|
-Subject | The common name (CN) of the certificate, such as CN=MyTXCert |
-CertStoreLocation | The certificate store; Cert:\CurrentUser\My is the personal store of the current user |
-KeyExportPolicy Exportable | The private key can be exported, which is what the signing samples of Text Control use |
-KeySpec | The key specification |
-FriendlyName | A readable name that the certificate store shows |
-NotAfter | The expiration date; without it, the certificate is valid for one year |
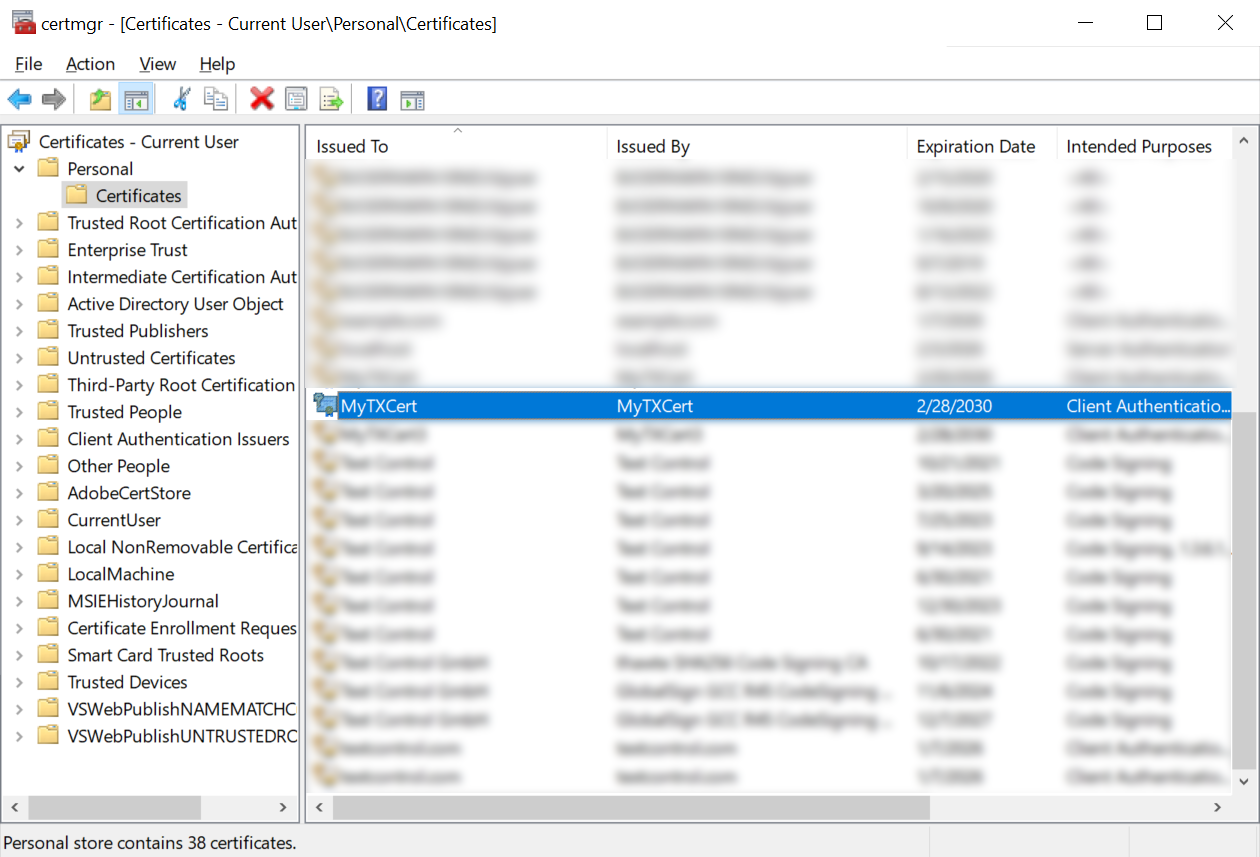
Run PowerShell as an administrator. The new certificate appears in the Certificate Manager, certmgr.msc, under Personal > Certificates, with the subject as its name in Issued To and Issued By and its expiration date:
A certificate whose extended key usage is code signing is created with the -TextExtension parameter. The following commands create such a certificate and export it; replace the thumbprint with the one that the first command prints:
New-SelfSignedCertificate -Type Custom -Subject "CN=Text Control, O=Text Control, C=US" `
    -KeyUsage DigitalSignature -KeyExportPolicy Exportable -FriendlyName "TextControlSelf" `
    -CertStoreLocation "Cert:\CurrentUser\My" `
    -TextExtension @("2.5.29.37={text}1.3.6.1.5.5.7.3.3", "2.5.29.19={text}")

$password = ConvertTo-SecureString -String "123" -Force -AsPlainText

Export-PfxCertificate -Cert "Cert:\CurrentUser\My\6BA35B742656FB2EC48B09116ABAE5123082F116" `
    -FilePath certificate.pfx -Password $password
In the -TextExtension values, 2.5.29.37 is the extended key usage with the value 1.3.6.1.5.5.7.3.3 for code signing, and 2.5.29.19 adds basic constraints.
Create a Certificate With OpenSSL
On Linux, OpenSSL creates the certificate in three steps, which Getting Started lists as commands: a private key with a certificate signing request (CSR), a certificate signed with that key and a PFX file with the certificate and the key. The first command asks for details such as country, state, city, organization and e-mail address, and the last one for the password of the PFX file.
On Windows, you can run the same commands in the Windows Subsystem for Linux (WSL). If WSL isn't installed yet, run these commands in PowerShell as an administrator and restart the computer after the first one:
wsl --install
wsl --set-default-version 2
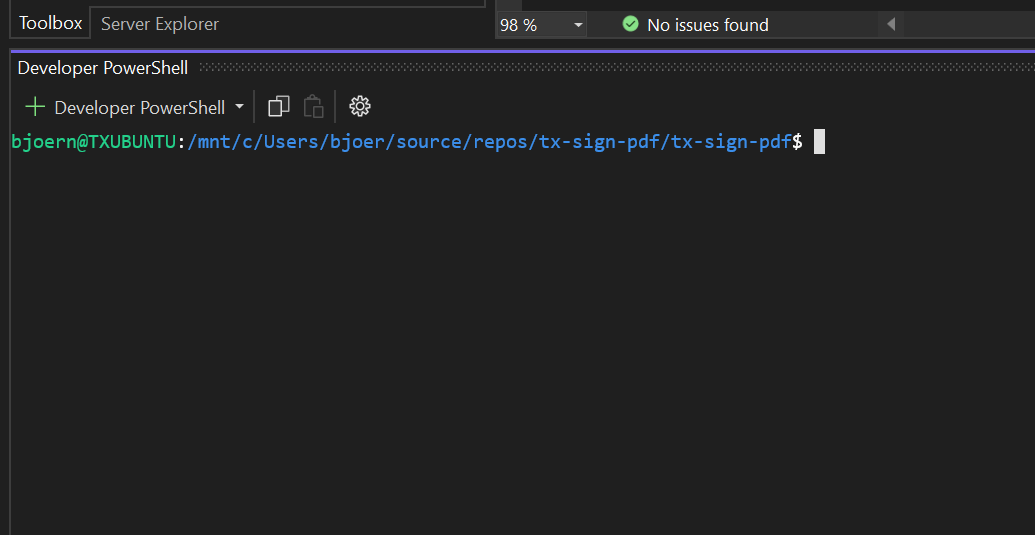
wsl --install installs the default Linux distribution, usually Ubuntu; wsl --install -d Ubuntu installs Ubuntu explicitly. In Visual Studio, open View > Terminal, select Developer PowerShell, type wsl, change to the folder of your application and run the OpenSSL commands there. The prompt then shows the Linux user and the path of the project folder below /mnt/c:
Create a Digital ID in Adobe Acrobat Reader
A digital ID from Acrobat Reader is a PFX file with a certificate, a private key and a public key, which TX Text Control can use directly:
Open Acrobat Reader and choose Preferences from the main menu.
Choose Signatures and click More... in the Identities & Trusted Certificates section.
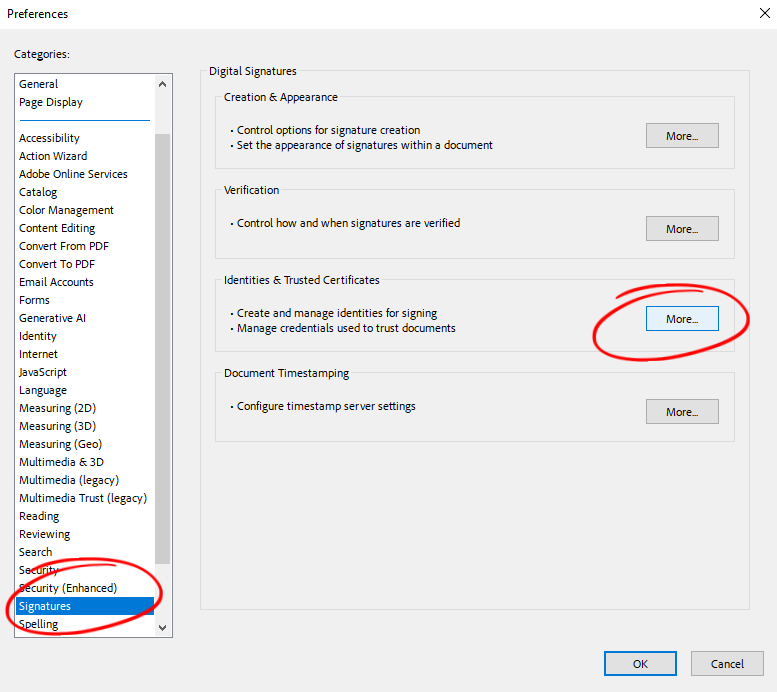
Click the Add icon to create a new digital ID.
Choose A new digital ID I want to create now and click Next.
Choose New PKCS#12 digital ID file and click Next.
Enter your personal information, choose Digital Signatures for Use digital ID for and click Next.
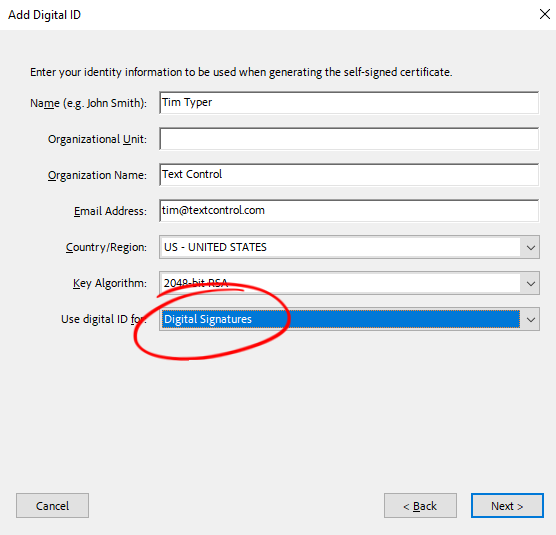
Select the location of the file, enter a password to protect it and click Finish.
Use the Test Certificate
Add the PFX file to your project and set its Copy to Output Directory property to Copy if newer. Your code loads it like any other certificate and signs with it, as Signing PDF Documents shows. Before you sign, print its details as in Check a Certificate Before Signing: for a self-signed certificate, Subject and Issuer are the same, and HasPrivateKey must be true, or the certificate can't sign.
Open the signed PDF in Acrobat Reader to see the signature and the certificate details in the Signatures panel. Test certificates expire like any other, after one year with the OpenSSL command of Getting Started, so check NotAfter when signatures suddenly show warnings.
Move to a Certificate From a Certificate Authority
- Only the certificate changes. The signing code loads a PFX file and passes it to
DigitalSignature. For production, replace the file and the password, or load the CA certificate from the certificate store or Azure Key Vault, as Certificate-Based Signatures shows. - Configure a certificate per environment and keep PFX files and passwords out of source control, as Load the Certificate in ASP.NET Core describes.
Next Steps
- Certificate-Based Signatures: load production certificates from the store or Azure Key Vault.
- Signing PDF Documents: sign generated documents.
- Signature Validation: check the signatures you create.