Angular
Two applications work together for the Angular Document Viewer: an ASP.NET Core backend that renders documents with TX Text Control .NET Server and an Angular application that displays them with the Document Viewer component. You install the npm package, add the tx-document-viewer component to a template, connect it to your backend and load a document from TypeScript.
Prerequisites
- Visual Studio 2026 with the .NET 10 SDK for the backend. The engine package requires .NET 8 or higher.
- A TX Text Control .NET Server license and access to the Text Control private NuGet feed.
- Node.js and npm.
- The Angular CLI 19. To install it globally, open a command prompt and run:
npm install @angular/cli@19
The Angular steps were written with Angular CLI 19 and Visual Studio Code. The package supports Angular versions up to 21. The latest Angular CLI creates applications with a newer Angular version and different file names, so install version 19 to follow the steps.
How the Applications Work Together
The Angular component only contains the viewer's user interface. The documents are loaded and rendered by an ASP.NET Core backend that references the TXTextControl.Web.DocumentViewer package. The component's basePath property contains the URL of this backend. Because the Angular development server and the backend run on different origins, the backend must allow cross-origin requests (CORS).
Evaluate Without a Backend of Your Own
Text Control hosts a trial backend at backend.textcontrol.com for evaluating the Angular components. It needs a personal trial access token, which you create on the trial access token page after signing in with a Text Control account. The token is valid for 30 days.
To use it, skip the backend steps below and set basePath to https://backend.textcontrol.com?access-token=yourtoken, with your token in place of yourtoken. For development and deployment, you host your own backend as described next.
Create the Backend
Create the Project
- In Visual Studio 2026, choose Create a new project.
- Select ASP.NET Core Web API as the project template and confirm with Next.
- Enter a project name, choose a location and confirm with Next.
- Choose .NET 10.0 (Long Term Support) as the Framework, check Use controllers and confirm with Create.
Install the NuGet Packages
- In Solution Explorer, select your project and choose Manage NuGet Packages... from the Project menu.
- Select the Text Control private NuGet feed as the Package source.
- Install
TXTextControl.Web.DocumentViewerandTXTextControl.TextControl.Core.SDK.
Alternatively, run the following commands in the project folder:
dotnet add package TXTextControl.Web.DocumentViewer
dotnet add package TXTextControl.TextControl.Core.SDK
For the Windows-only Classic engine, install TXTextControl.Web.DocumentViewer.Classic and TXTextControl.TextControl.ASP.SDK instead.
Configure Program.cs
Open Program.cs and replace its content with the following code:
using TXTextControl.Web.MVC.DocumentViewer;

var builder = WebApplication.CreateBuilder(args);

// Add services to the container.
builder.Services.AddControllers();

// *** Required for Document Viewer ***
builder.Services.AddCors(p => p.AddPolicy("corsapp", builder =>
{
    builder.WithOrigins("*").AllowAnyMethod().AllowAnyHeader();
}));

var app = builder.Build();

// Configure the HTTP request pipeline.

app.UseHttpsRedirection();

app.UseAuthorization();

app.MapControllers();

// *** Required for Document Viewer ***
// add the DocumentViewer middleware
app.UseCors("corsapp");
app.UseRouting();
app.UseTXDocumentViewer();

app.Run();
The code does the following:
AddControllersregisters the controllers, including the controller that the viewer package provides for the viewer's HTTP requests.AddCorsandUseCorsdefine and apply a CORS policy. It allows requests from all origins, so the Angular application can call the backend. In production, you can restrict the policy to the origins of your frontend.UseTXDocumentVieweradds the Document Viewer to the request pipeline.
The project template contains a sample controller that returns weather forecasts. You can remove it.
To protect the viewer endpoints with an access token, see the blog article Adding a Security Middleware to ASP.NET Core Web Applications to Protect TX Text Control Document Editor and Document Viewer Endpoints.
Start the Backend
- Press F5 to start the backend.
- Note the HTTPS URL of the backend, for example
https://localhost:7275. You find it in Properties/launchSettings.json. You need this URL for thebasePathproperty of the component.
Leave the backend running while you work on the Angular application.
Create the Angular Application
Open a command prompt and create a new project:
ng new my-viewer-app
Confirm CSS as the stylesheet format and answer N to disable server-side rendering and static site generation. The --no-standalone option creates an application with an NgModule, to which you add the viewer module.
Change to the project folder, install the Angular CDK and the Document Viewer package, and open the folder in Visual Studio Code:
cd my-viewer-app
npm i @angular/cdk@19
npm i @txtextcontrol/tx-ng-document-viewer
code .
The Document Viewer package needs @angular/cdk. Install it with the major version of your Angular version first. Otherwise npm tries to add @angular/cdk 21, which requires Angular 21, and the installation fails with an ERESOLVE error. Angular npm Packages explains the supported Angular versions and how to handle peer dependency conflicts.
Import the Document Viewer Module
Open src/app/app.module.ts, import DocumentViewerModule from @txtextcontrol/tx-ng-document-viewer and add it to the imports array. The complete file looks like this:
import { NgModule } from '@angular/core';
import { BrowserModule } from '@angular/platform-browser';
import { DocumentViewerModule } from '@txtextcontrol/tx-ng-document-viewer';
import { AppRoutingModule } from './app-routing.module';
import { AppComponent } from './app.component';
({
declarations: [
AppComponent
],
imports: [
BrowserModule,
AppRoutingModule,
DocumentViewerModule
],
providers: [],
bootstrap: [AppComponent]
})
export class AppModule { }
If your Angular CLI version generates different file names, add DocumentViewerModule to the imports of the module that bootstraps your root component.
Add the Component to the Template
Open src/app/app.component.html and replace its complete content with the following code. Replace https://localhost:7275 with the URL of your backend.
<tx-document-viewer
  width="800px"
  height="800px"
  basePath="https://localhost:7275"
  documentData="SGVsbG8gdGhlcmU="
  dock="Window"
  [toolbarDocked]="true"
  documentPath="test.docx"
  [isSelectionActivated]="true"
  [showThumbnailPane]="true">
</tx-document-viewer>
documentData contains the text "Hello there" as a Base64-encoded string. documentPath only sets the document name that the viewer displays.
Component Properties
The properties width, height and basePath are required. Others set the document, the docking, the toolbar, text selection, the thumbnail pane, the signature settings and the displayed strings. Bind boolean and object values with square brackets, for example [toolbarDocked]="true". tx-document-viewer in the Angular API reference lists all properties with their types and defaults.
Run the Applications
- Make sure that the backend is running in Visual Studio.
- In the command prompt, start the Angular application from the my-viewer-app folder:
ng serve
Your default browser opens the Angular application, and the Document Viewer shows the text "Hello there". If the viewer doesn't load, check that the backend is running and that basePath matches its URL.
Because dock is Window, the viewer fills the browser window, and the status bar shows the name from documentPath:
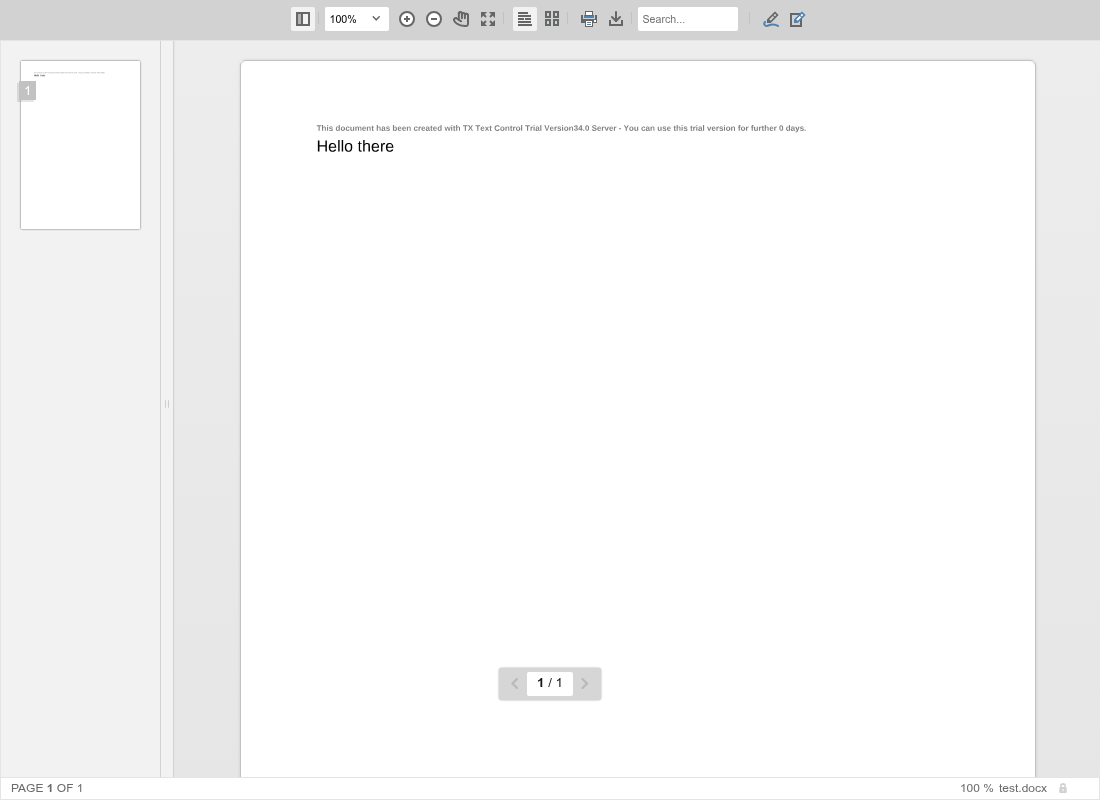
The small gray line above the text is the trial text of the trial packages the screenshot was taken with; see Trial and Licensed Packages.
Load a Document With TypeScript
In most Angular applications, the document is loaded at run time, not through the documentData property. The Angular component supports the same JavaScript API as all other Document Viewer frontends: the TXDocumentViewer object. This object exists only after the viewer has been initialized, which the viewer signals with the documentViewerLoaded event on the window object.
Open src/app/app.component.ts. Add HostListener to the import from @angular/core, and declare the global TXDocumentViewer object below the imports so that TypeScript accepts it:
import { Component, HostListener } from '@angular/core';

declare const TXDocumentViewer: any;
Then add the following method to the AppComponent class. HostListener calls it when the documentViewerLoaded event occurs:
('window:documentViewerLoaded', ['$event'])
onDocumentViewerLoaded() {
TXDocumentViewer.loadDocument(btoa('<strong>Loaded with TypeScript</strong>'), 'loaded.html');
}
Remove the documentData attribute from app.component.html and save both files. When the application reloads, the viewer shows the document that the method loads.
loadDocument expects the document as a Base64-encoded string and the document name to display. In a real application, you typically request the document from your backend with the Angular HttpClient and pass the returned Base64 string to loadDocument. To collect signatures, pass a SignatureSettings object as the third parameter.
Next Steps
- JavaScript: more about the JavaScript API, including annotations and signatures.
- Angular npm Packages: the supported Angular versions and peer dependency conflicts.
- Loading Documents: pass documents from a controller, load them at run time and show PDF files with PDF.js.
- Digital Signatures: collect signatures and sign documents on the server.