
JavaScript
Angular, React or another framework isn't required for the Document Viewer: a plain HTML page works as well. You create the ASP.NET Core backend that serves the viewer's scripts and renders the documents, add the tx-document-viewer element to the page and use the TXDocumentViewer JavaScript API to load documents, work with annotations and forms and collect signatures.
Prerequisites
- Visual Studio 2026 with the .NET 10 SDK for the backend. The engine package requires .NET 8 or higher.
- A TX Text Control .NET Server license and access to the Text Control private NuGet feed.
- A local web server or development server that serves the HTML page.
How It Works
The Document Viewer is a web component: a custom HTML element named tx-document-viewer. You don't install an npm package. Instead, the page loads two scripts from the ASP.NET Core backend, which provides them through the TextControl/GetResource endpoint of the TXTextControl.Web.DocumentViewer package:
minimized.tx-viewer.min.jscontains the viewer and the globalTXDocumentViewerobject.minimized.tx-viewer-component.min.jsdefines thetx-document-viewerelement.
The element reads its settings, including the URL of the backend, from a JSON object in its settings attribute. The backend then renders the document pages. Because the page and the backend usually run on different origins, the backend must allow cross-origin requests (CORS).
Create the Backend
The backend is an ASP.NET Core Web API project with the packages TXTextControl.Web.DocumentViewer and TXTextControl.TextControl.Core.SDK, whose Program.cs adds the Document Viewer middleware and a CORS policy that lets the HTML page call it. Create it, configure it and start it as described in Create the Backend in the Angular tutorial, and note the HTTPS URL of the backend in Properties/launchSettings.json, for example https://localhost:7275. Leave the backend running while you work on the page.
Create the HTML Page
Create a file named index.html with the following content. Replace https://localhost:7275 in all three places with the URL of your backend.
<html>
<head>
<meta charset="utf-8" />
<title>TX Text Control Document Viewer from JS</title>
<script src="https://localhost:7275/TextControl/GetResource?Resource=minimized.tx-viewer.min.js"></script>
<script src="https://localhost:7275/TextControl/GetResource?Resource=minimized.tx-viewer-component.min.js"></script>
</head>
<body>
<tx-document-viewer
id="viewer1"
settings='{"documentData":"VGV4dCBDb250cm9s", "dock":1, "basePath":"https://localhost:7275"}'>
</tx-document-viewer>
</body>
</html>
The settings attribute contains a JSON object. Because the JSON uses double quotes, enclose the attribute value in single quotes. The example uses these settings:
| Setting | Description |
|---|---|
documentData | The document as a Base64-encoded string. VGV4dCBDb250cm9s is the text "Text Control". |
dock | How the viewer is docked. The value 1 (Fill) docks the viewer in its container, and 0 (Window) makes it fill the browser window. |
basePath | The URL of the backend. |
The element also accepts the settings documentPath (the displayed document name), toolbarDocked, isSelectionActivated, showThumbnailPane, signatureSettings and documentLoadSettings. To display a different document later, use loadDocument as shown below.
Run the Page
- Make sure that the backend is running.
- Serve index.html from your local web server and open it in the browser.
The Document Viewer shows the text "Text Control". If the viewer doesn't appear, check that the backend is running and that the script URLs and basePath match its URL.
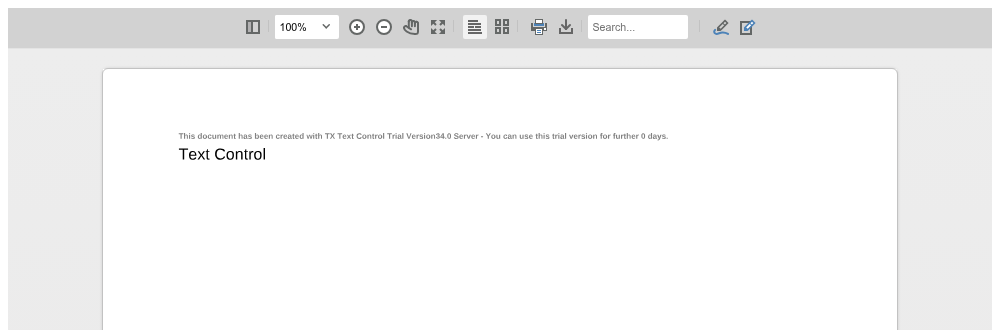
The page thumbnails aren't shown, because the settings attribute doesn't contain showThumbnailPane. Add "showThumbnailPane":true to the JSON to show them. The small gray line above the text is the trial text of the trial packages the screenshot was taken with; see Trial and Licensed Packages.
Load a Document With JavaScript
The TXDocumentViewer object exists only after the viewer has been initialized. The viewer then raises the documentViewerLoaded event, which you handle on the window object. Add the following script to index.html, directly before the closing body tag, and remove documentData from the settings attribute:
<script>
  window.addEventListener("documentViewerLoaded", function () {
    TXDocumentViewer.loadDocument(btoa("<strong>Loaded with JavaScript</strong>"), "loaded.html");
  });
</script>
loadDocument takes the document as a Base64-encoded string and the document name that the viewer displays. Supported formats are DOCX, PDF, RTF, HTML and TX; DOC requires the Classic engine. The method returns a promise that resolves to true when the document has been loaded. To load a document from your server, download it first, for example with fetch, and pass its Base64-encoded content to loadDocument.
A page can also contain several viewers, each addressed by its tx-document-viewer element, as Several Viewers on One Page describes.
Work With Annotations
Users can add drawings, stamps, sticky notes and comments with the annotation toolbar. The viewer keeps annotations separately from the document: you export them as a JSON string, store them, for example in your database, and load them again later:
- annotations.showToolbar shows or hides the annotation toolbar.
- annotations.export returns all annotations as a JSON string.
- annotations.load loads annotations from a JSON string.
The following script shows the annotation toolbar and writes the annotations to the browser console whenever they change:
window.addEventListener("documentViewerLoaded", function () {
  TXDocumentViewer.annotations.showToolbar(true);

  TXDocumentViewer.addEventListener("annotationsChanged", function () {
    var json = TXDocumentViewer.annotations.export();
    console.log(json);
  });
});
To display stored annotations, call TXDocumentViewer.annotations.load(json) with the JSON string you exported.
Work With Forms
When a document contains form fields, users can fill them out in the viewer. The forms object gives you access to the entered values. validate returns true if all required fields are completed, and getValues returns an array of all form fields with their values:
function submitForm() {
  if (TXDocumentViewer.forms.validate()) {
    var values = TXDocumentViewer.forms.getValues();
    console.log(values);
  }
}
To create a PDF with the entered values merged into the document, use saveDocument. It returns a DocumentSaveResult whose base64 method provides the document data:
async function saveAsPdf() {
  var result = await TXDocumentViewer.saveDocument(TXDocumentViewer.StreamType.AdobePDF, { mergeFormFields: true });
  var base64 = await result.base64();
  console.log(base64);
}
Collect Signatures
The viewer can turn signature fields in a document into signature boxes that users sign by drawing, typing or uploading a signature. To start a signing process, pass a SignatureSettings object as the third parameter of loadDocument. In the following example, documentData contains a Base64-encoded document with a signature field named txsign:
window.addEventListener("documentViewerLoaded", function () {
  var signatureSettings = {
    showSignatureBar: true,
    redirectUrlAfterSignature: "https://localhost:7275/document/sign",
    ownerName: "Paul",
    signerName: "Jacob",
    signerInitials: "PK",
    signatureBoxes: [ { name: "txsign", signingRequired: true, style: 0 } ]
  };

  TXDocumentViewer.loadDocument(documentData, "contract.tx", signatureSettings);
});
When the user submits the signed document, the viewer's controller in your backend posts it to the endpoint in redirectUrlAfterSignature, where your code can sign it digitally with a certificate. Digital Signatures explains the signature settings, the endpoint and the callbacks of the signing process.
JavaScript API Overview
The TXDocumentViewer object also prints, searches, navigates, controls the toolbar and works with tracked changes. The Object Model lists its methods and objects with the pages that describe them. The same API is available in the ASP.NET Core, Angular and React versions of the viewer.
Next Steps
- Document Viewer JavaScript API: the object model of
TXDocumentViewerin detail. - Events: react to what happens in the viewer.
- Annotations: let users comment on and mark up documents.
- Digital Signatures: collect signatures and sign documents on the server.